Overview
Because we live on property, we can be a little hard to find. So, we decided to make a beautiful and unique house number sign that could sit at the end of our driveway to make it easy for everyone to find us! This modern number sign is a great way to welcome friends to your home and a wonderful way to create a lasting first impression.
I am sharing the basic DIY of how to make this here, but you can head to my blog here to get a full clickable materials list as well as some further in depth information about the details of making this awesome sign.
What do you need to make a house number sign?

Cut wood and sand edges
We cut a 12″ x 2″ board (we bought a board about 5′ long) to a 3′ length using a compound miter saw. Then we gave it a light sanding on the edges where we cut the board.
Step 1

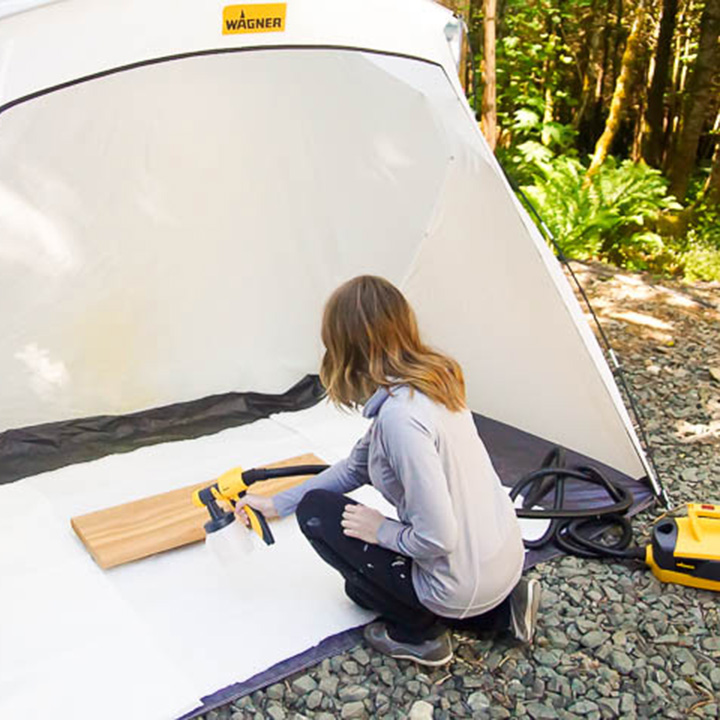
Apply clear coat stain
Then we placed a Wagner Spray Liner in the smaller paint cup, and we filled it with the stain of our choice. Then we used our Wagner FlexiO 4000 Paint Sprayer with the detail nozzle to apply one coat of outdoor clear coat stain to the cedar board.
Step 2
Follow directions and let dry
Please remember to follow your stain’s directions. You can check out my blog for more details about this. Then we let it dry completely before proceeding.
Step 3
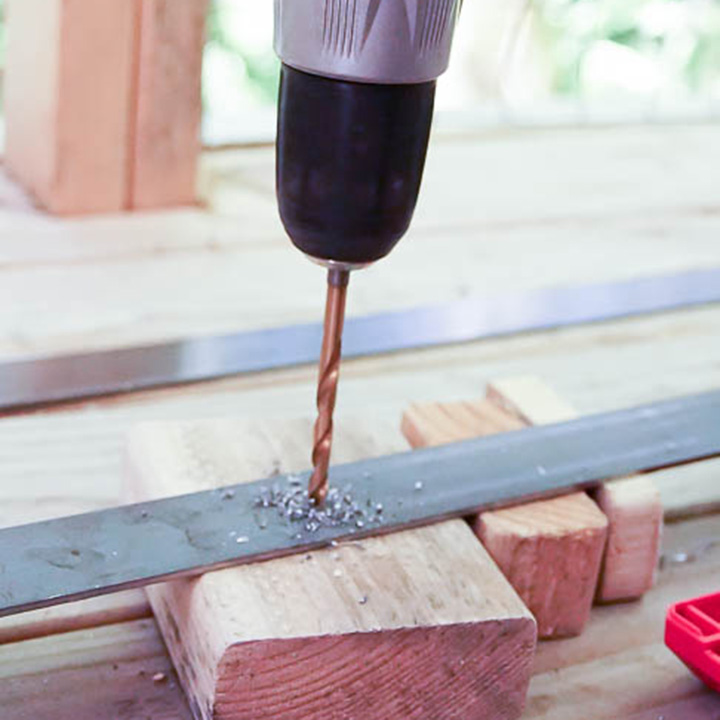
Drill holes into iron
Next, we used a 5/16″ drill bit to drill holes into the flat weld steel iron about 1′ apart so we ended up with 4 holes in each piece of iron. Then we set the iron on the wood board and marked where the holes were and then drilled holes into the wood using the same 5/16″ drill bit.
Step 4
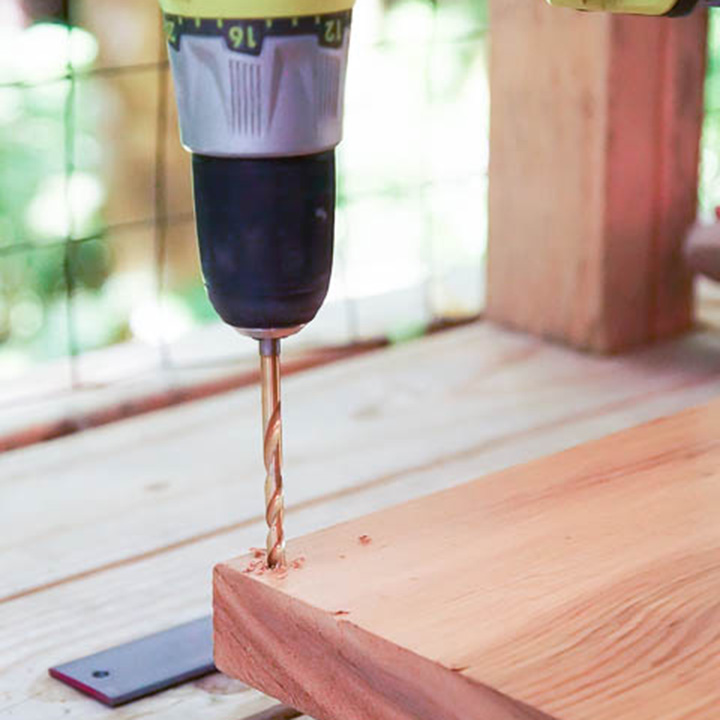
Drill holes into board
Next, we drilled 2 holes in the angle iron using the same 5/16″ drill bit. We wanted these to line up with the top and bottom exterior holes on the board, so we used the existing holes as a guide.
Step 5

Attach numbers to board
If you want to add a metal-safe, clear coat to your angle iron and flat iron, this is a good time to do it, but this is optional.
Then we followed the instructions on the address numbers we bought to attach them to our board.
Step 6
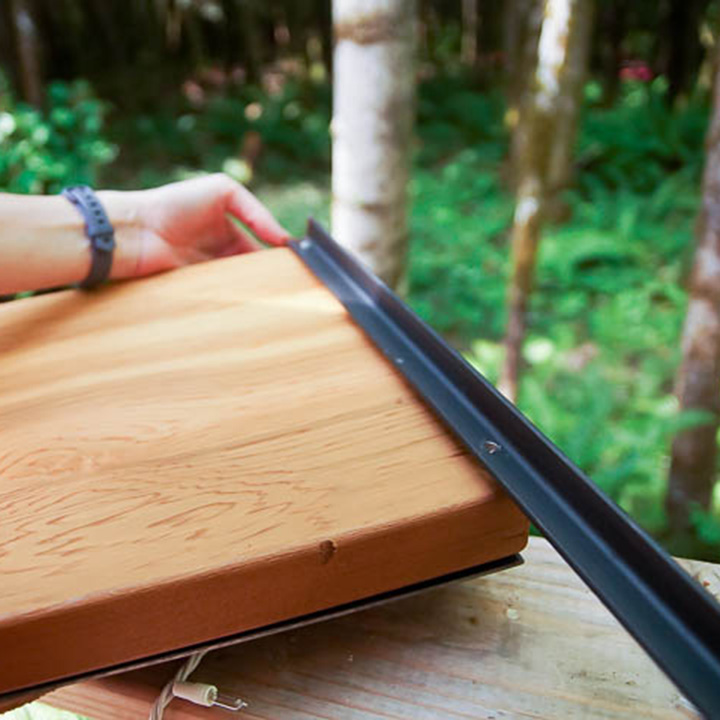
Attach iron to board
And finally, we attached the flat iron and the angle iron to the wood board using the bolts and washers.
Step 7
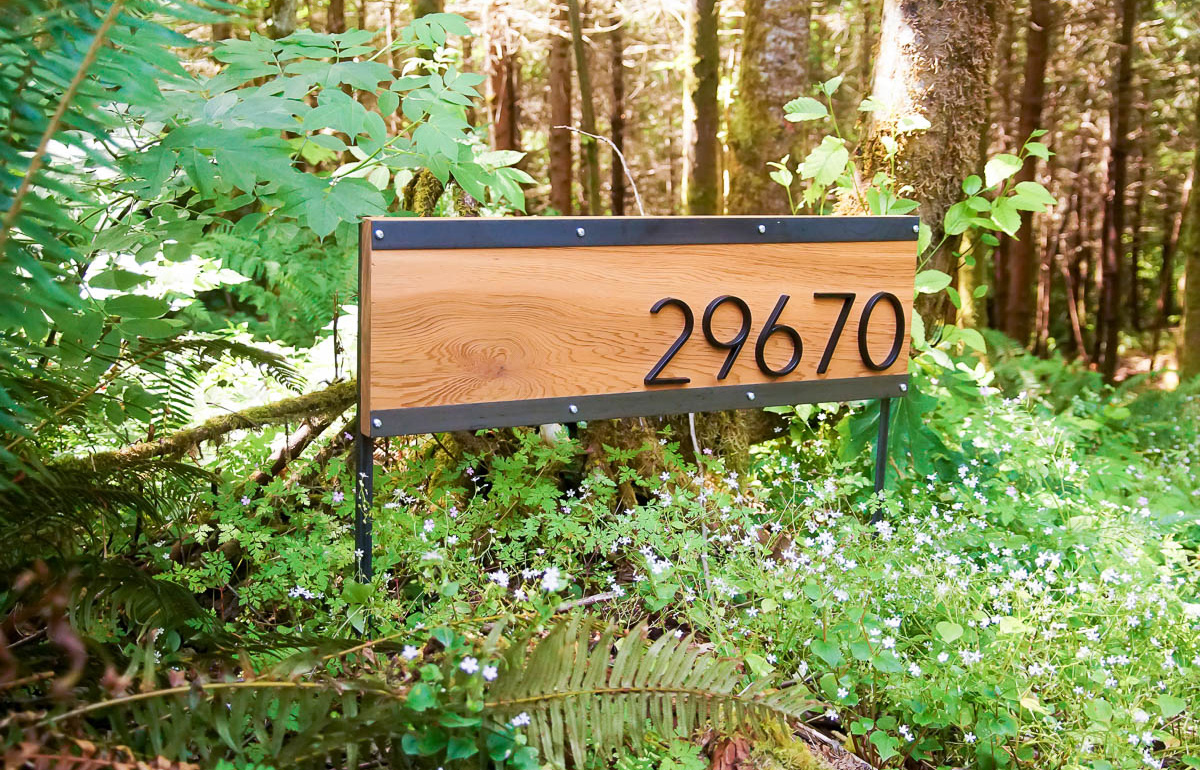
Display your new house number sign!
And your board is ready to put in the ground and display!
This sponsored post was created by Simply Designing. Head to the blog for the full post and details.
Step 8

Download Project Steps & Shopping List
We’ll never share your email with anyone else