Overview
Home renovation projects can be one of the most expensive investments you make, especially if you choose to remodel the kitchen and replace the cabinets – the cost is easily into the thousands. However, if you like the layout and amount of storage space you have, then paint spraying the kitchen cabinets, and adding some new hardware is a great alternative.
In this project, we update these outdated dark-wood kitchen cabinets into a modern remodeled look at a fraction of the cost. We’re talking only hundreds, instead of spending thousands of dollars on this project! Also, if you have cabinets elsewhere in the house, such as the bathroom, you can follow these same easy steps.
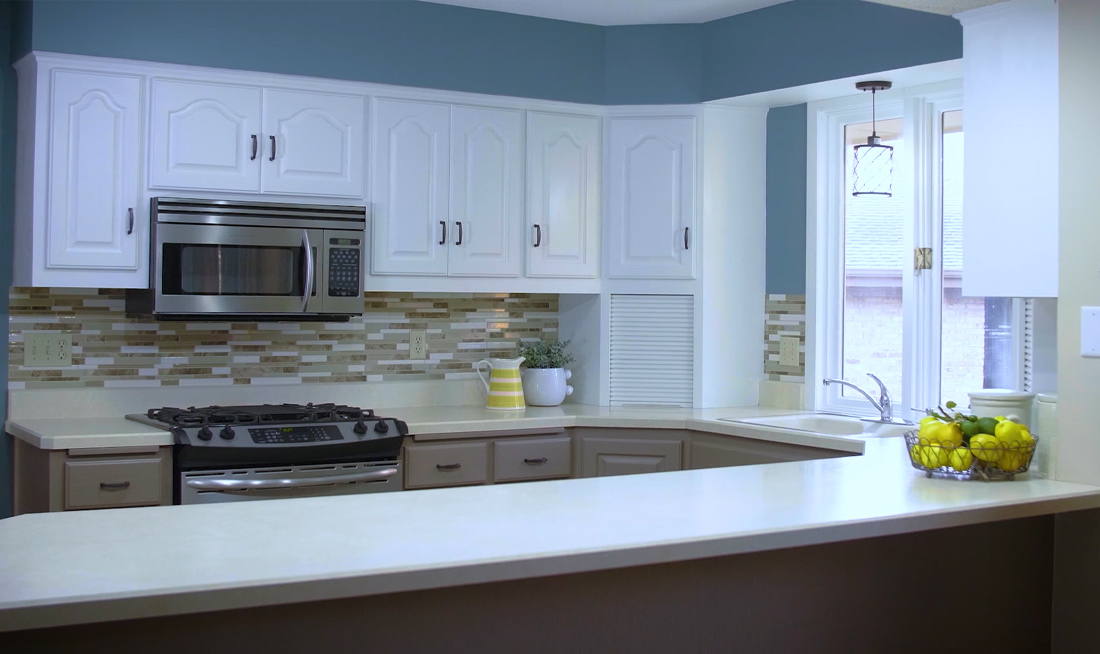
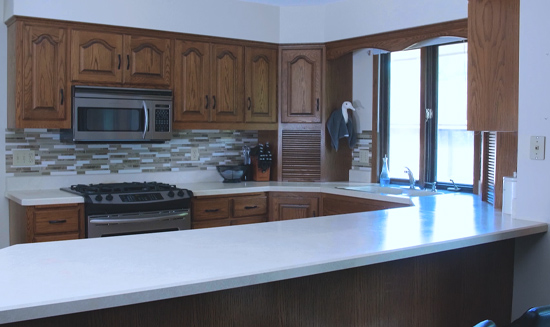
Before
After

Instructions
PREPARE THE CABINETS FOR PAINT SPRAYING
Begin by emptying your kitchen cabinets and removing the appliances.
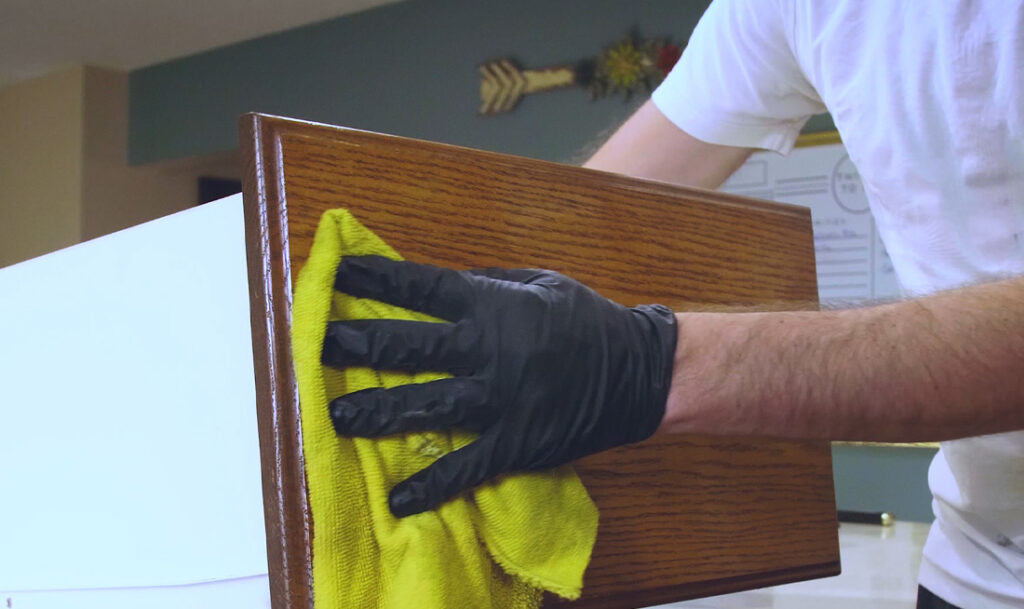
Clean the cabinet boxes, doors and drawers and use wood filler to patch and holes or damaged areas. It’s crucial that you clean up any cooking grease splatter or the new paint won’t stick. Paint thinner works well for this, but any type of degreaser will do.
Next, sand all of the wood with a medium grit sandpaper to smooth any wood filler and scuff up any existing finish. This gives the surface a little more tooth so the new paint will stick better. Remember to wipe the sanding dust off with tack cloths and caulk all the joints for cabinets, walls, ceilings and other door panels.
Mask off anything or parts of your kitchen that you don’t want to get paint on – this includes the countertop, backsplash, windows, and the insides of your cabinets.
Number all of the cabinet doors and hardware so you’ll know where to re-install them. Pro Tip: Number the hinge hardware on each door, write the corresponding number in the recess where the hinge attaches and cover it with tape to avoid getting paint on it, then store the hardware inside of that cabinet. Taking the extra prep-steps makes for a smoother reinstallation.
Step #1
PRACTICE PAINT SPRAYING
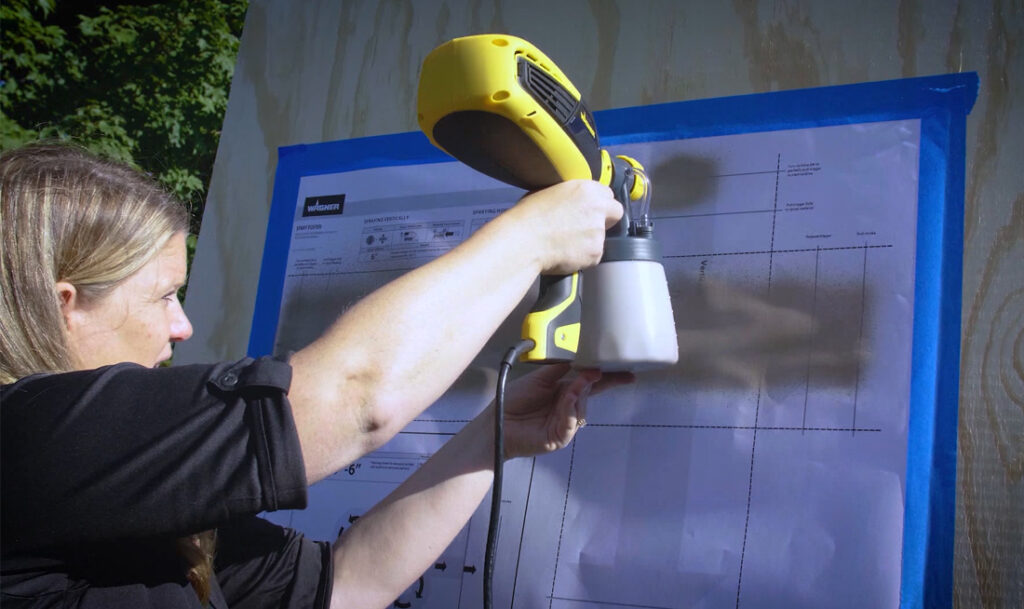
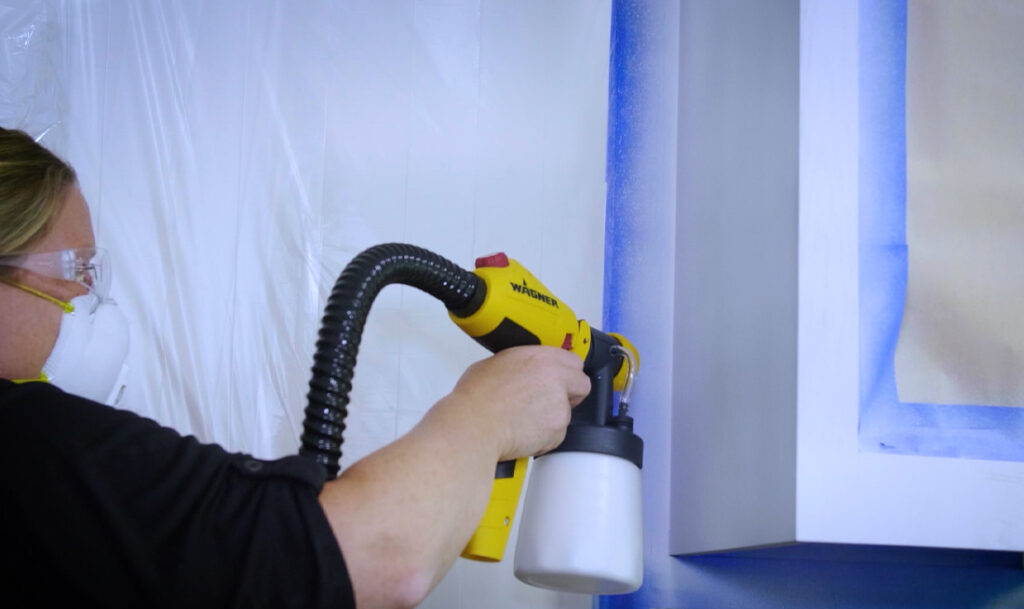
Now you’re ready to paint spray! For this size DIY project, we recommend using a FLEXiO 5000 paint sprayer.
If you’re new to spraying, remember to practice first! Every FLEXiO sprayer comes with a spray poster, so you can practice your spray patterns before you start your projects. You can also practice on large pieces of cardboard.
For this project, we’re using the Detail Finish nozzle attachment, which is great for fine finishing on cabinets, furniture and trim.
Attach the Detail Finish nozzle, load your paint, and start practicing. You will want to adjust both the material and airflow settings to get your desired finish.
Make sure to hold the paint sprayer 4-6” away and release the trigger after each pass. We also recommend overlapping your passes by 50% to ensure even coverage.
Step #2
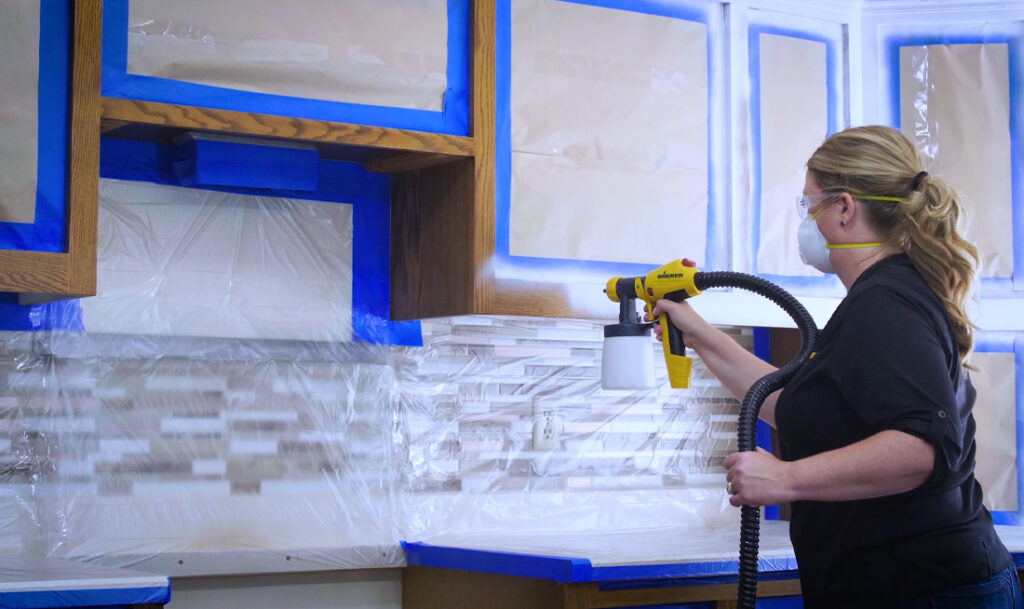
PRIME THE CABINETS
Now you’re ready to start priming the cabinets.
Being with the upper cabinets, then move to the lower ones. If you have crown molding start there, then move to the inside edges. Make sure to paint spray the inside edges at a bit of an angle to ensure you are getting in all the nooks.
Then you can spray paint on the fronts of the cabinets. Remember to spray with the grain of the wood and hold the sprayer perpendicular to the cabinets.
Next, spray the cabinet doors. Lay the doors down horizontally to ensure that you get a clean finish with no drips and runs.
Lastly, spray primer on the drawer fronts. To make the job easier, we recommend using a big Lazy Susan. This allows you to stand the drawers on the end and spin them around, spraying from all sides. Pro tip: Mask off the boxes to avoid getting paint inside the drawers.
Allow the primer to dry per the manufacturer’s instructions before applying the topcoat of paint.
Step #3
PAINT THE CABINETS
After the primer has dried per the paint manufacture’s timeline you’re ready to apply the top coat.
But first, if there are any rough edges, use 220 grit sandpaper or higher and sand the surface before spray painting the top coat.
The paint spraying techniques you used earlier for priming are the same you’ll use to apply the top coat. We recommend applying one or two coats for the upper and lower frames and the cabinet faces.
Let the paint dry per the manufacturer’s instructions (overnight is usually easiest), then come back to the project in the morning to put everything back together.
Step #4
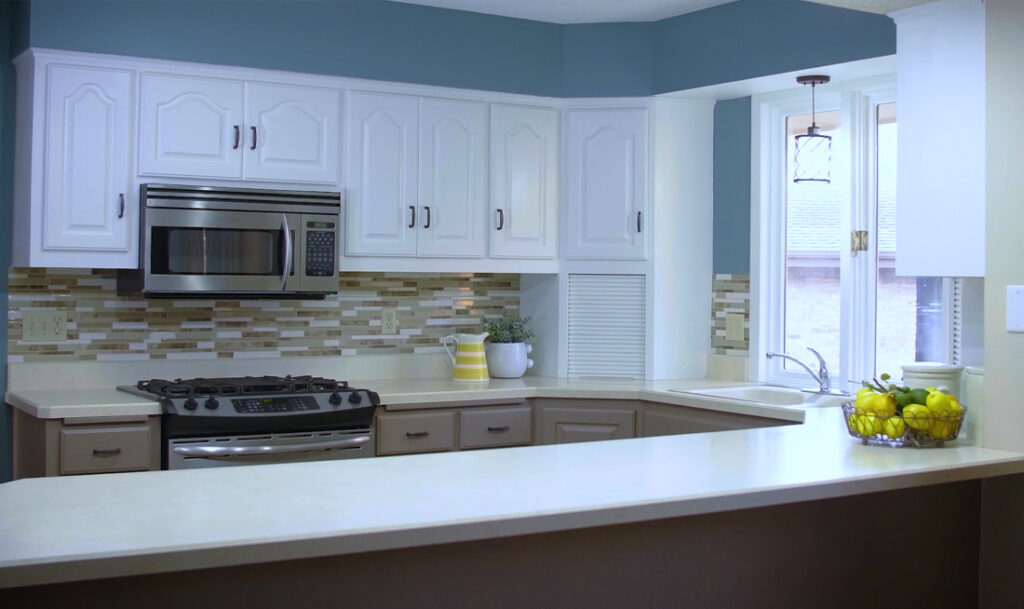
ENJOY THE NEW KITCHEN
It’s hard to believe with just a few gallons of paint, we took a dark-dated kitchen and transformed it into something fresh and modern while saving the homeowner thousands of dollars. Be sure to watch our how-to video to see these tips and tricks in action!
Step #5

Download Project Steps & Shopping List
We’ll never share your email with anyone else