Overview
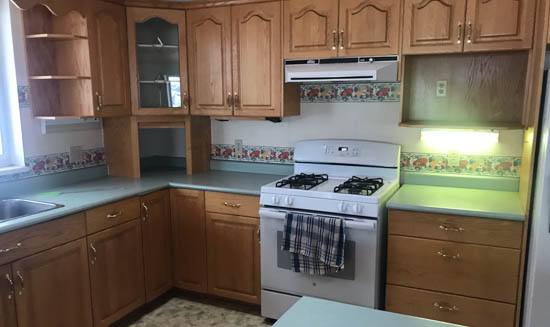
Preparation is maybe the most time-consuming part of this whole process. Remove the cabinet doors and give them a light sanding and cleaning. Although it’s possible to paint without sanding, you’ll have extra confidence in the adhesion if you don’t skip this step. Don’t forget to sand and clean any other faces that will be painted including side panels and kicks.
Before
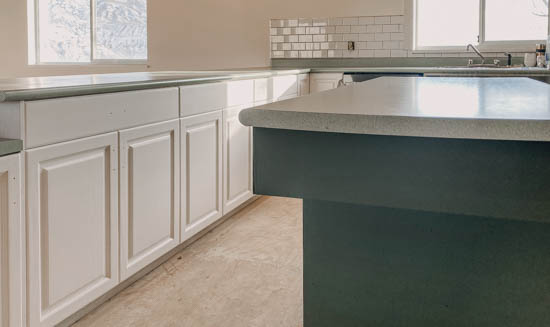
After
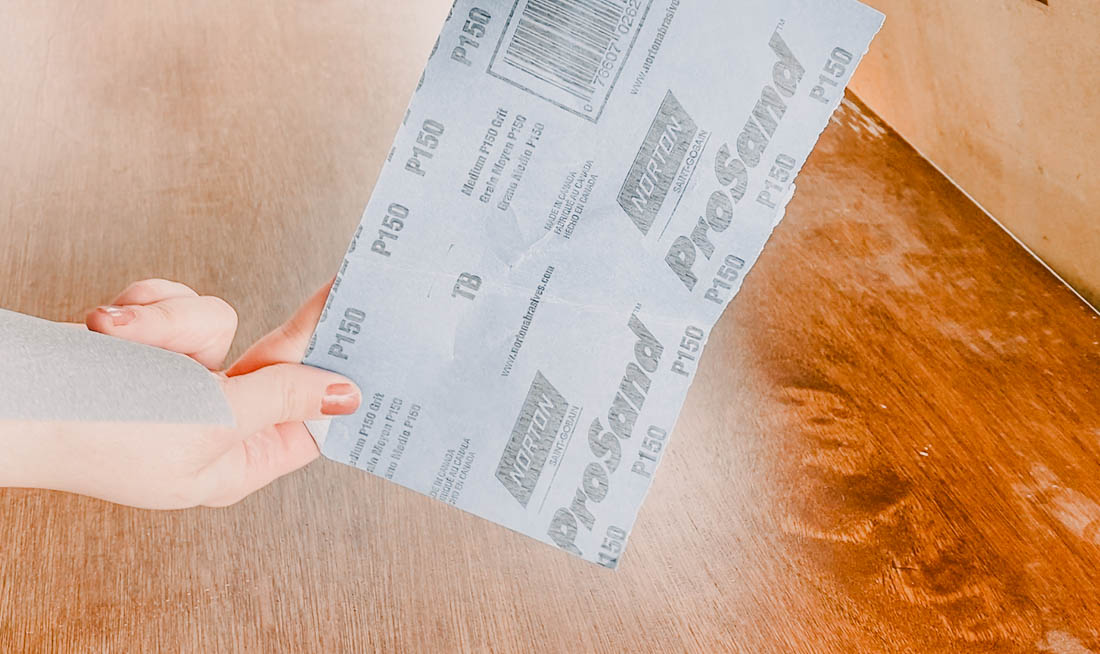
Preparation: Sand for Better Paint Adhesion
Preparation is maybe the most time-consuming part of this whole process. Remove the cabinet doors and give them a light sanding and cleaning. Although it’s possible to paint without sanding, you’ll have extra confidence in the adhesion if you don’t skip this step. Don’t forget to sand and clean any other faces that will be painted including side panels and kicks.
Step #1
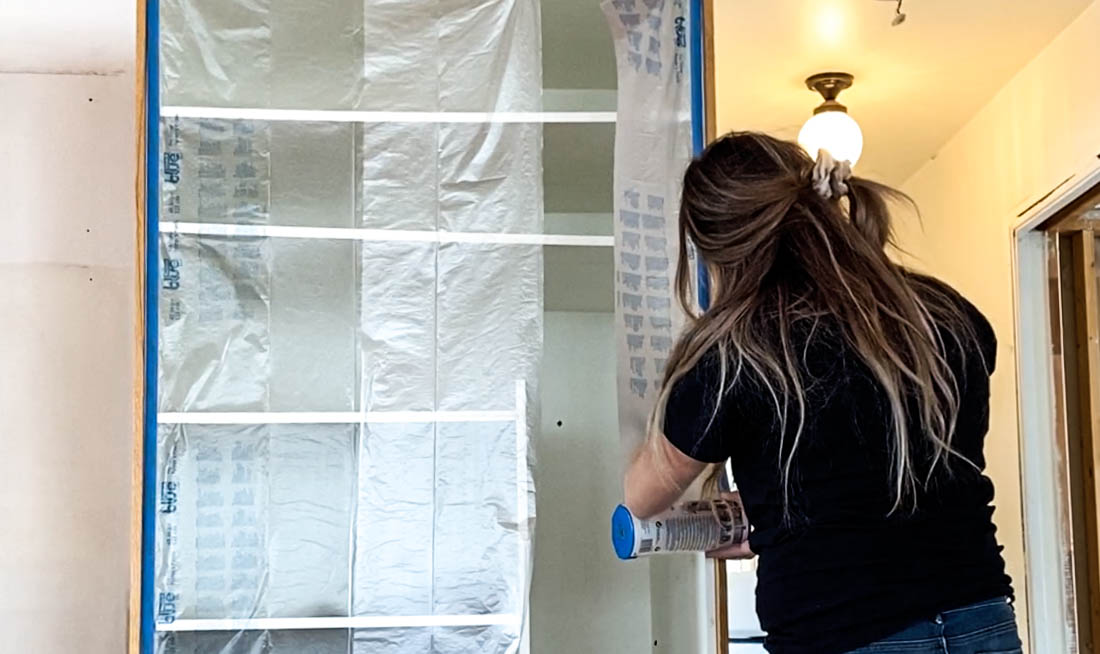
Masking: Mask for Even Faster Spraying
Mask off any areas you don’t want to get overspray. While the paint sprayers are very accurate, a light dust of paint may settle on surfaces, so it’s better to be safe and cover anything you don’t want to get residue!
Step #2
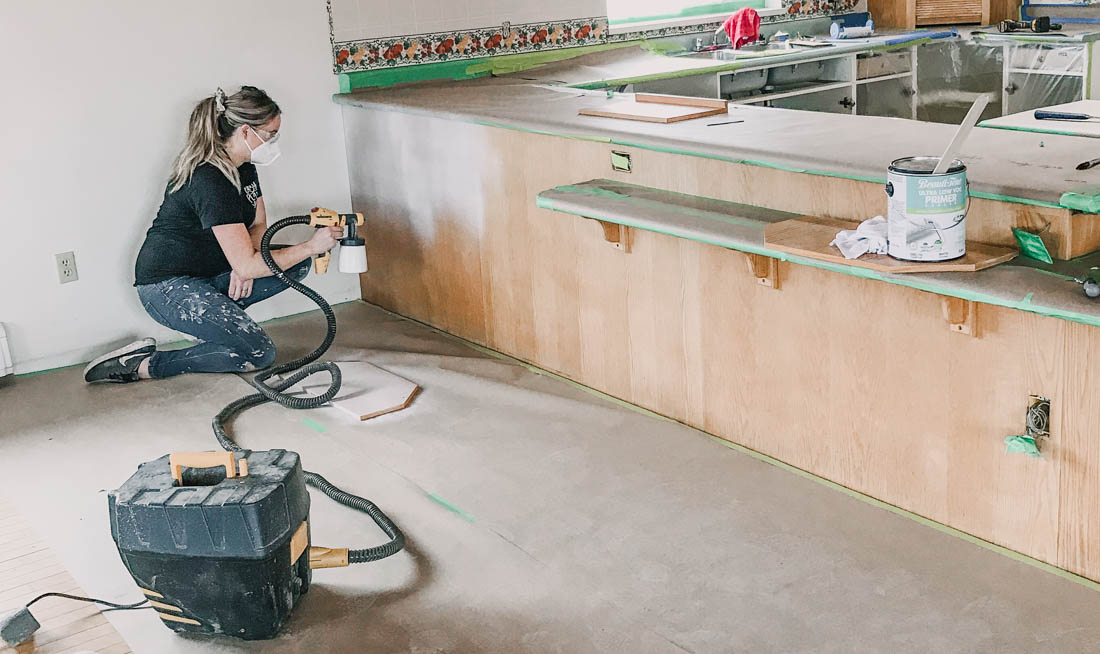
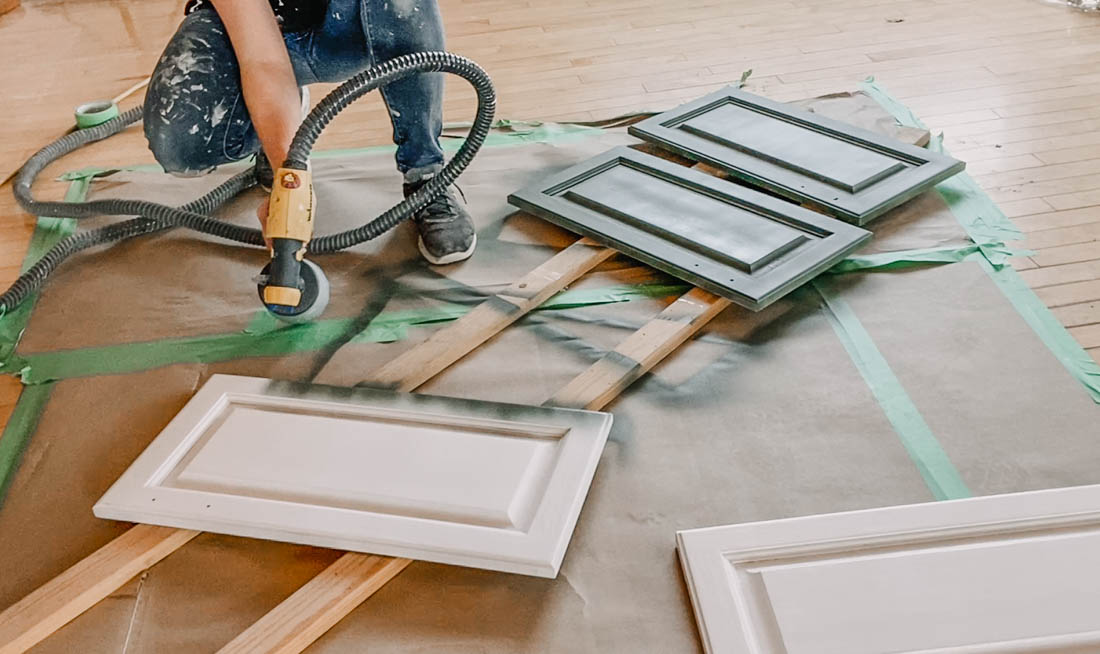
Set Up Your Sprayer: Practice Spraying First
Take some time to get comfortable with the settings on your sprayer for this particular project. Each type of paint sprays differently so it’s recommended to take a scrap piece of wood or cardboard to test your settings to get the perfect spray pattern. For cupboards, we recommend using the FLEXiO 5000 with the Detail Finish Nozzle. This nozzle will give a much finer finish than the standard nozzle which is better for larger surfaces.
Step #3
Prime First for Color Accuracy
Prime the cabinets with either a strong adhesion cabinet primer (for MDF or previously painted surfaces) or a stain blocking primer (if you have oak cabinets like these ones here). It may take two coats of primer to get a full coverage without bleed from the wood color. Light coats will help ensure a smooth finish and lasting adhesion.
Step #4
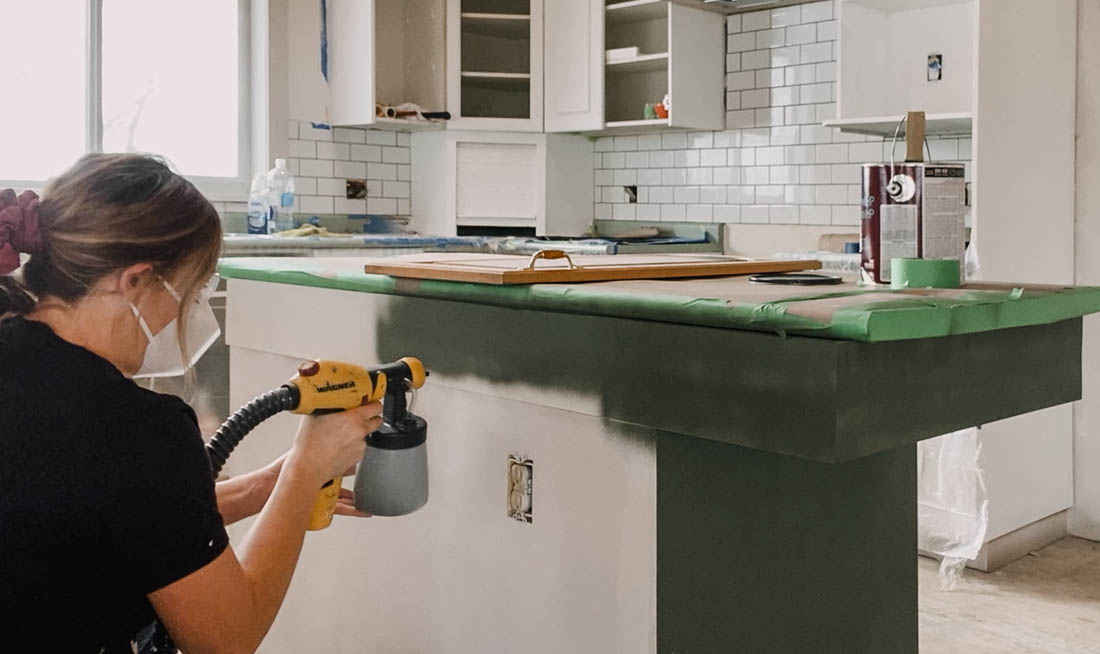
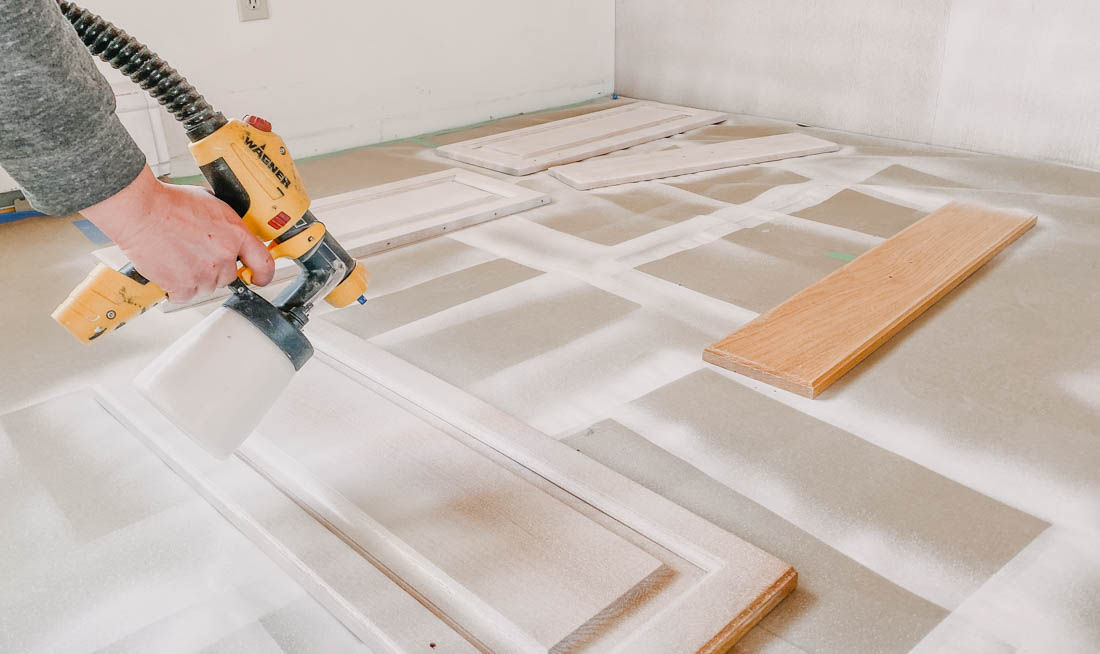
Spray Paint Color of Your Choice
Now the fun part- painting! Here you’ll paint multiple coats of the color of your choice. If your doors have multiple facets like these, make sure to physically move around the door to have the paint sprayer directed at each face. This will ensure you get into each of the nooks with even coverage. Let paint dry completely between each coat.
Step #5
Put the Kitchen Cabinets Back Together! Enjoy Your Work.
See it all come together as you put the doors back on the cabinets! In this particular project, there’s still floors and more to be finished before the kitchen is ready for use, but you can see the power of paint with just this portion of the makeover complete!
Step #6

This sponsored post was created by Lemon Thistle. Head to the blog for the full post and details.
Step #7

Download Project Steps & Shopping List
We’ll never share your email with anyone else