Overview
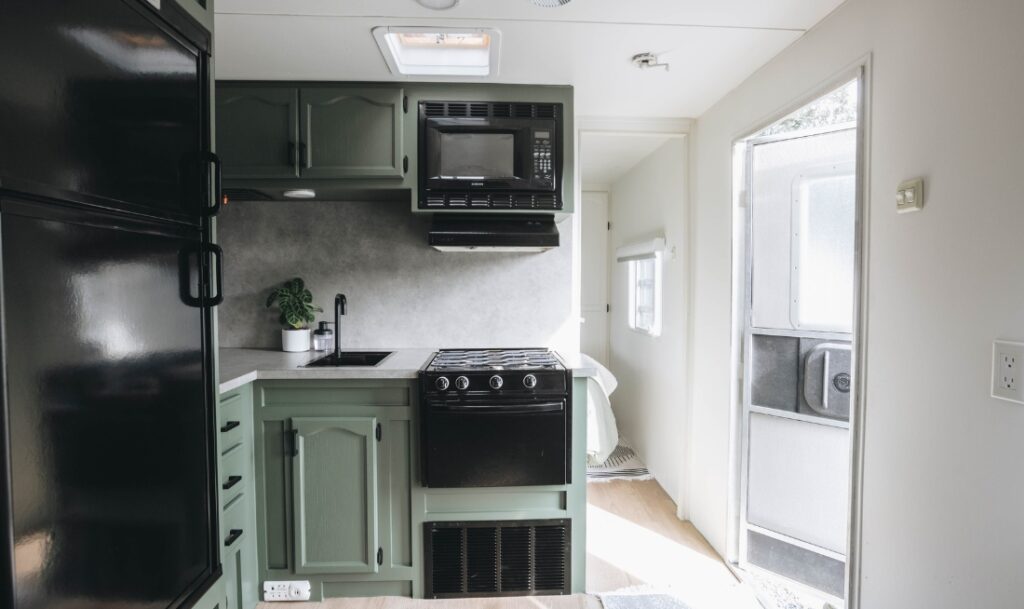
My cabinets have been this light gray color for about 8 years. I have liked how light and bright they made my kitchen but lately, I have had the itch to add more color into my home. Since my kitchen has so much natural light, I felt confident I could pull off a darker shade. So, let’s say good-bye to the gray and hello to a new paint color!
Instructions
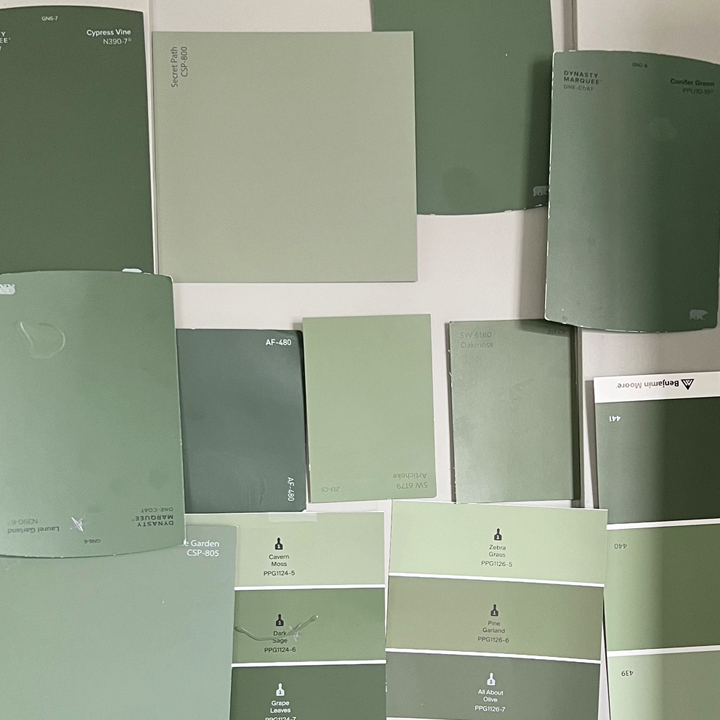
I opted to go with green since it’s my favorite color and I already have it sprinkled throughout my home. I had the HARDEST time narrowing down which shade of green however. It took me months to settle on my top four. I had samples mixed up and painted my top choices on poster boards. Seeing the colors on a larger scale in the space really helped me decide.
Step #1

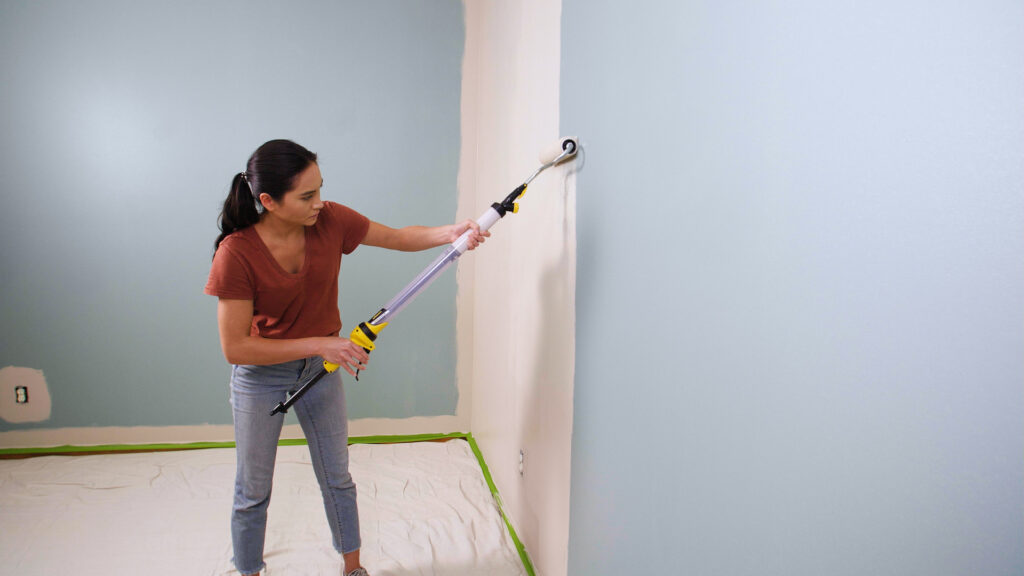
The prep work for any painting project is the least fun part, but it is also the most important part. Since the cabinets are in a kitchen, there was some grease residue. Even though I wipe down my cabinets at least once a week, even the slightest bit of grease can prevent the new coat of paint from adhering properly.
Step #2
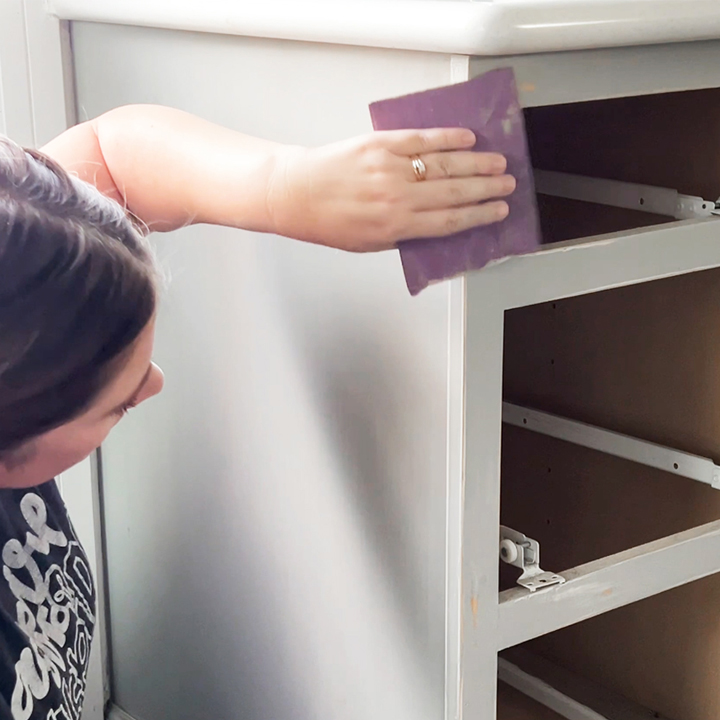
After cleaning them really well, I lightly sanded them with a fine grit sandpaper. I like using 220 grit. I also sanded the cabinet bases. Sanding not only ensures that all the dirt and grime are off, but it also creates a texture on the surface which helps the new coat to stick.
Step #3
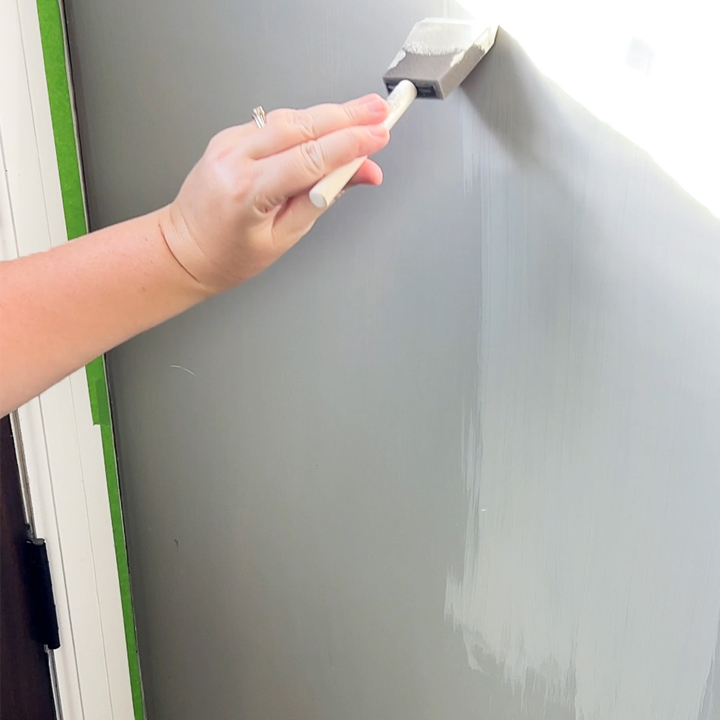
If you are painting from light to dark, or dark to light, it is nice to have your primer tinted. You can buy some primers pre-tinted (they are usually gray) or you can have the store tint your primer for you just like they do for paint. Seeing the gray primer on my cabinets and realizing the primer and the paint were almost the same color, made me even happier I was switching to a brighter color.
Step #4
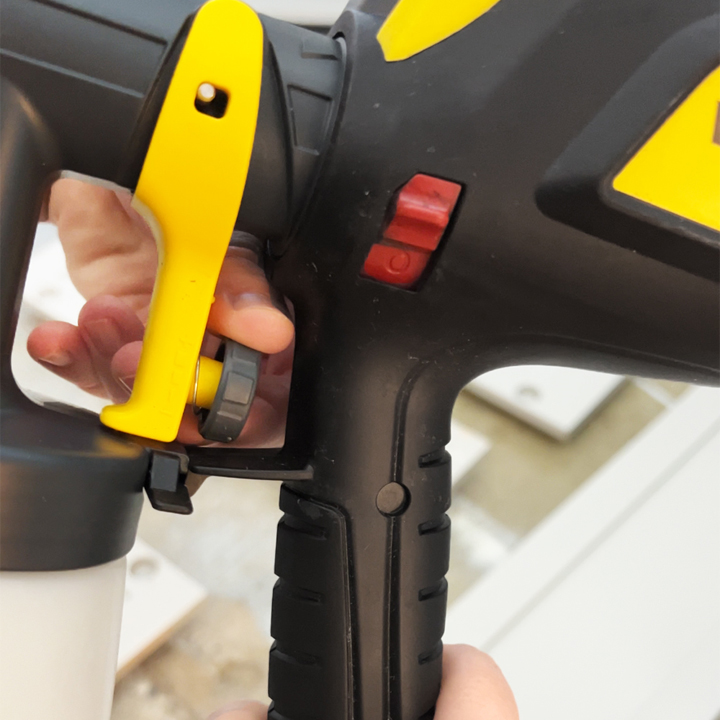
Now for the fun part! It was time to spray the cabinet doors and drawer fronts. I have an unfinished room in my basement that I occasionally use as a spray room for larger projects. I propped up the door and drawers so they were slightly off the ground.
Step #5
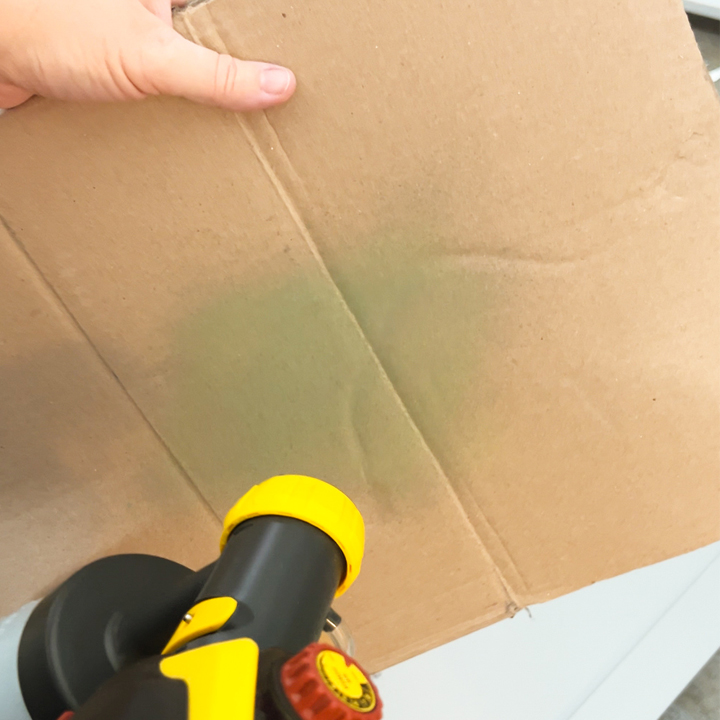
I usually use small scraps of wood. I chose to use my Wagner FLEXiO 3500 with the Detail Finish nozzle for this since it gives such a smooth finish! Once I had my paint added to the sprayer, I tested the spray on cardboard. This way I can adjust and get it perfect before spraying the cabinet doors.
Step #6
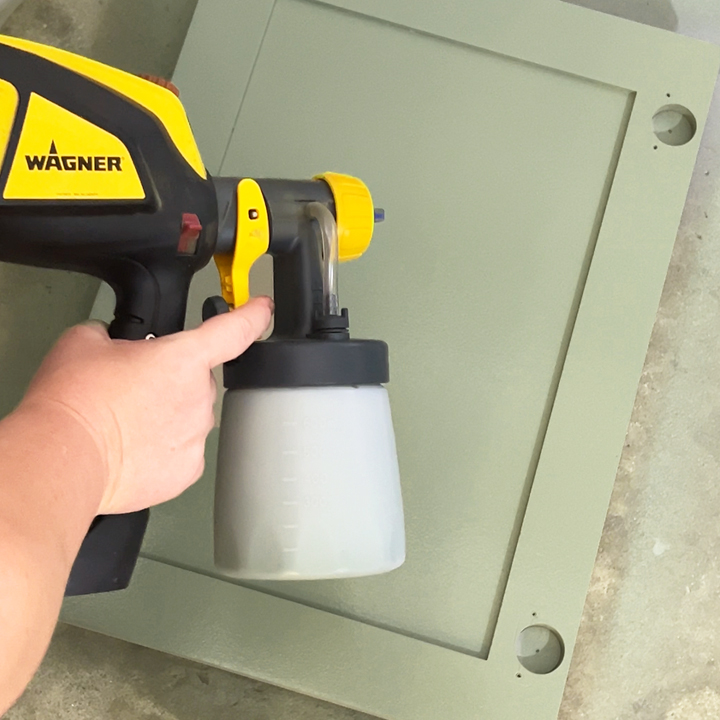
I like to spray the back side of cabinet doors first. This way when I turn them over, if they get dinged up, it is the backside and not the pretty front. Once they had completely dried, I sprayed the fronts. I ended up doing 3 light coats. I am so happy with the professional looking finish!
Step #7

Another fun detail I added was this botanical contact paper. I added it to the drawers and the bottoms of all the cabinets.
Step #8
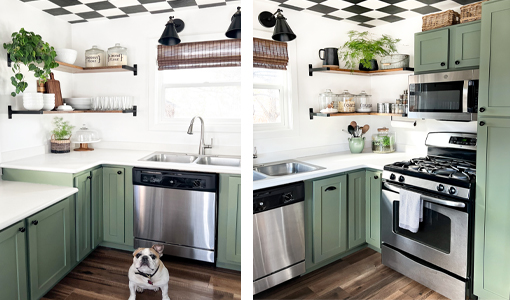
I’m in love with how my kitchen looks with the new color. It is crazy how simply changing the color, completely changes the whole feel of the space.
See the full post by Stacy Risenmay here.
Step #9

Download Project Steps & Shopping List
We’ll never share your email with anyone else