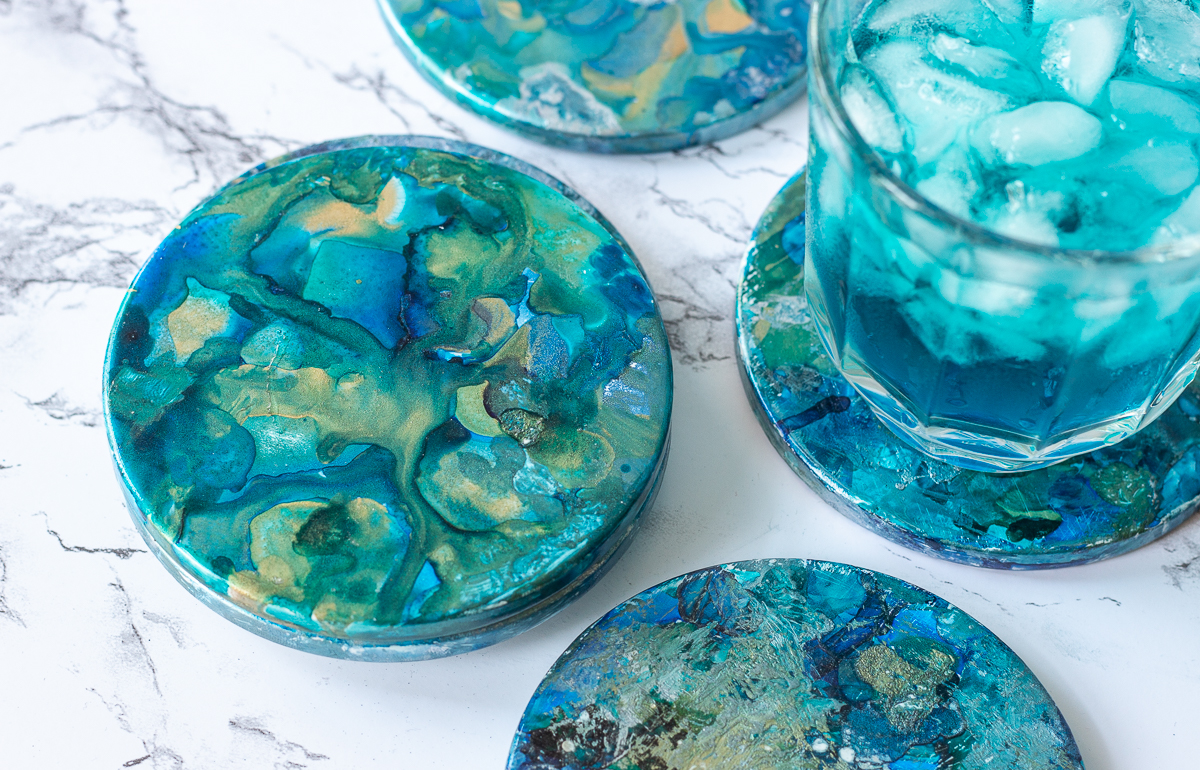
Overview
Use alcohol inks and a heat gun to create vibrant marbleized coasters to match your favorite cocktail.

Protect work area
Protect your work surface with plastic sheeting or a nonporous dropcloth. Alcohol inks will bleed through paper and stain the surface beneath. It’s also a good idea to wear rubber gloves to avoid staining your hands with the inks.
Step #1
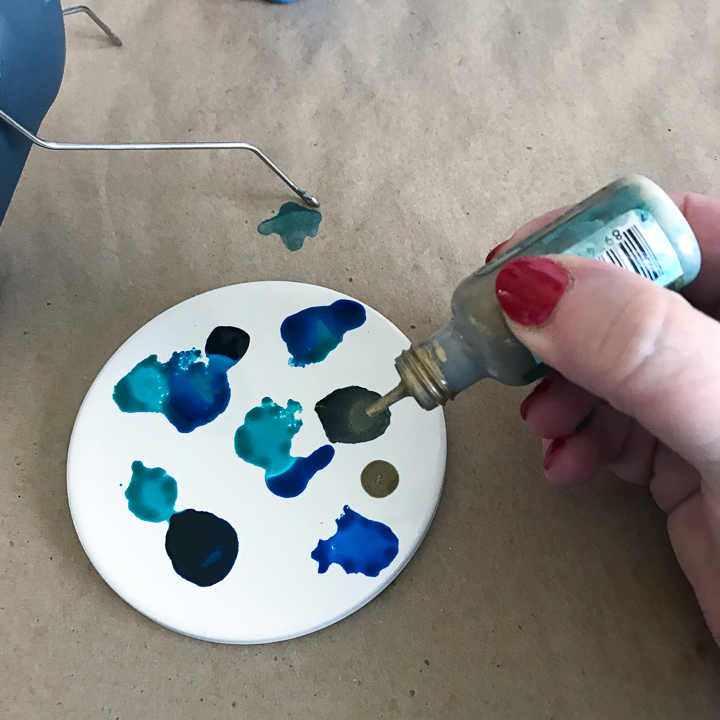
Shake ink and add drops to coasters
Shake alcohol inks, especially the metallic and pearlescent colors, well before using. Add random drops of regular alcohol inks, metallic inks and alcohol pearls on the glazed tile.
Step #2
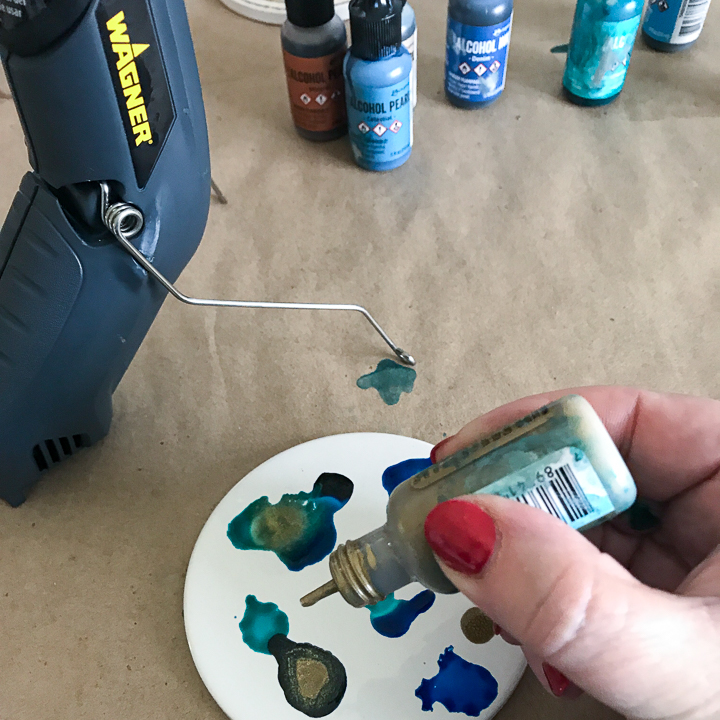
Create multiple layers
You can add drops of color inside other colors to create cool effects.
Step #3
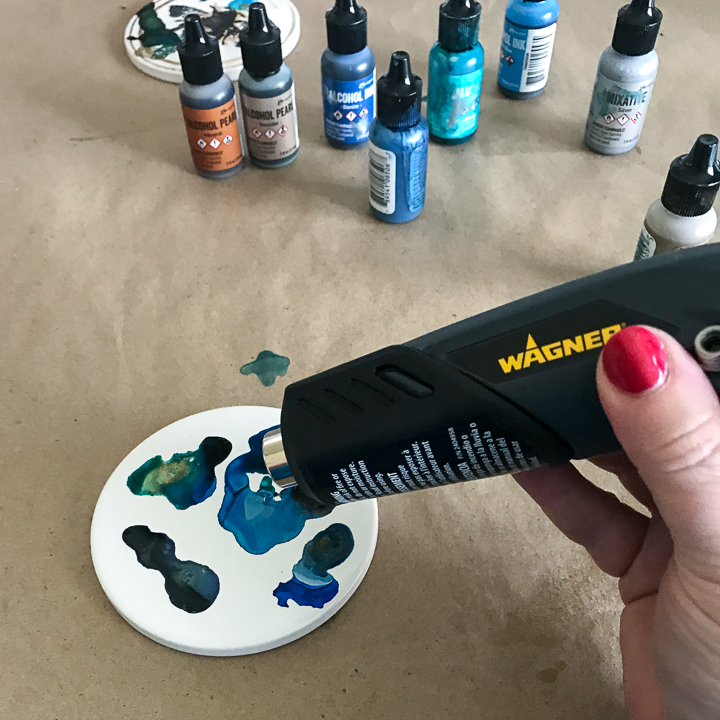
Set heat gun to low
Starting on low setting, use the heat gun to make the ink flow to create marbleized patterns. For better ink flow, you can spritz the coaster lightly with alcohol. This will dilute the colors and make them less vibrant, but you can get some cool patterns.
Step #4
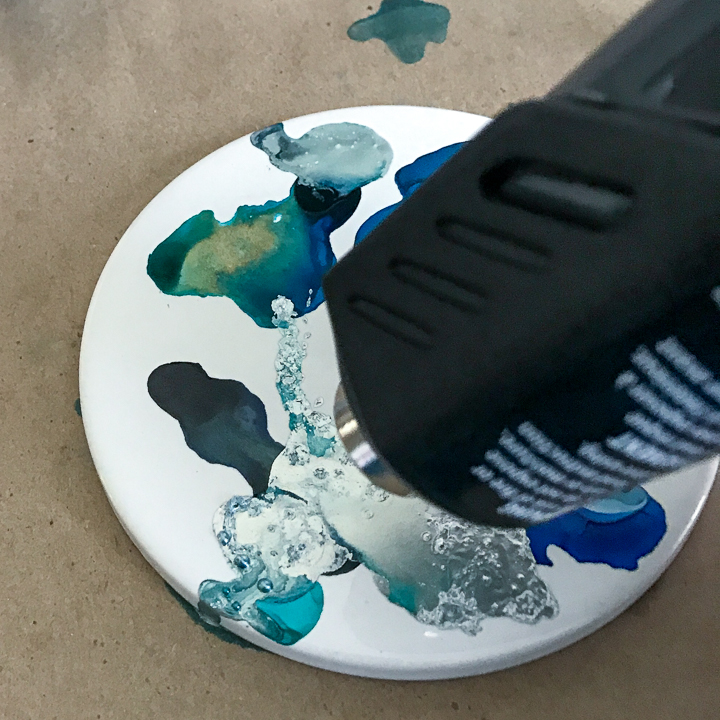
Heat ink until it bubbles
Apply more heat and move the heat gun closer to the surface of the coaster to add texture. As the inks heat up, they will begin to bubble.
Be mindful that the ceramic coasters will be hot to the touch when using the heat gun.
Step #5
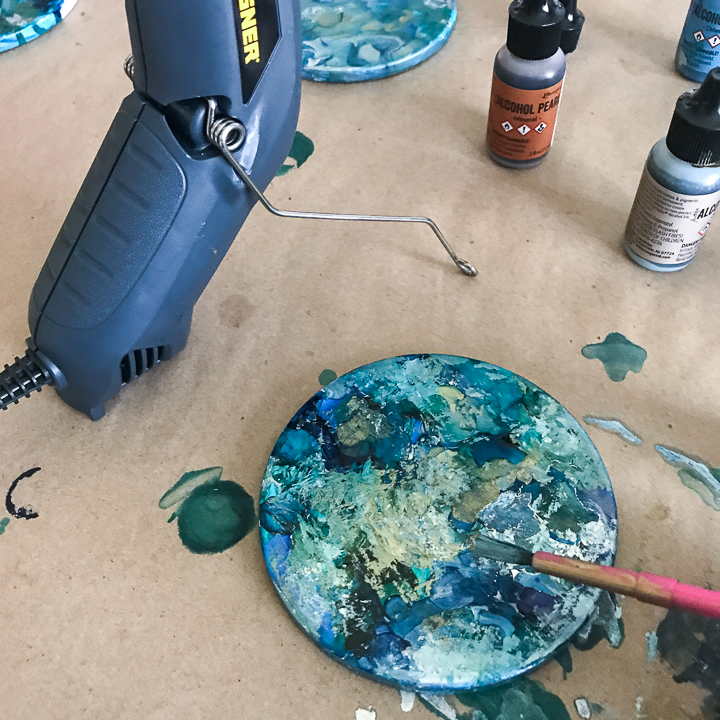
Continue to add layers of ink
Continue adding drops of alcohol ink and applying heat until the entire coaster is covered with pigment. As the inks dry, you may want to layer different colors on top of one another to achieve unique effects.
You can create the look of veining by tilting the coasters from side to side and allowing the ink to flow freely.
Use an inexpensive child’s paint brush to brush the ink on the sides of the coasters and to create an impressionistic effect on the top.
Step #6
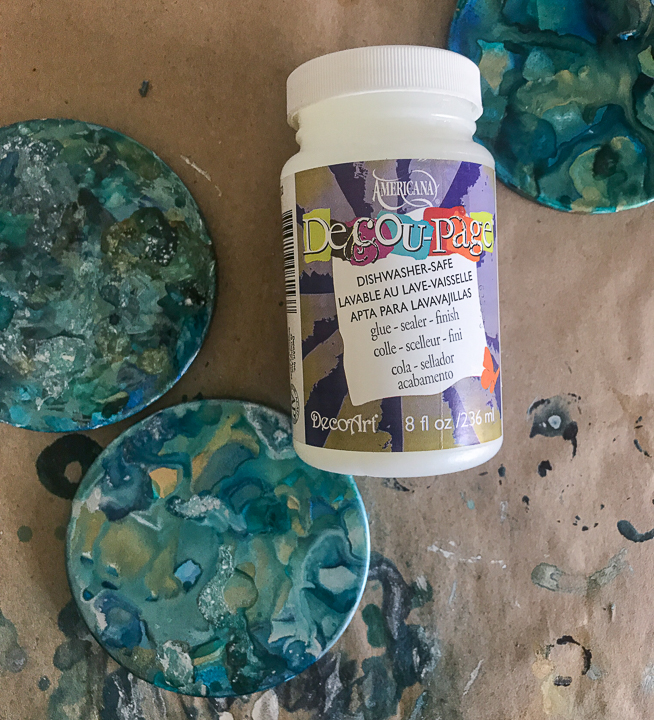
Let dry and seal
Allow the coasters to dry for several hours or overnight. Once the coasters are completely dry, you can use a fine grit sandpaper to smooth out any unwanted texture. Or you may opt to leave the texture.
Seal the coasters before use by applying several coats of dishwasher-safe decoupage medium with a foam brush. You can also spray them with a clear, gloss acrylic.
Apply adhesive felt pads to the bottom of the coasters to protect furniture.
Step 7

More info
This sponsored project was created by Atta Girl Says. Head to the blog for the full post and details about this project.
Step 8

Download Project Steps & Shopping List
We’ll never share your email with anyone else