Overview
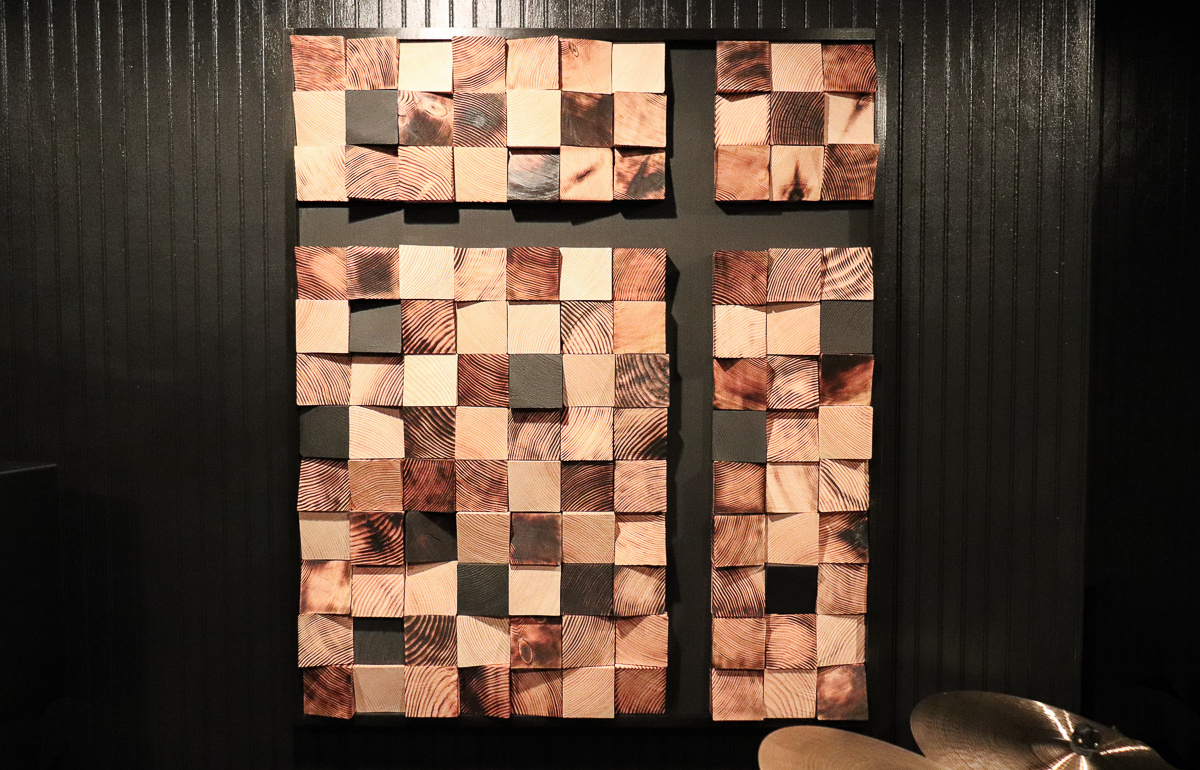
For anyone with a home theater – this is a must-see project! Any home theater, music room, or movie room needs to have proper acoustics for the best sound, but acoustic panels aren’t very pretty. We wanted to make a piece that not only helped with the acoustics of our music room but one that would also add beauty. We decided to use wood and create a panel that would help diffuse the sound and knew it could look amazing!
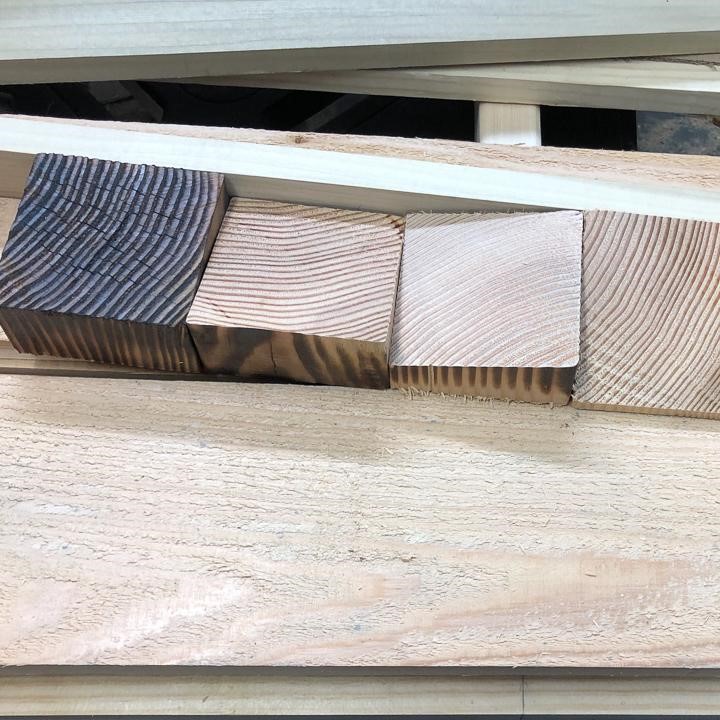
Cut wood blocks
The first step was to cut 4″ x 4″ x 8′ fir wood posts into 1 – 2 inch thick blocks on a 15 degree angle. Only one side is cut at that angle, leaving one side flat to attach to your frame. We also integrated several pieces without any angle to add a variety to the design. Make sure that your wood is untreated!
Step #1
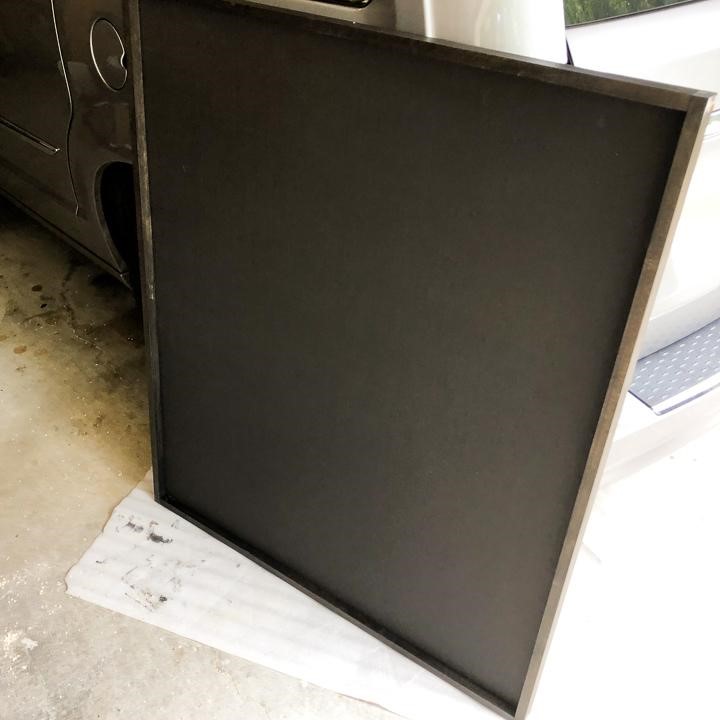
Build frame
Next, we built the frame. The height and width can vary to whatever size you want. Our piece measured 40 inches by 45 inches. Here’s how we did it.
Step #2

Spray back of frame
The back is made of 1/4 inch plywood that we spray painted flat black and sides are made from 1.5″ x .75″ poplar pieces.
Step #3
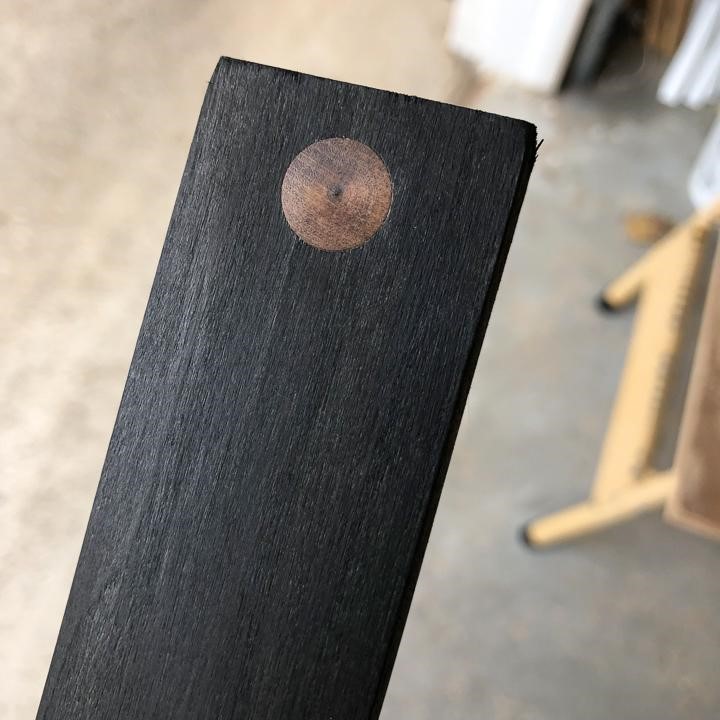
Cut sides and attach to back
Using a table saw, we cut an off-center channel in each piece to slide the plywood backing into. The channel ensures a tight fit for the backing and helps with stability. We then stained each piece using black stain and finished with a coat of satin poly.
Next we built three sides of the frame using a nail gun, slid the plywood backing into the slotted frame and nailed the final side of the frame into place. Finally, we ran a bead of wood glue around the edges for extra strength.
After we had our frame built, we started playing around with charring techniques and this is where the fun really began!
Step #4
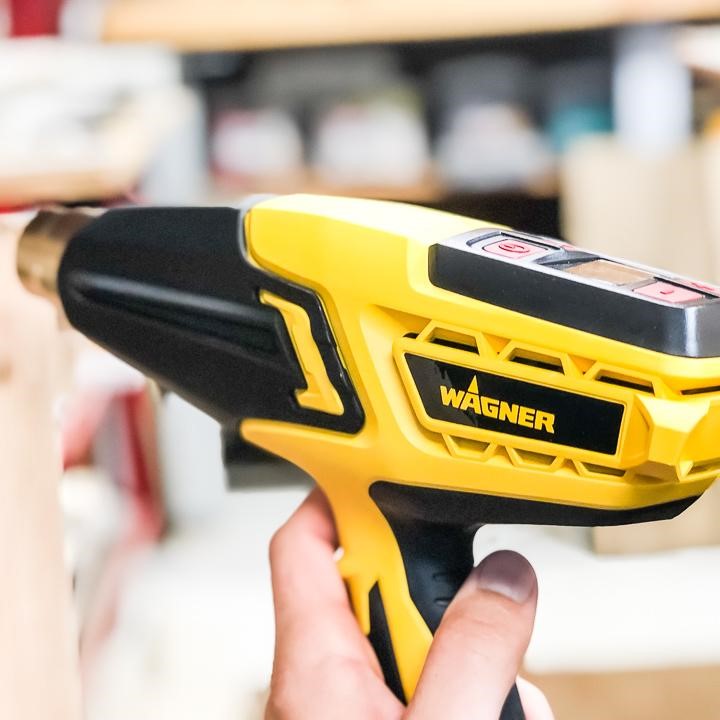
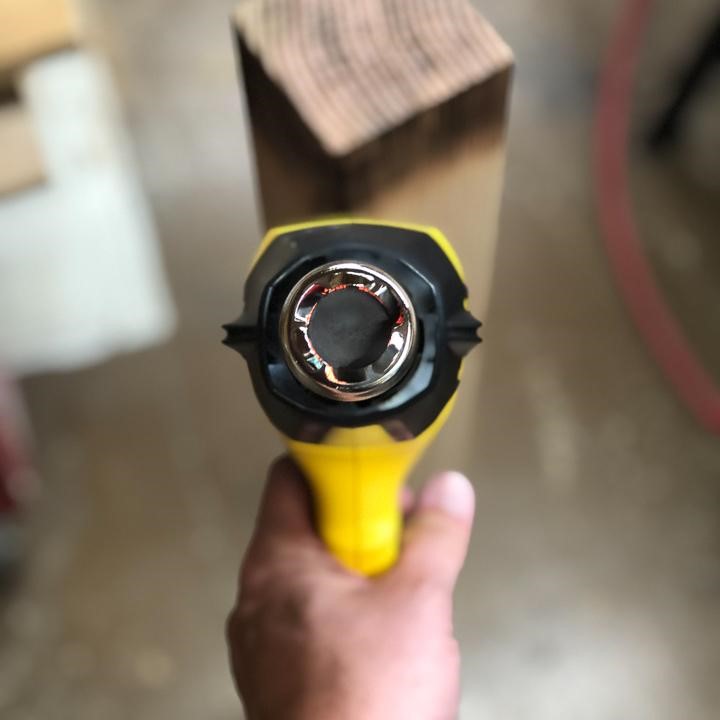
About the FURNO 700 heat gun
The Wagner FURNO 700 Heat Gun has variable temperature settings ranging from 125°F – 1300°F plus multiple fan speeds. The large LCD screen lets you view the temperature adjustments in increments of 10°F. These features allow you to have precise control for any project.
Step #5
Consistent heat and comfortable
Right from the start we noticed that Wagner has made it very easy to create a consistent look with even heat while remaining cool in your hands. The soft-grip handle is also very comfortable and never felt heavy in our hands even after using it for long periods of time.
Step #6
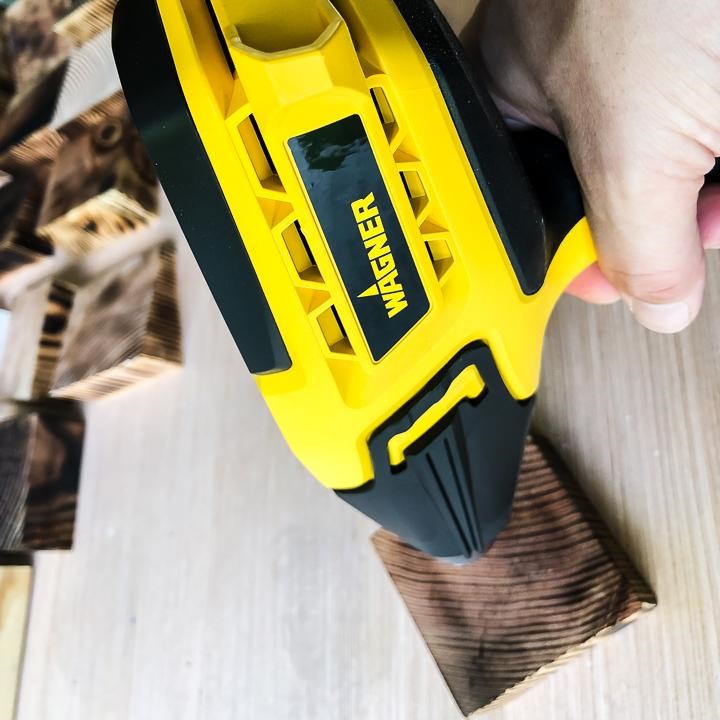
Char wood
The heavily charred look takes a little longer time to make, but it was so fun to watch the wood transform. If you are wanting to achieve a heavily charred look like this, we recommend working in a well-ventilated area.
We spent about a day charring all the wood pieces. We painted a few wood pieces black to add some depth as well as left some pieces natural to create a true variegated effect.
Step #7
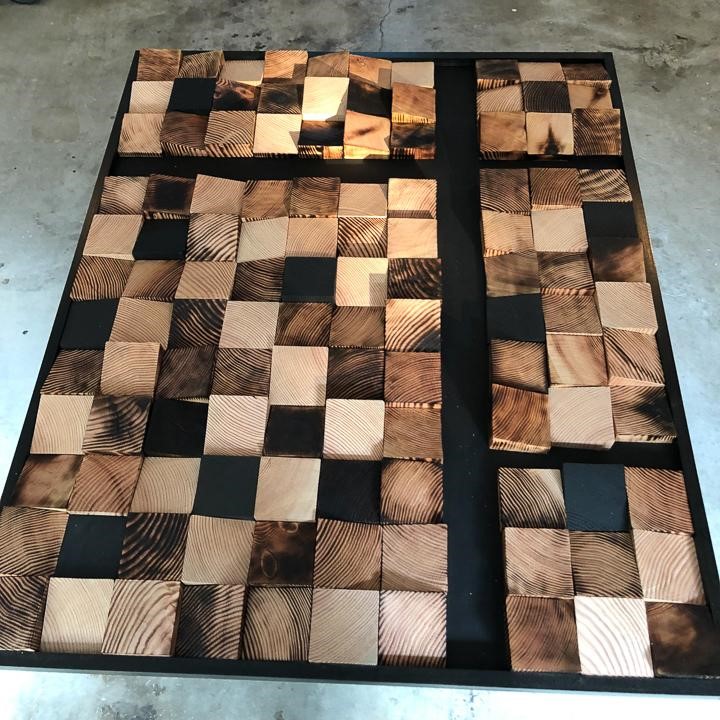
Assemble pieces
Now it was time for the fun part! Assembling the wood pieces. I played around with the blocks and settled on this design. We love it!
Step #8

Secure pieces into place, let dry overnight, and hang
Once we finalized where each wood block would go, we used construction adhesive to secure each piece in place. Let it dry overnight and you’re ready to hang your wood art.
Step #9

Download Project Steps & Shopping List
We’ll never share your email with anyone else