Overview
If there’s one thing that shouldn’t be passed up when it comes to free (or next to free) is wood. Whether you find a solid piece of furniture, or décor, or just plain ol’ lumber (which is like gold nowadays), grab it. I’m eager to show you a fun, easy, budget-friendly build that includes playing with a pretty cool…errrr…hot tool. Let’s get our DIY!
Instructions

CHOOSE WOOD
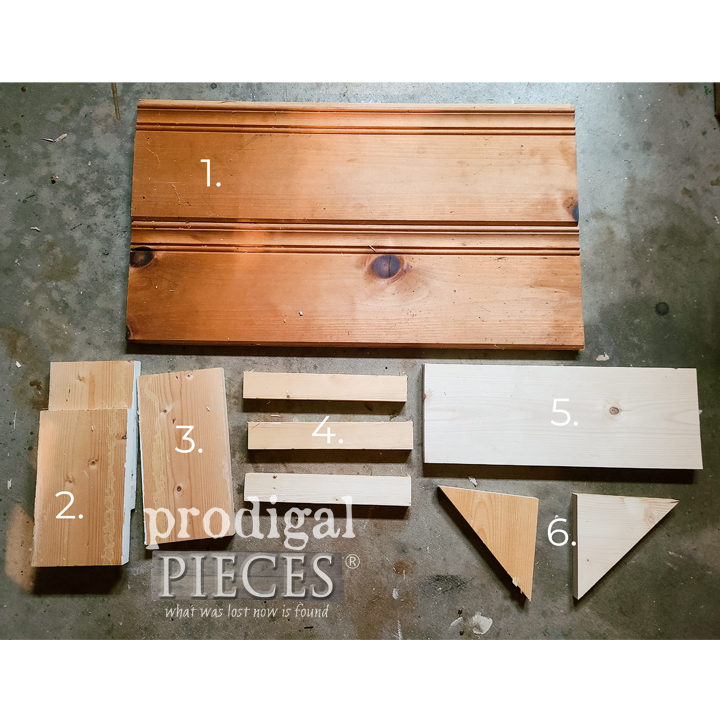
Before we begin, take a look at this gorgeous tongue & groove pine I recently picked up during city cleanup. I found several lengths of board, but this one will be my project piece for today’s build. You can use new wood as well, so keep that in mind.
Step #1
FIND A FURNO
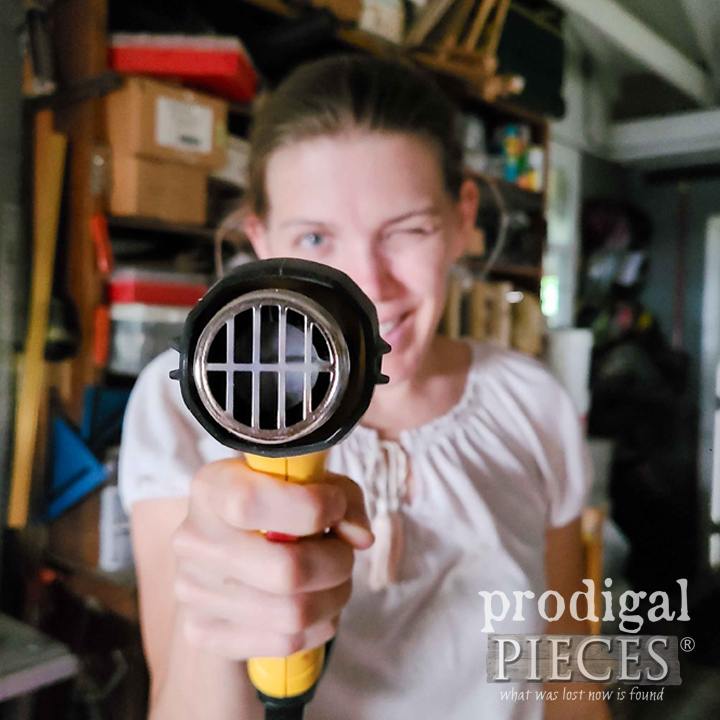
First, let’s talk about this hottie, the Wagner Heat Gun. I’ll be the first to admit when I used to work for paint crew in college, I underestimated the potential of this handy tool. I seriously deemed it a glorified hair dryer. However, I have since been put in my place and realize the scope of benefits it offers.
Step #2

HEAT GUN USES
You can see how I’ve used a heat gun to remove layers of paint in this video tutorial on another #trashure find. Also, you can see how I used it to bend metal on a reclaimed sleigh I built, and also a fun way to add graphics or logo to your woodworking projects . There’s limitless uses for crafting, home repair, and woodworking.
Step #3
SUPPLIES
If you’d like to create this project for your home, please head to my website for a supply list. For this, I use pine, but feel free to use any species of wood you prefer. Also, you can tweak this to your heart’s content to suit your space.
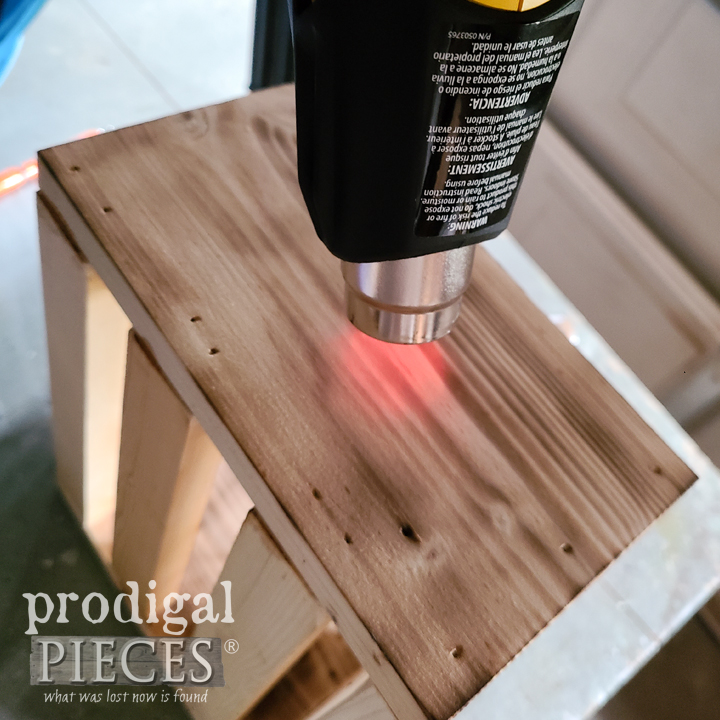
Step #4
ASSEMBLE
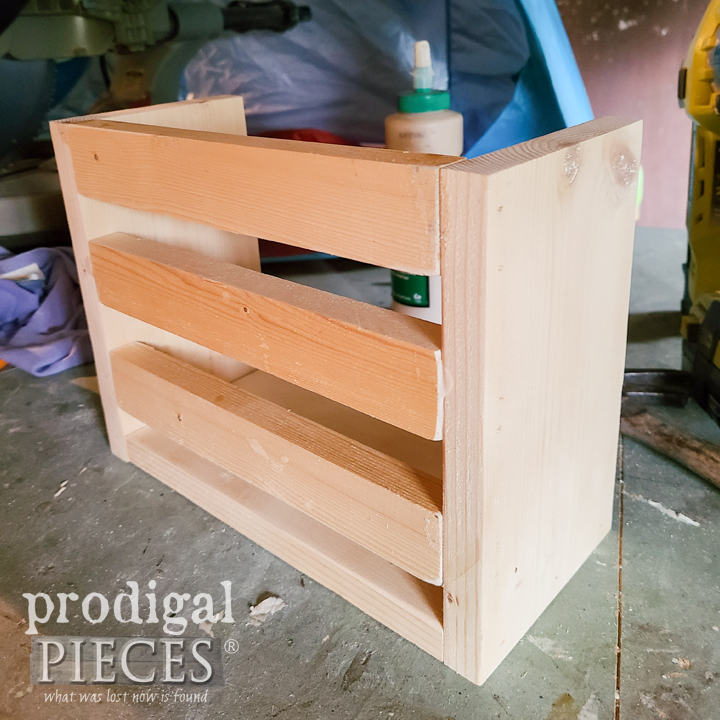
Next, once you have your pieces cut, it’s time to assemble. My preferred tool is a nailer with brads, but you can also use a drill/screw. Just make sure to pre-drill to prevent splitting. Also, assemble the parts in sections to make finish assembly easier: (1) Assemble #1 pieces (use a pocket joint to connect if not using tongue & groove), the #2, #3, & #4 pieces into a crate (shown below), and #5 & #6 into a shelf. In addition, use wood glue to reinforce the joints.
Step #5
TEXTURIZE
However, our DIY fun is just beginning! It’s time to break out our Furno Heat Gun and give this wood some texture and the burnt wood finish. The two back boards I use a charcoal reactive stain to make it nice and dark. Though, for the crate and shelf, I want to contrast that with a scorched wood look. Simply rest the gun on the stand on a safe surface, turn it on, and allow it to heat up for a couple of minutes. Then, slow and steady, pass it over the wood to give it a charred look. You’ll see the grain pop out in a miraculous way. Also, hit the edges and corners to give it a darker effect. It’s so addictive!
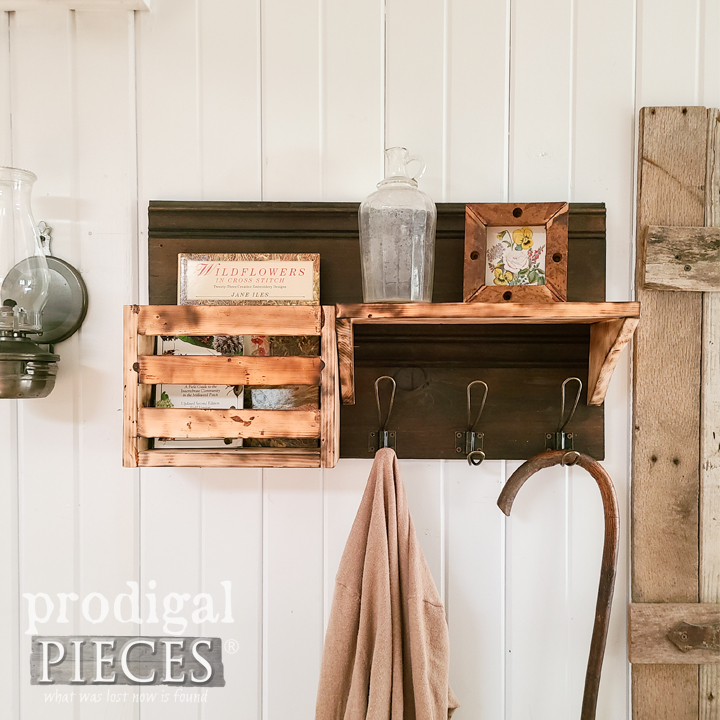
Step #6
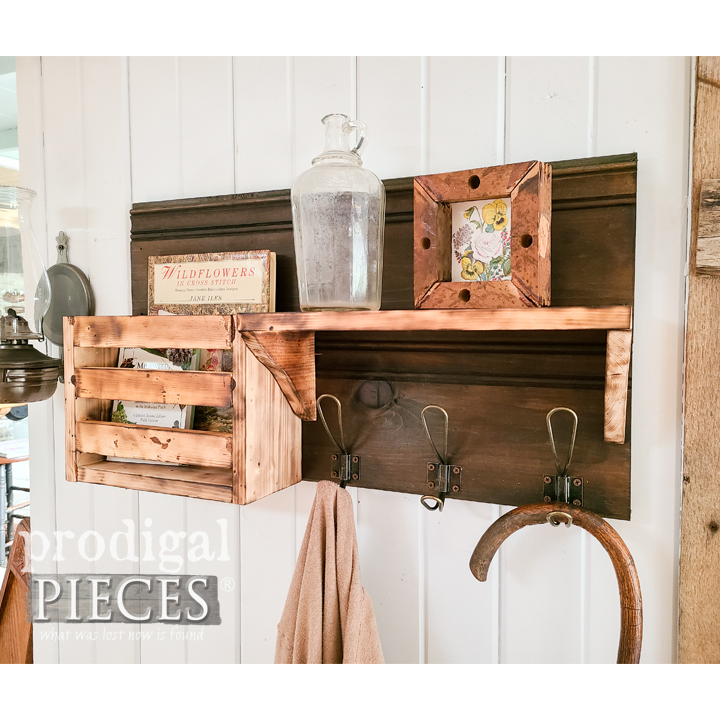
DISPLAY
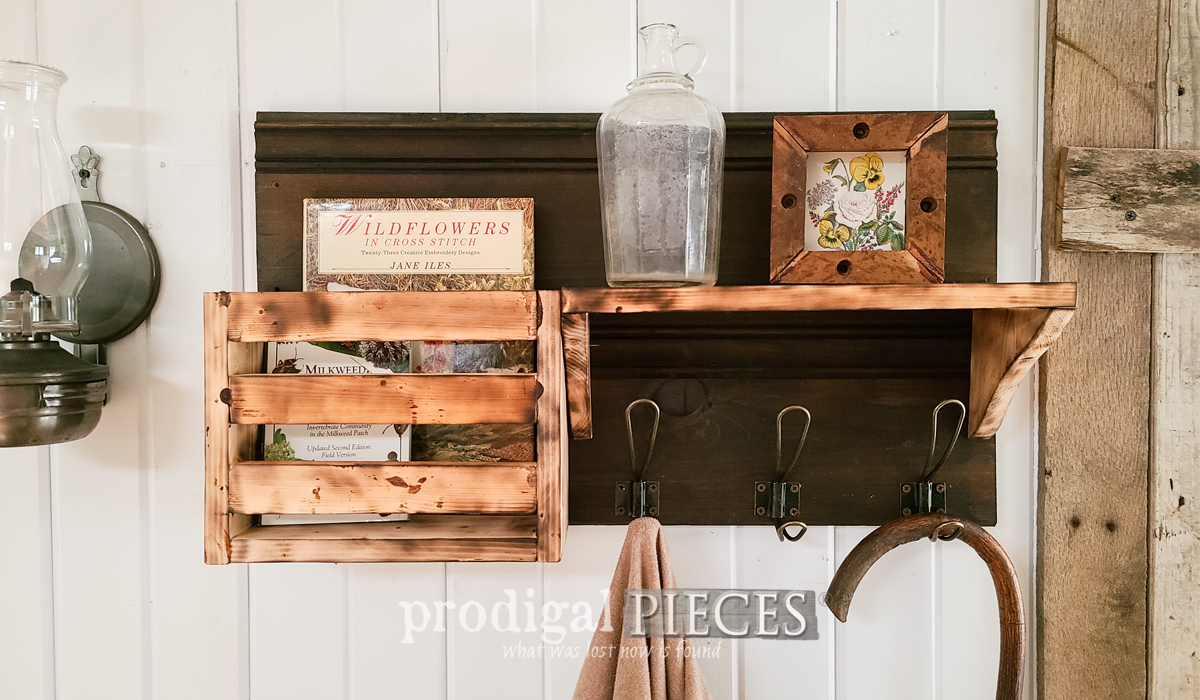
Finally, mark where you want your pieces attached and pre-drill holes to attach from the back using screws. Also, be sure to add your keyhole hardware. That hardware allows for a flush mount, as well as can hold heavy objects with no problem. Here’s our DIY scorched wood shelf complete with hooks for coats or towels.
Step #7
TRY IT OUT
In all that I do, my goal is inspire you to give DIY a try. This sort of project can be adjusted to suit any décor with stains or paint, and even in size. Build it to suit YOU. And, if you’re like me, you love to learn tips and tricks to make creating your home easy and an adventure. If you have any questions, please feel free to email me via the contact tab on my site: Prodigal Pieces. Stop by to say Hi! Until next time…
This sponsored post was created by Prodigal Pieces. Head to the website for the full post and details.
Step #8

Download Project Steps & Shopping List
We’ll never share your email with anyone else

