Overview
Painting interior trim really ties a room together in any home. Especially if you find a color that coordinates with your doors, cabinets, and walls. Painting your trim might sound like tedious work, but a Wagner FLEXiO 3500 with the Detail nozzle will help you get it done with a nice, smooth finish, plus you’ll have fun in the process.
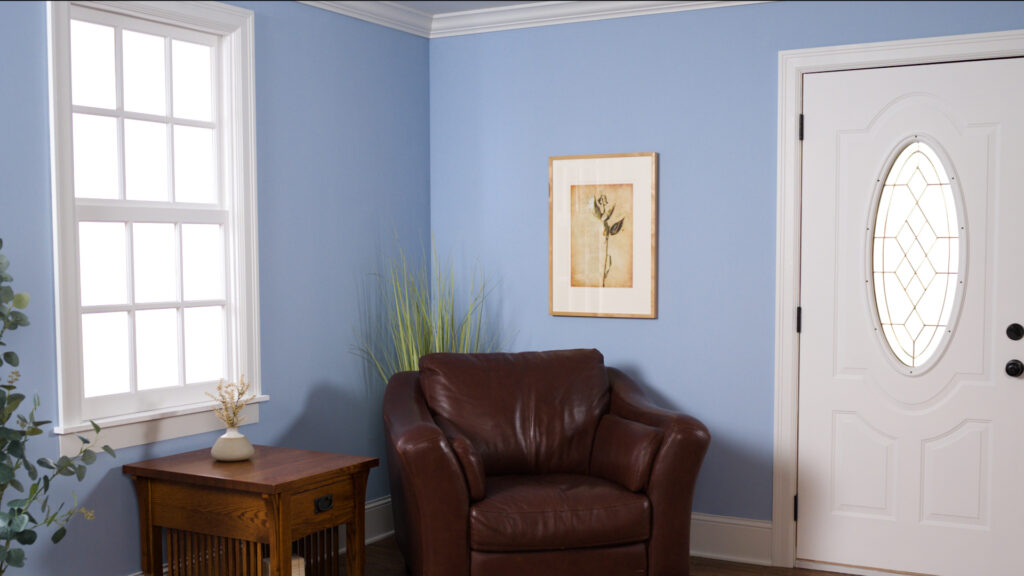
Before
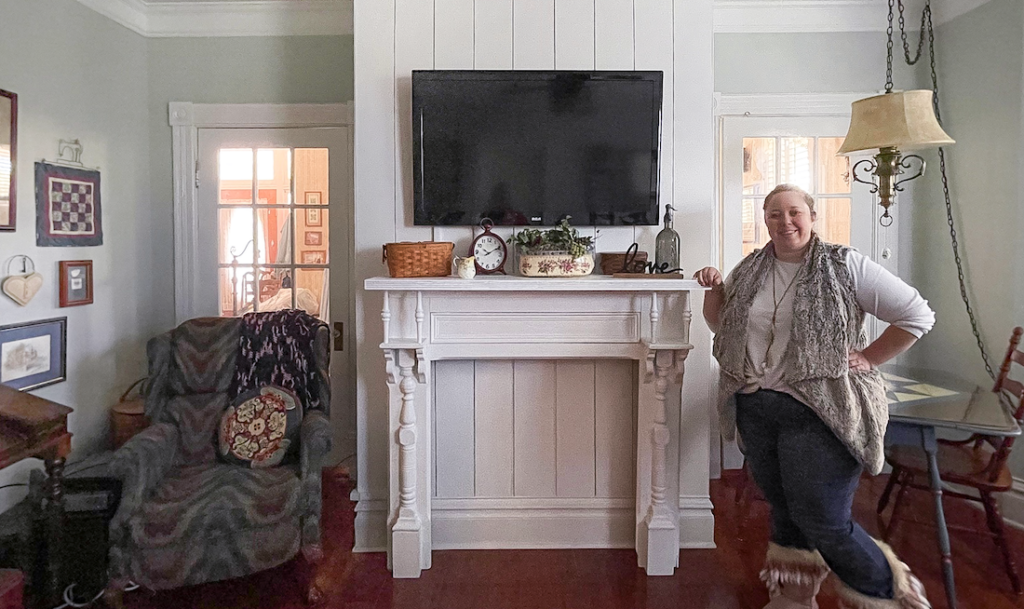
After
Instructions
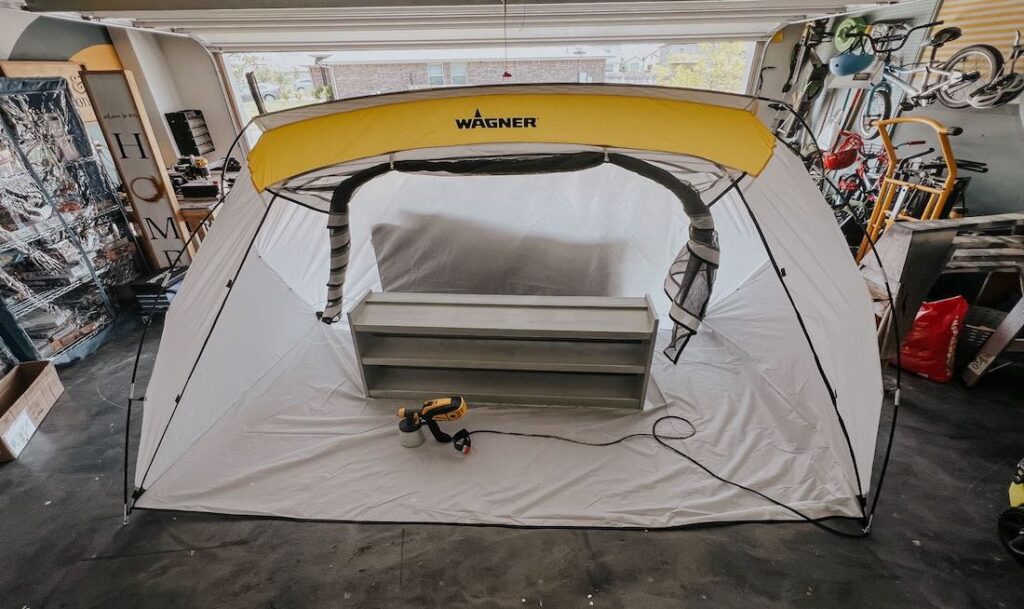
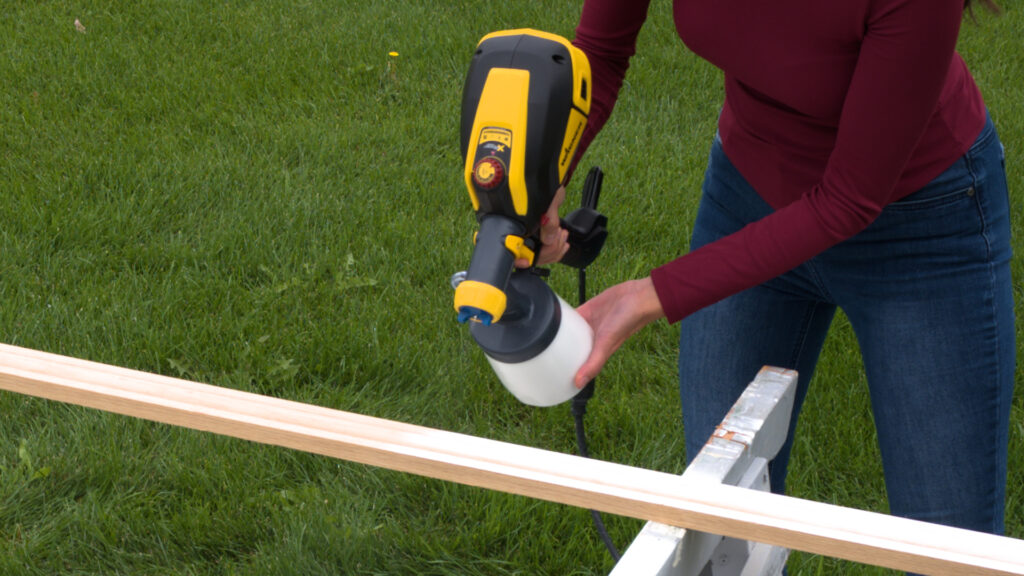
Spraying Trim on Sawhorses
If you haven’t installed your trim yet, painting it is really easy because you won’t have to mask any walls or bend and stoop while painting. Just lay it down horizontally on a pair of sawhorses, spray the trim, and install it once dry.
Step 1
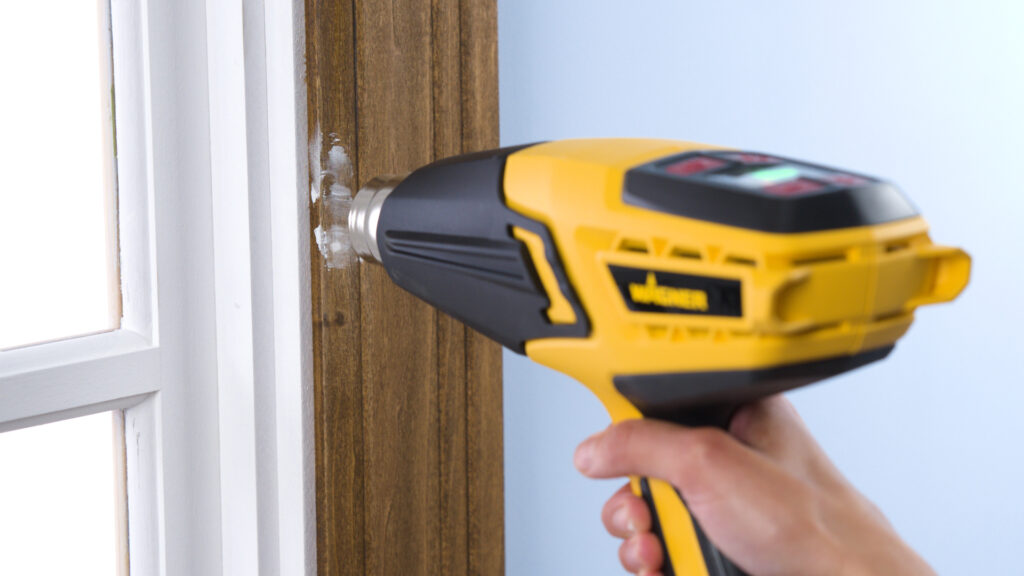
Repair Any Dings or Holes
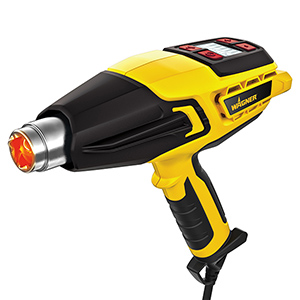
If your trim has already been installed, you’ll have a few more steps to do. Start by repairing any holes or dings with wood putty. Allow it to dry for the recommended time. You can also use a Wagner heat gun to speed up the process.
Step 2
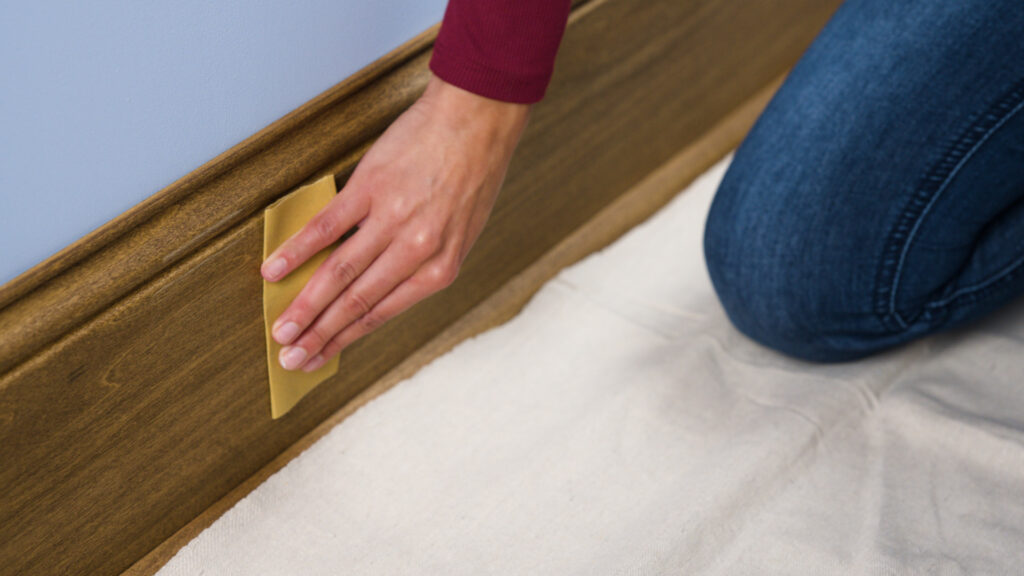
Sand the Trim
When the putty is dry, sand the filled nail holes smooth using medium grit sandpaper. Then scuff sand the rest of the trim to remove any gloss so the new paint will stick better.
Step 3
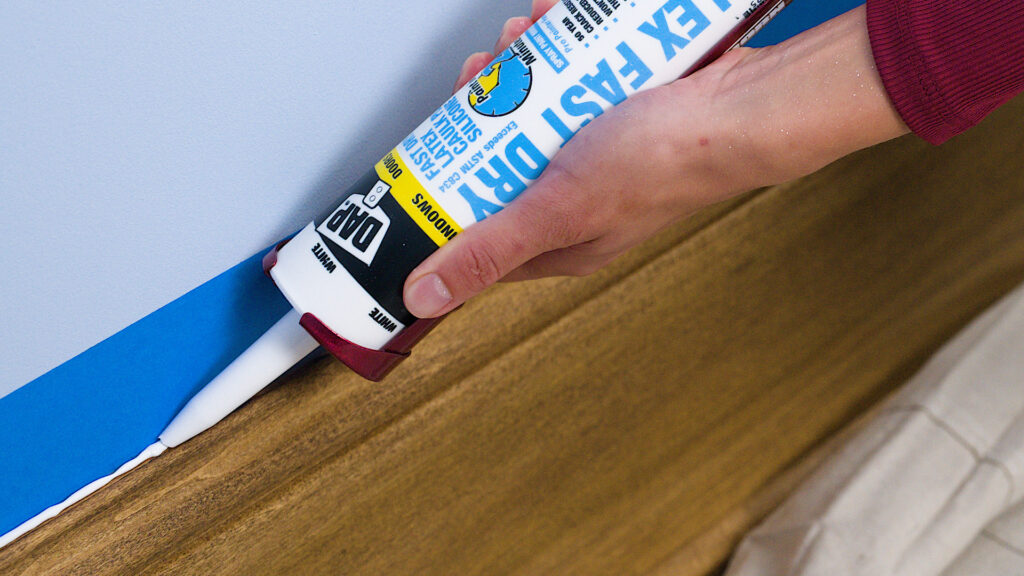
Caulk the Gaps
Wipe away the dust and clean the wood thoroughly with a wet rag or tack cloth. Also be sure to caulk any gaps between the walls and trim using latex caulking.
Step 4
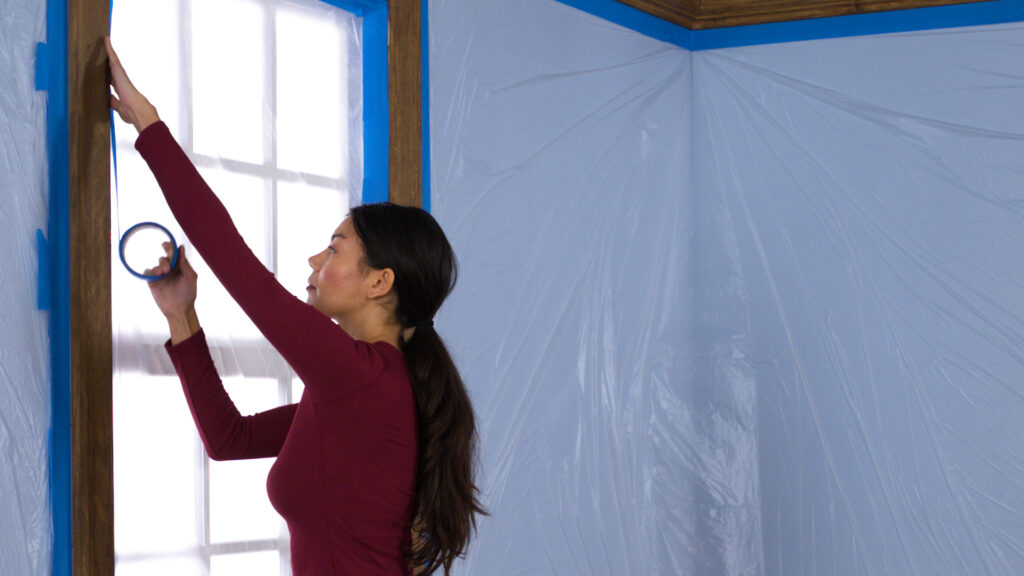
Hang up Masking
Now it’s time to prepare the room for painting. Grab your plastic masking and painter’s tape and cover anything you don’t want painted, including the walls and ceiling around the trim. Lay down drop cloths to protect your floor and any furniture that might still be in the room.
Step 5
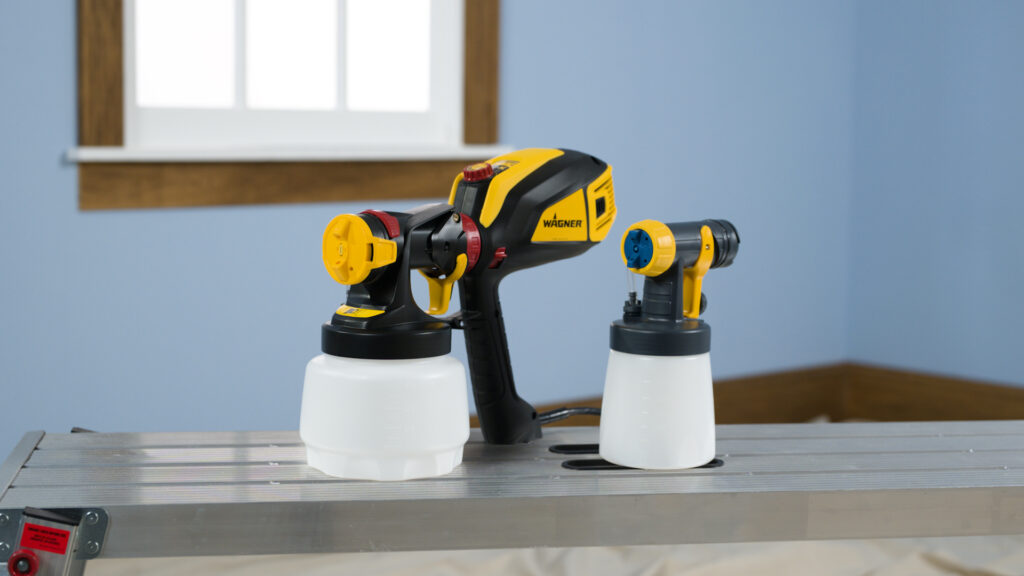
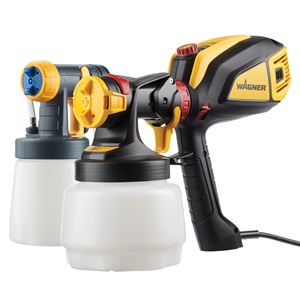
Prepare the FLEXiO 3500
Now for the fun part…spraying! We recommend using the Wagner FLEXiO 3500 paint sprayer, which is great for a wide variety of projects, including painting trim.
The FLEXiO 3500 comes with two nozzles: an iSpray nozzle for broad surfaces and a Detail nozzle for fine finish work like painting trim.
Spraying is much faster and easier than a brush, plus it’ll give us a nice, smooth finish with no brush marks.
Step 6
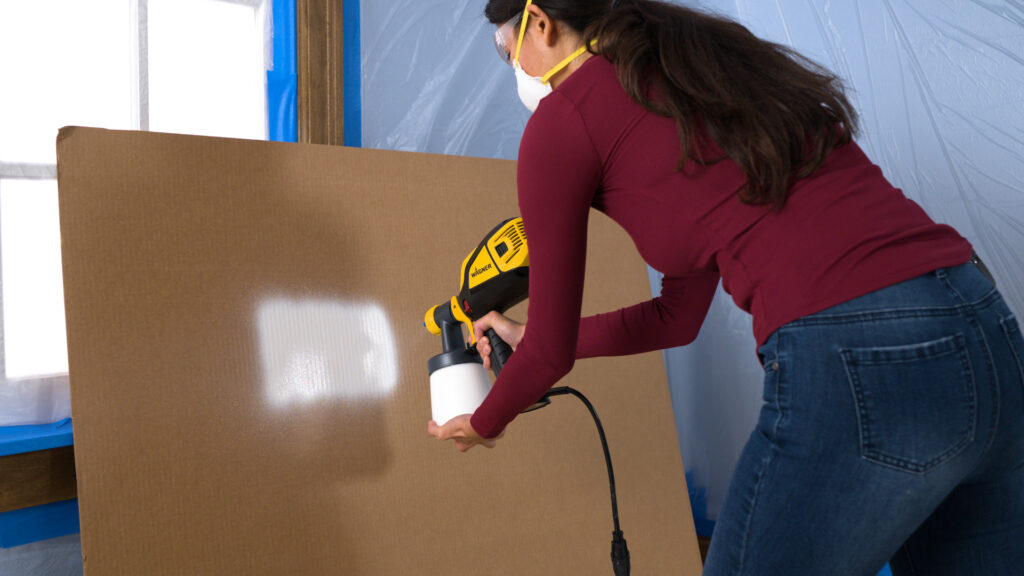
Test Your Spray Pattern
Choose your favorite paint color and pour it along with Wagner Paint Easy into your sprayer material cup. Popular color choices for trim are white or black, but you can have fun choosing the best color for your room.
Once you’ve adjusted the paint flow and air flow and tested your spray pattern on a piece of cardboard, you’re ready to start painting.
Step 7
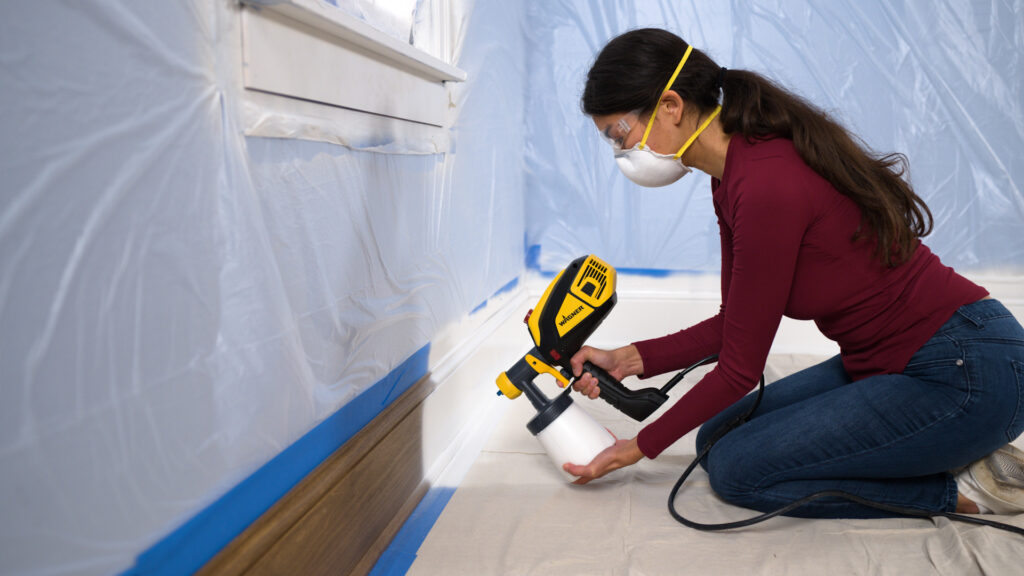
Spray the Trim
Adjust your Detail nozzle for the direction you’ll be spraying in, then start at one end of the trim and spray along its entire length. Keep the sprayer steady and about 6 inches away from the trim. Be sure to keep the tip of your sprayer parallel with the trim while you’re spraying.
Step 8
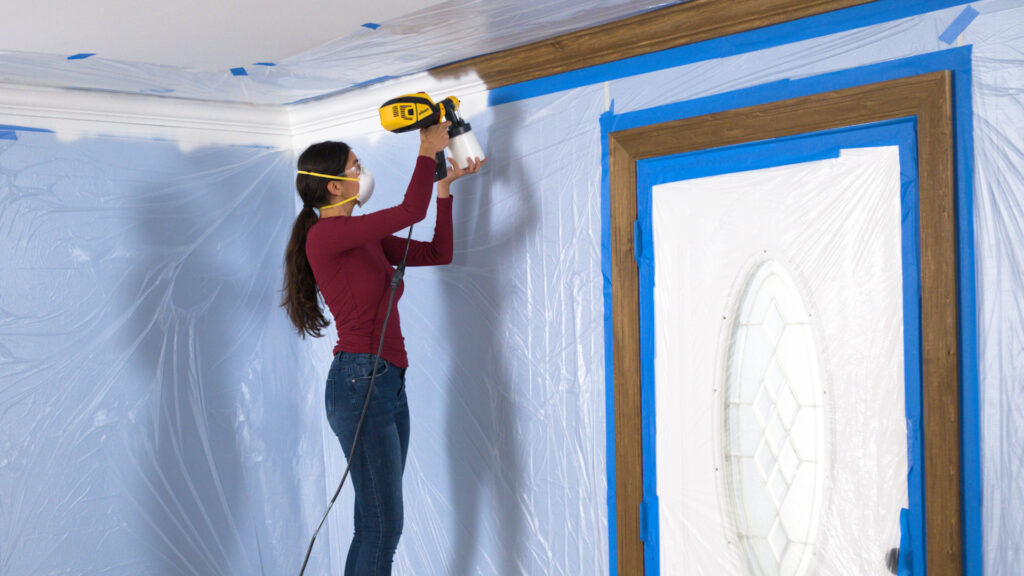
Spray Side to Side or Up and Down
Adjust your nozzle for up and down spraying or side-to-side. Wipe the spray tip periodically with a wet cloth to prevent paint build-up on the nozzle. In most cases, even the widest trim can be covered in one pass.
Step 9
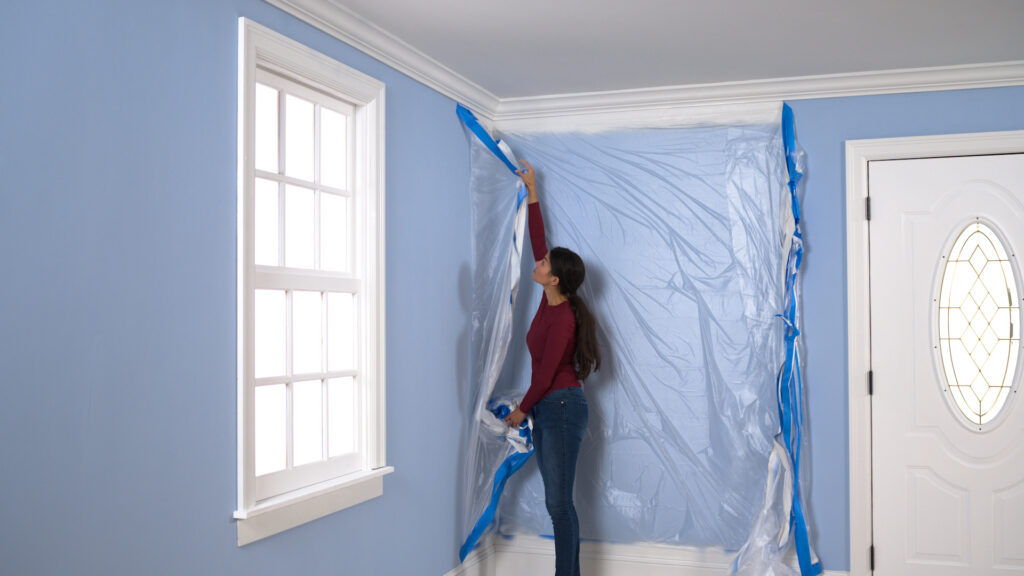
Remove the Masking
Remove all of the painter’s tape and masking when the paint is still slightly wet so that the tape doesn’t pull off any trim paint.
Step 10
Enjoy the Room!
Enjoy your transformed room! The painted trim really pops and ties in nicely with the color of the walls. Plus, this was so fun that it didn’t even feel like work!
Step 11

Download Project Steps & Shopping List
We’ll never share your email with anyone else