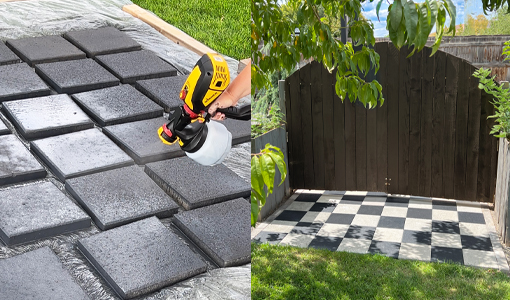
WHEN TO PAINT A FENCE
Painting a wood fence is one of the best ways to protect your investment.
If you’ve recently built your fence, you’ll want to let the wood season for 3-4 weeks before painting it because moisture in unseasoned wood can cause warping. Additionally, paint adhesion, and absorption into the wood will suffer. Remember to be patient and wait for dry weather where you can start your paint spraying project in the early morning before the sun heats the surface of the wood. A surface that’s too hot prevents you from achieving a pro-like finish because solvents in the paint to evaporate too quickly, resulting in cracks and other imperfections.
Please note, these steps can also be used to stain spray a wooden fence.
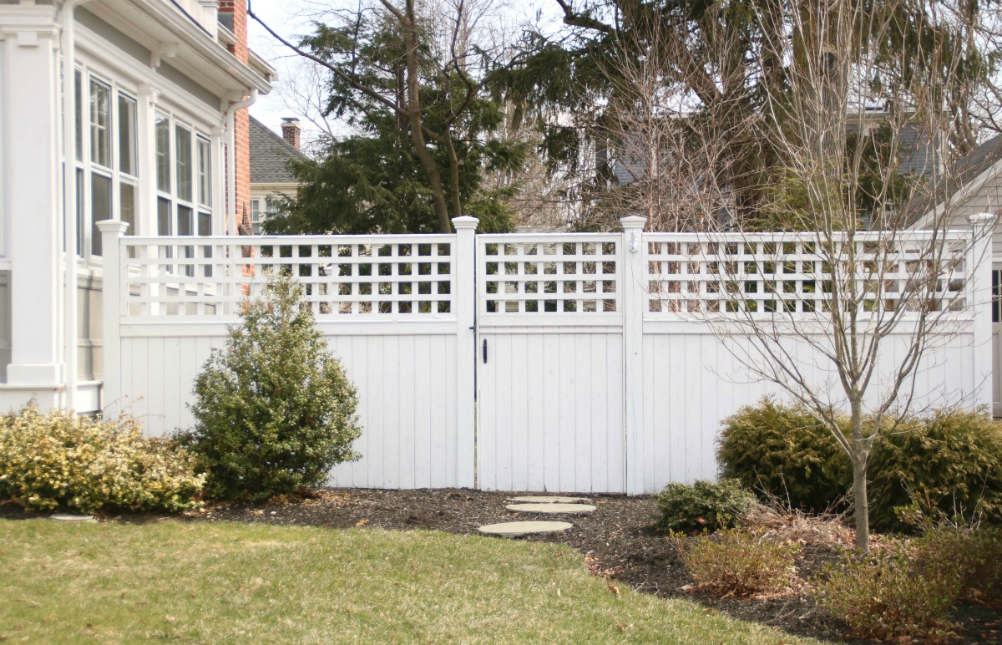
Before
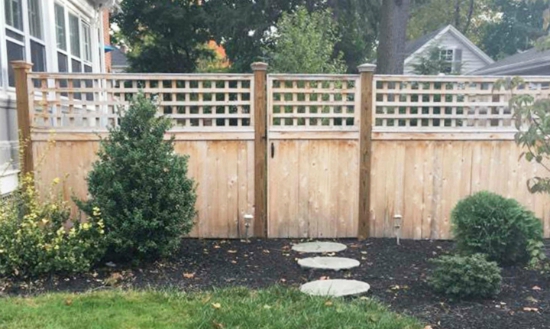
After

PREPPING TO PAINT SPRAY YOUR FENCE
Professional painters call the process of scraping, cleaning and masking for paint jobs “prepping.” Here are some important steps to take when prepping to use a paint sprayer.
TRIM AREA – Trim back any grass, weeds, trees or bushes that are in contact with the fence. This exposes all of the fence’s surfaces and ensures a clean and complete finish.
REMOVE OLD PAINT – If your fence has been previously painted, prepping also includes scraping off all peeling or chipping paint. A Wagner Paint EATER and Wagner Heat Gun can help with this process – see our DIY project on how to remove paint from wood for more instructions.
REPAIR FENCE – Repair or replace any damaged portions of the fence. Check for loose nails or screws and reseat them. If the fence needs repairs, it’s better to do these before you start paint spraying so you can hide any new screws or wood filler. Most importantly, having a surface that’s as uniform as possible will give you the best results.
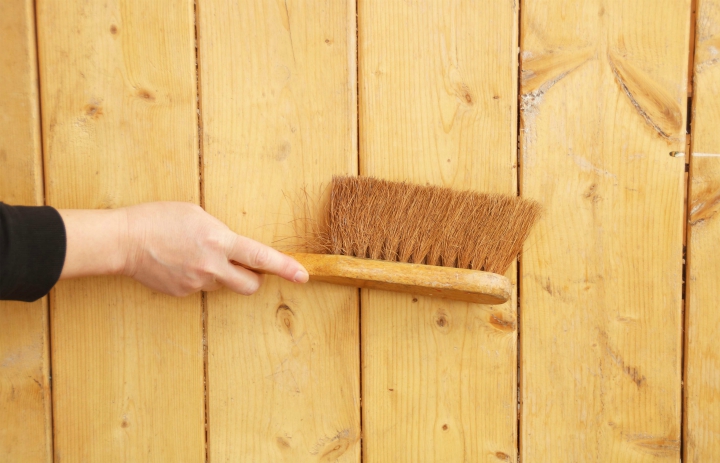
CLEAN FENCE – Use a counter brush to remove any dust, cobwebs or debris from the wood surface and trellis work. A power washer can also get the job done quickly and efficiently, but remember to let the fence thoroughly dry before applying paint.
DROP CLOTHS – Use drop cloths to protect surrounding vegetation, sidewalks and landscape features. Don’t forget to put a drop cloth immediately under the section of the fence you’re painting to catch drips.
PRIMER – If you’re painting over a darker color paint with a lighter one, then you might need to spray a coat of primer first.
Step #1
SETTING UP THE PAINT SPRAYER
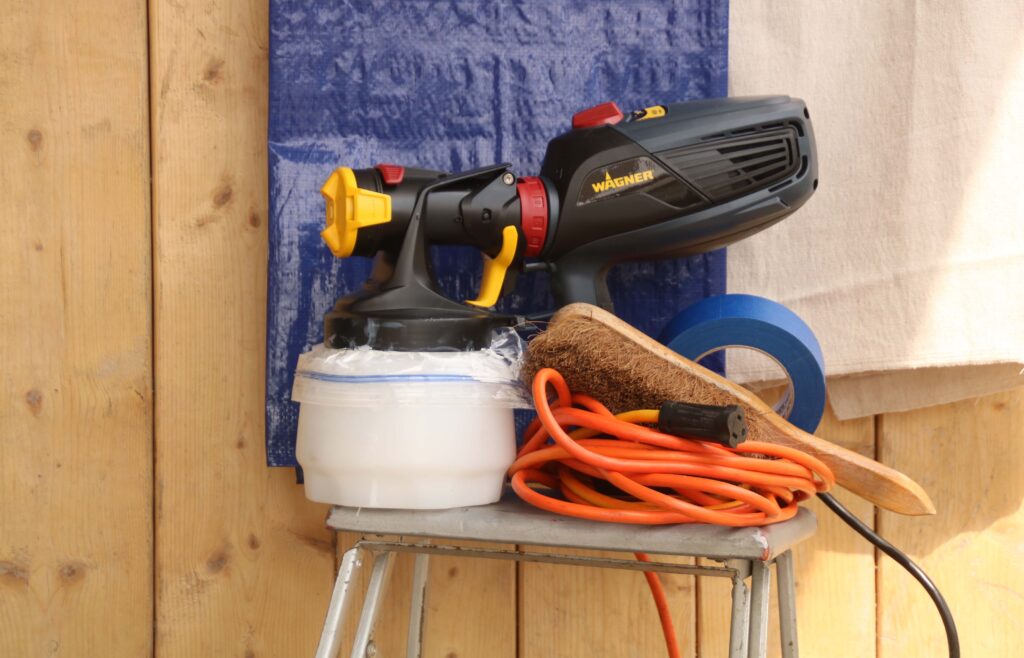
Unless you’re painting a small fence section, you’ll save money by buying paint in five-gallon buckets and you can cut painting time in half by using a Wagner Paint Sprayer over a brush.
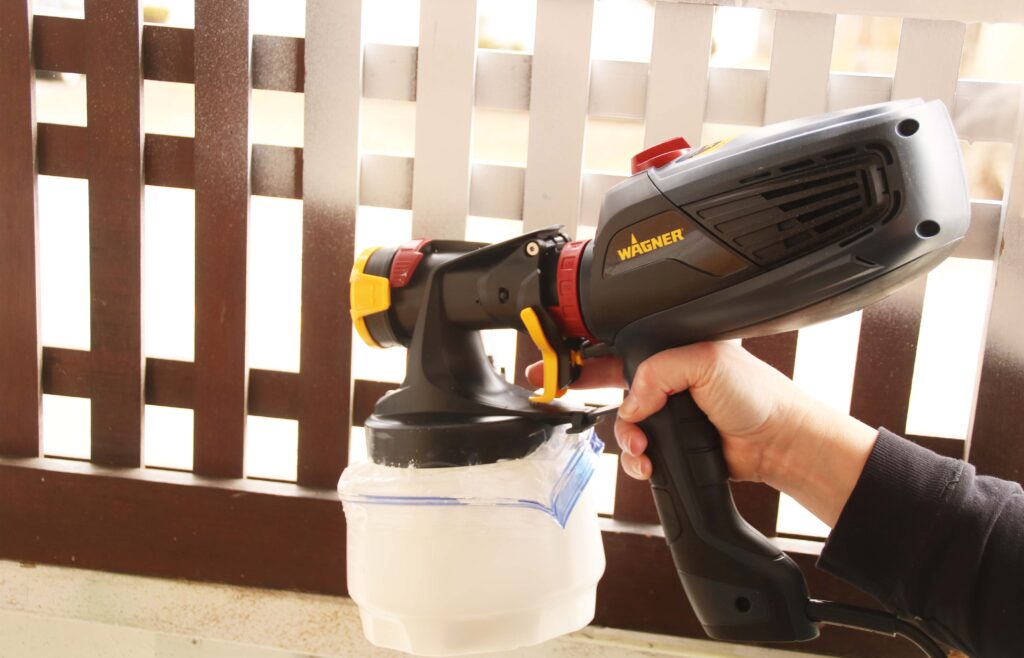
It is quick to set up the sprayer and get it primed for painting. Adjust the nozzle to give broad coverage while still affording you the ability to focus in corners and crevices.
All FLEXiO paint sprayers come with nozzles you can adjust as needed, which is an advantage over conventional airless paint sprayers.
Step #2
PAINT SPRAYING TECHNIQUE
One of the cardinal rules of paint spraying is to maintain a uniform 6-8″ distance between the nozzle and the surface you’re painting. Be careful not to arc off at the end of the stroke.
When painting rails or in a horizontal pattern, set the nozzle to spray a vertical pattern, and move the paint spray gun left and right.
When painting panels or in a vertical pattern, set the nozzle to spray a horizontal pattern, and move the paint spray gun up and down.
Depending on the texture and layout of your fence, sometimes it’s a good idea to go back over your work in the perpendicular direction. This creates a crosshatched pattern that eliminates streaks.
Even if your fence needs two coats, it can take just a weekend to give it a completely new look that will impress the neighbors.
Rest assured, paint spraying is easy, and if you’ve never used a paint sprayer or need more detailed instructions, you can view our how to use a paint sprayer tutorial here.
Step #3

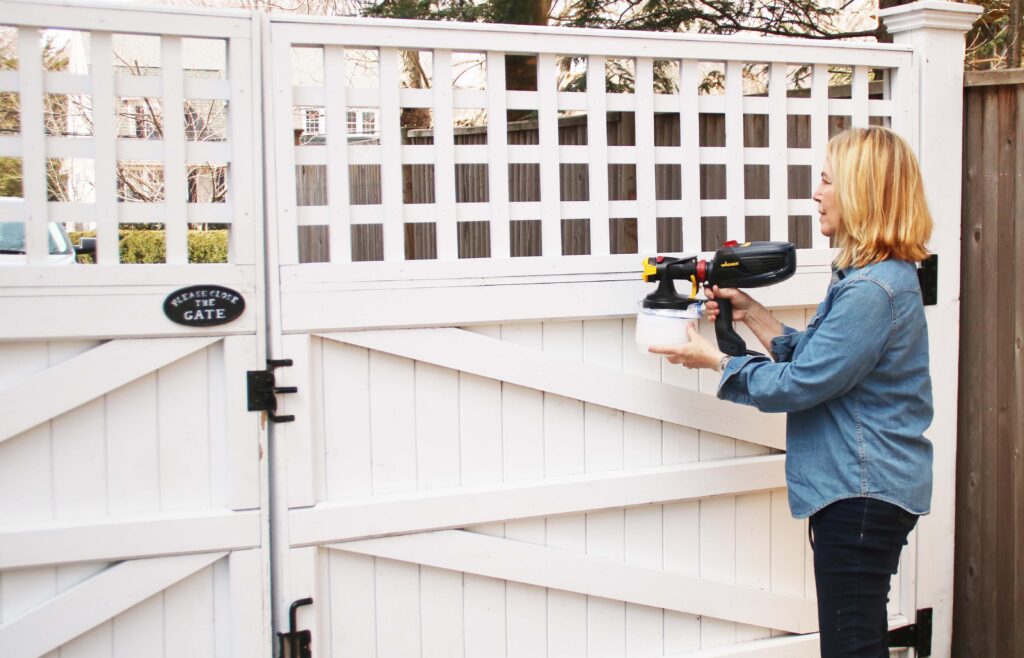
SPRAYING TOP OF FENCE
Keep a step ladder handy to aide in paint spraying the top portion of the gate or anything too high to reach.
To paint spray the trellis portion of fence, set the FLEXiO paint sprayer to horizontal spray pattern and spray from side to side starting at the top.
Move slowly enough to make sure you cover all the nooks, crannies and edges of the intricate cut work.
Step #4
REVIEW YOUR PAINT SPRAYING
Once the fence is completed, revisit each portion of the fencing (both top and bottom) and retouch any spots that have a thin coat of paint or show bare wood – this is especially if it’s a new wooden fence as the paint will absorb into the wood and could appear thin/light in sections.
Enjoy the even finish over all the intricate parts of your fence, both front and back. Hand painting with a brush would have taken weeks to complete this project.
Step #5

Download Project Steps & Shopping List
We’ll never share your email with anyone else

Products Used

FLEXiO 2500 Sprayer
$159.99

FLEXiO 3500 Sprayer
$189.99

FLEXiO 5000 Sprayer
$250.00

FLEXiO 4000 Sprayer
$240.00