Overview
After moving into my new home 10 months ago I knew right away I was going to have a problem with my sloped, dirt filled front yard. Moving the new house into place meant allllll existing grass was gone and being on a slope rain water has been busy carving groves into my front yard for months. In order to stop the rain we needed a permanent solution to rid the yard of dirt and give the rain a specific path down the slope.
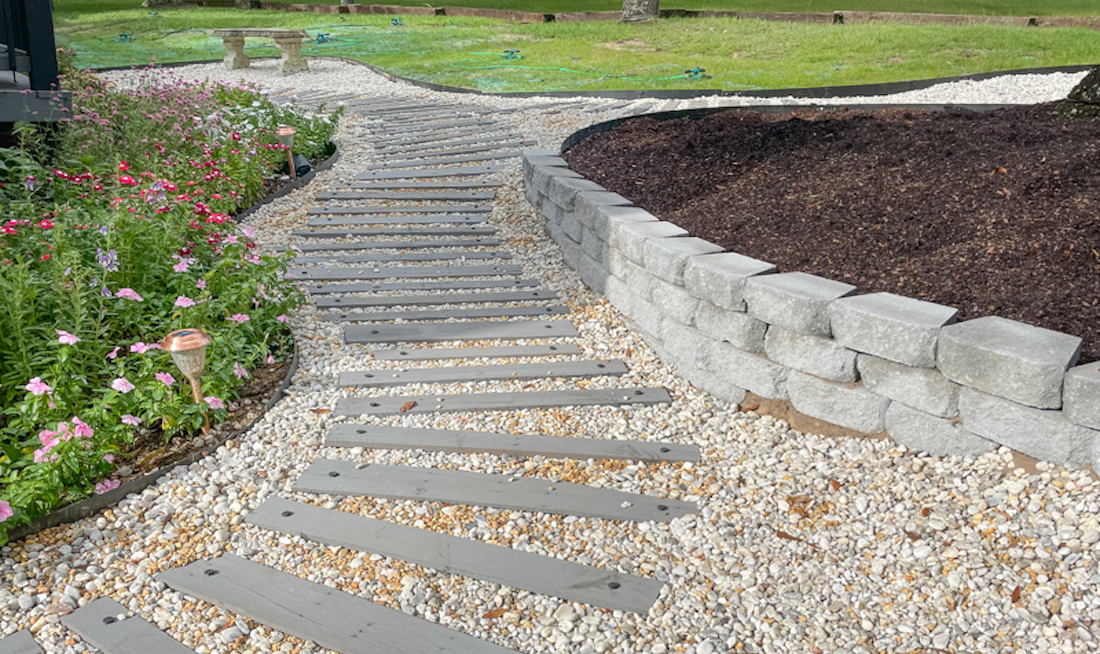
This area is actually quite large which is why I chose to fill the entire space with pea gravel and then create a pallet pathway on top of the gravel. The pallets add so much stability and they’re less expensive than the gravel so that we need less of the pricey rock and more of the in-expensive pallets.
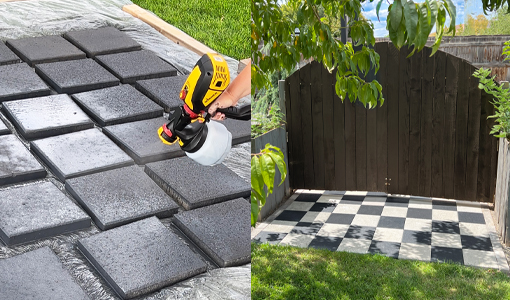
Of course, when adding a wooden element to your path you’ll need to seal the wood or replace it when it rots from the humidity and moisture. And since I live in Alabama (humidity central!) I grabbed my little Wagner FLEXiO Sprayer to seal these bad boys with stain.
Let’s get started:
Level the Ground and Add Pea Gravel
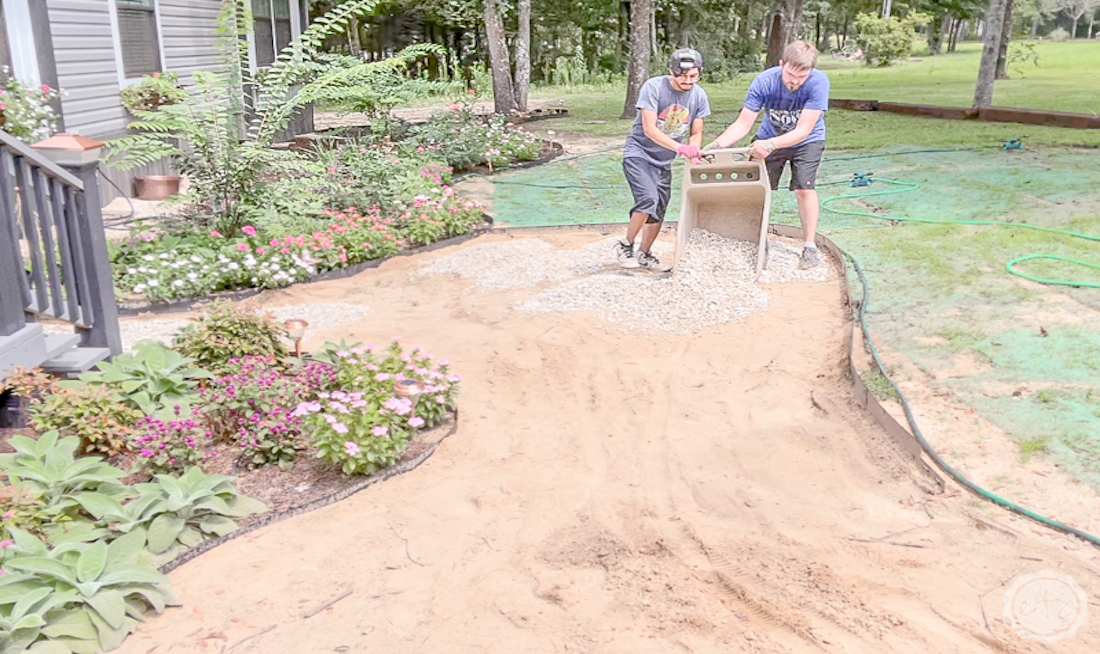
Before we can add our pallets, we need to prep the area! For me that included pulling (or spraying!) any weeds and then leveling the ground. Remove any dirt that makes the ground too high and fill in any holes or divots that may be present. Then you can smooth the ground with a rake and pack everything down with a tamper. Perfect!
Go ahead and fill the area with your pea gravel and you’re ready for the next step. Bonus Tip: I used pea gravel since I’m fighting the rain on my slope, but you could also create a pallet walkway with mulch or even in grass! Think of what would look best (and function properly) in your space!
Step #1
Cut and Prep the Pallets
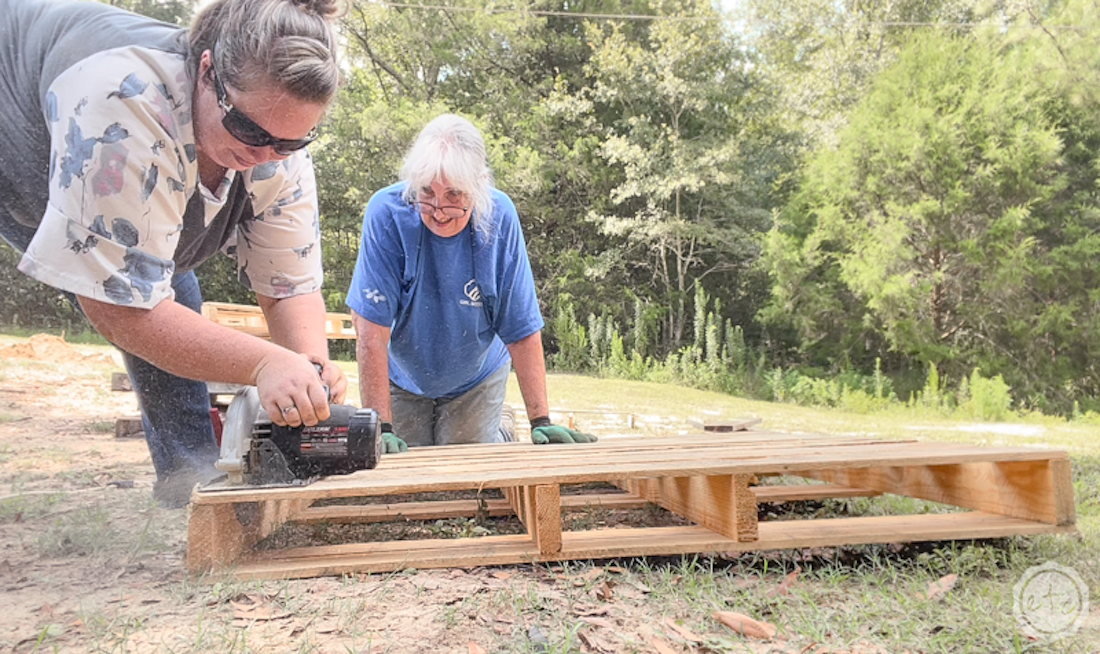
Pallet time! In order to use pallets as our walkway we’ll need to do a little prep work… basically
we need to take these pallets apart! Instead of grabbing a crowbar (which is an option if you
don’t have power tools handy) I used a circular saw to cut straight down each side of my pallets.
Just make sure to be safe here! Protective eyewear is a must and keep your hands and toes
away from the blades at all times… if you’re not comfortable with power tools ask for help or
grab a crowbar. Trust me!
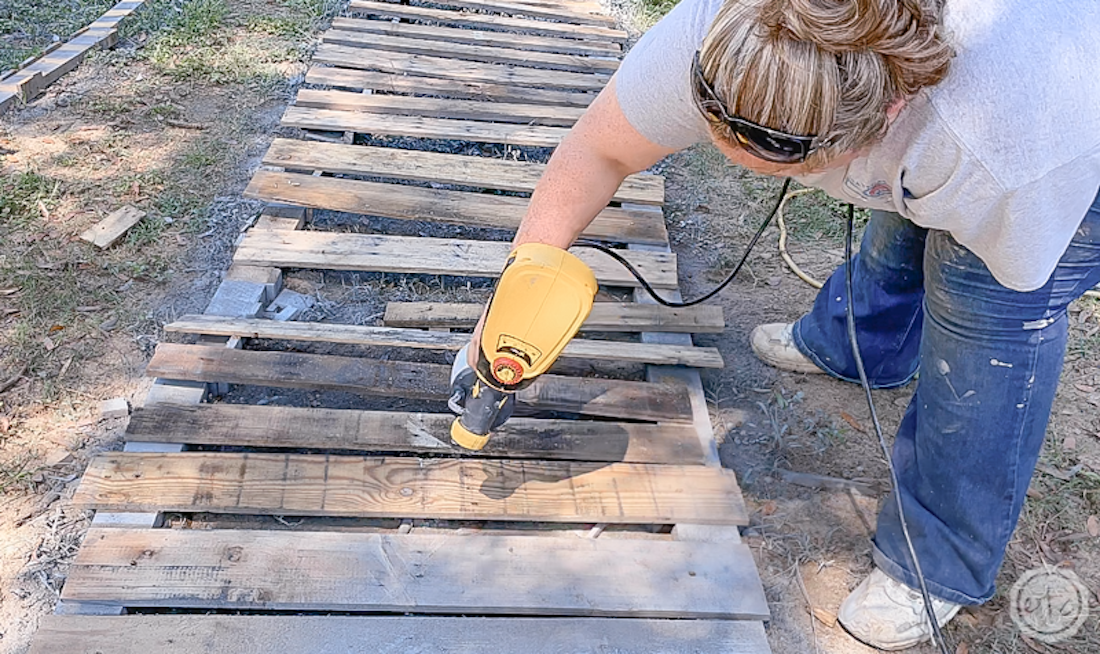
Next up I used a reciprocating saw to cut through the nails holding the middle portion of the
pallet together! Once allllllllll of the pallet slats were free I discarded the extra pallet pieces I
didn’t need and used my power drill (and a 10mm drill bit) to drill one hole on either side of the
pallet slats. You’ll want the holes to be about 4 inches from either side and centered…
Step #2
Paint the Pallets
Ready for the best part? Now that our pallets are disassembled and we have allllll our pallet slats prepped and ready to go it’s time to get painting! It takes about 15 pallet slats to do 8 feet of path, so I ended up with about 130 pallet slats for my project… which is way too many to stain by hand.
And since stain is essential to protect our pallet pieces from rain and humidity (not to mention bugs like termites and carpenter ants that we do. not. want. near. our. homes.) it’s important that we seal allllll the parts of our boards. Top, sides and ends. That would take forever with a brush, but it only took an hour or two with my Wagner FLEXiO sprayer!
Step #3
Install the Pallets
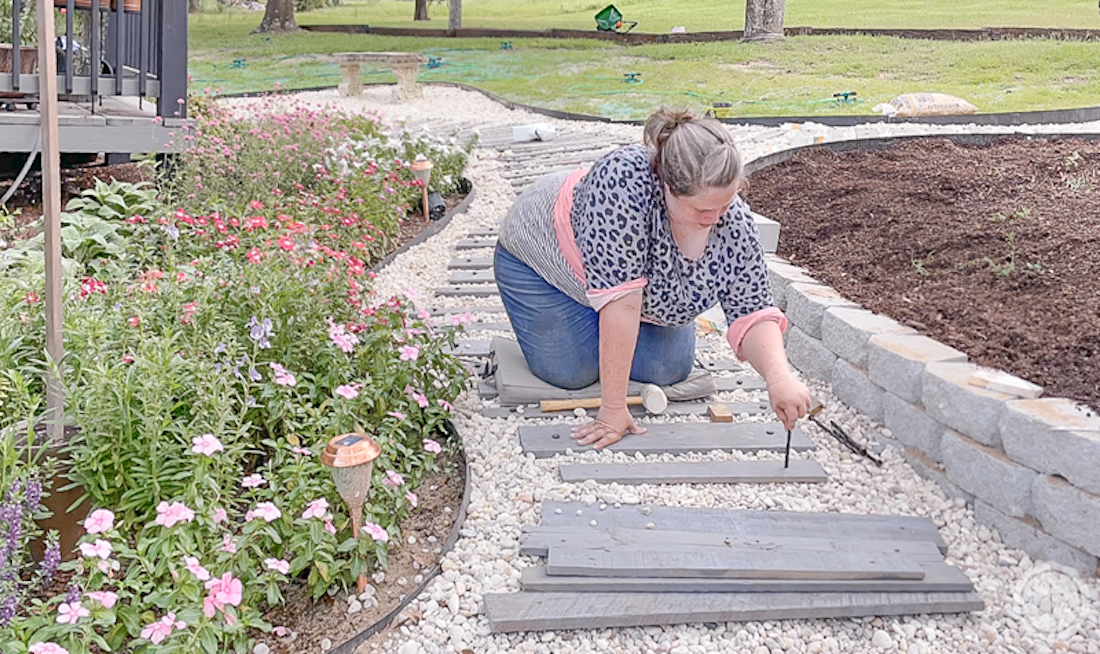
We’re so close to done! Once all the pallets are done go ahead and start laying them out on
your path. I used 2 wooden blocks that are roughly 3 inches long as spacers between my
boards… that way the space in between the boards will be consistent even if the boards
themselves are different lengths and widths.
Once I had a few boards laid out I grabbed a mallet and my anchoring spikes. Then I made sure
each board was level with the top of the pea gravel (and not sitting on top of the pea gravel) and
pounded in those anchoring spikes!
130 pallet slats later and you’re good to go!
Step #4

Decorate and Enjoy!
At this part you’re probably bone tired… this is not an easy project even if it is sooooooo worth
it! Luckily we only have a few finishing touches and then we’re done!
I added a few extra pieces like compost to the new garden bed around my tree and a pretty
concrete bench! You can also add extra tiny pebbles in between the pallet slats for extra stability
(in my opinion those tiny pebbles really filled in all the cracks and made the pallets that much
better!).
Then you’re done! Send pictures to everyone because this project will impress even the
un-impressionable. Enjoy!
This sponsored post was created by Happily Ever After Etc. Head to the blog for the full post and details.
Step #5

Download Project Steps & Shopping List
We’ll never share your email with anyone else