Overview
Don’t let layers of paint hold you back from restoring a salvaged mantle, or other painted furniture! When you use the FURNO 700 Heat Gun, you’ll tackle this project in no time, without chemicals!
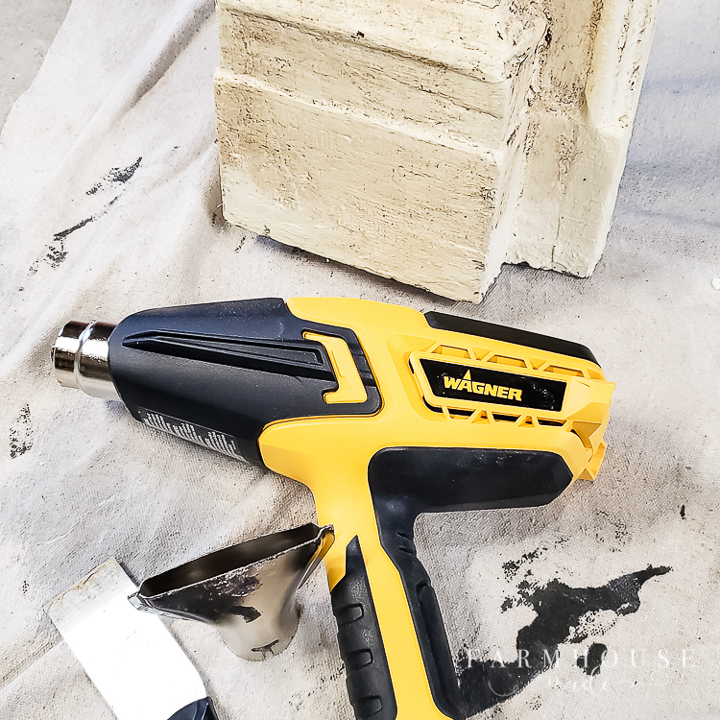
Prepare Work Area
Prepare your work area by laying down a drop cloth, placing your item on it, and putting the flare nozzle onto the end of the heat gun. Vent your workspace, put your mask on, and gloves.
Step #1
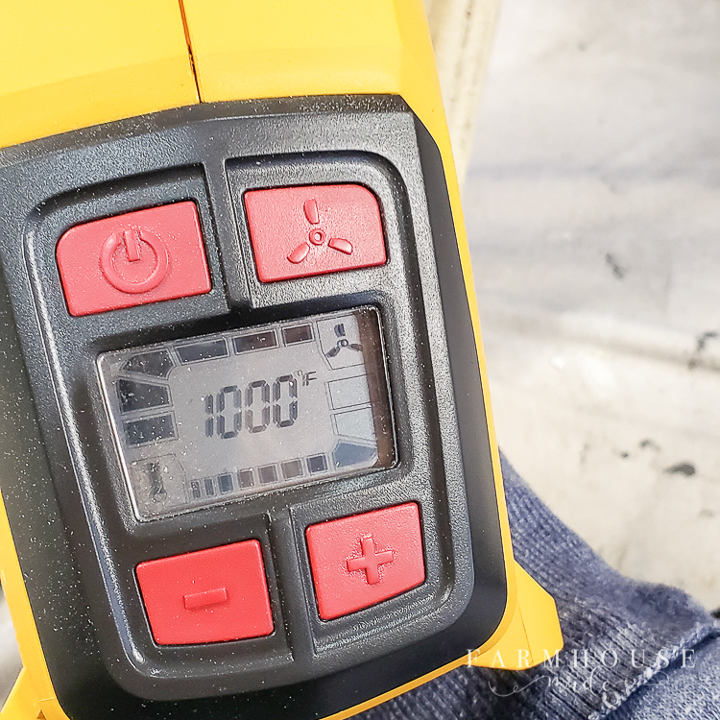
Turn Heat Gun On
Turn on your heat gun and set it to 1000. The heat gun has a stand built in, so you can set it down safely. The FURNO 700 goes from 125-1300* and stays perfectly cool and comfortable in your hands. I started at 1000 and adjusted accordingly up or down, depending on how well the paint was softening. The most effective temperature for me was 1100*.
Step #2
Begin Heating Paint
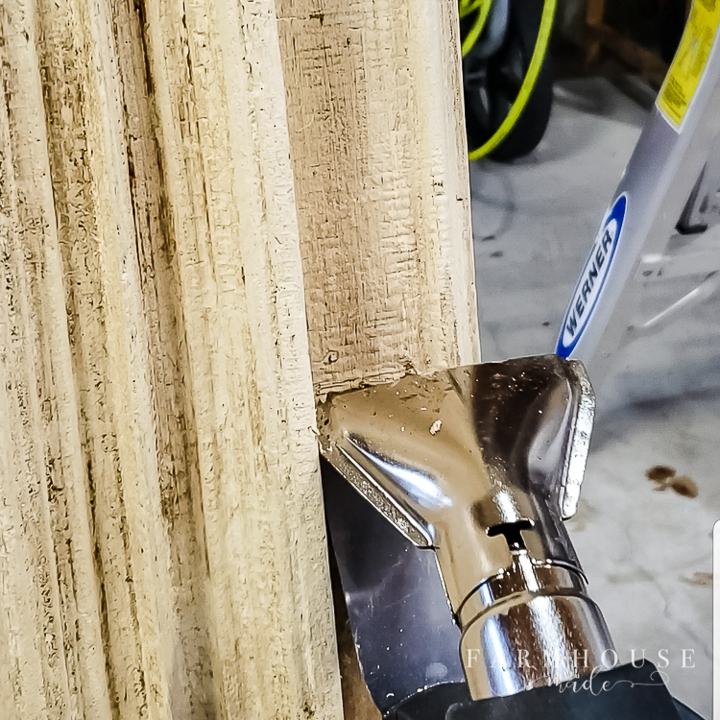
Working in small sections, heat the paint through all the layers. Keep the heat gun moving slowly a few inches away from the paint in a small section, and let the heat do all the work. When you’ve softened the paint, scrape it off and repeat. It should come off with minimal scraping, and some areas will lift easier than others. Some paint bubbles, and some does not. If your paint doesn’t bubble, it’s ok. Give it a few seconds and scrape. Once you keep working in sections, you’ll figure out the best time to heat your particular paint. You can watch a video of this process at Farmhouse Made.
Step #3
Work on the Details
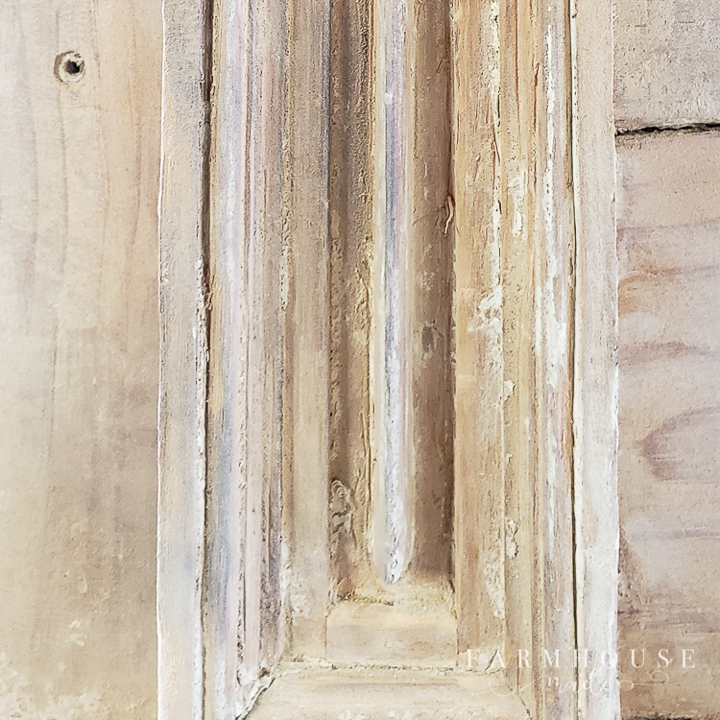
Once you’ve gotten the hang of heating and scraping, keep working over your piece. Give some attention to the details of your piece. If you want some remnants left behind, leave them. If you want it clean, keep going.
Step #4
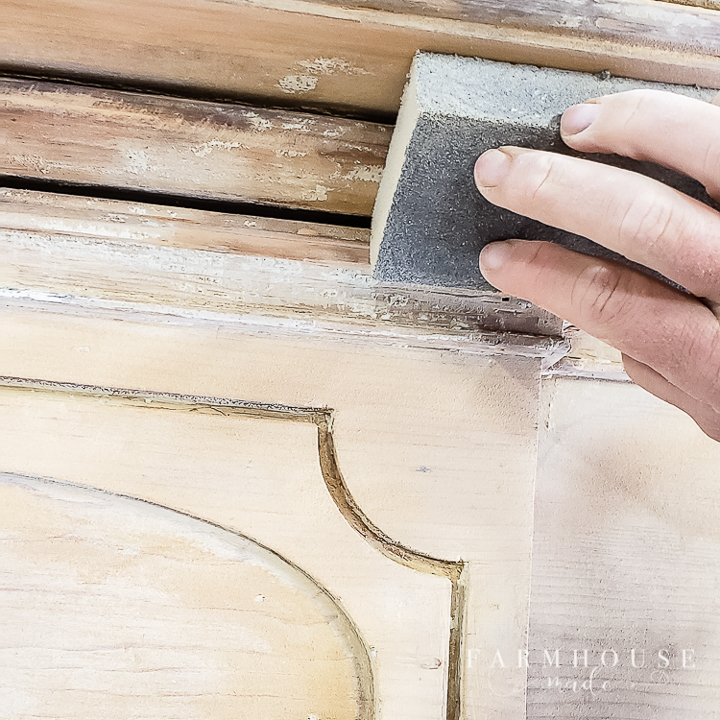
Lightly Sand
When you are finished removing the paint, you’ll want to lightly sand the piece to help remove anything crusty left behind, or smooth out some areas. Or, like me – sand off some burnt areas! I found lots of loose pieces, so I nailed them back in place. You may find that the paint is holding them together more than anything!
Step #5
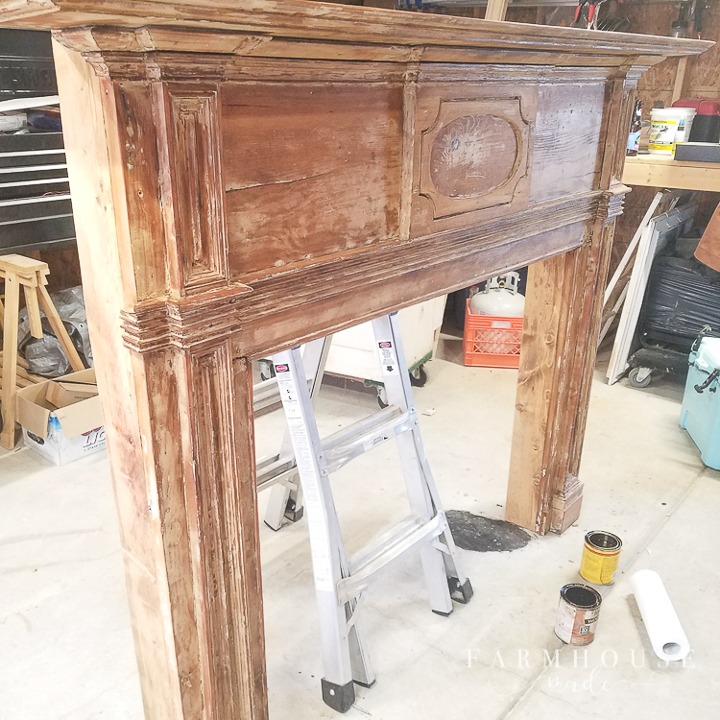
Finish Piece
Finishing the piece is entirely up to you! We chose to stain and wax this, but you can wipe it down, and decide to do what you like. This is a mix of neutral brown stains we had in the garage.
Step #6
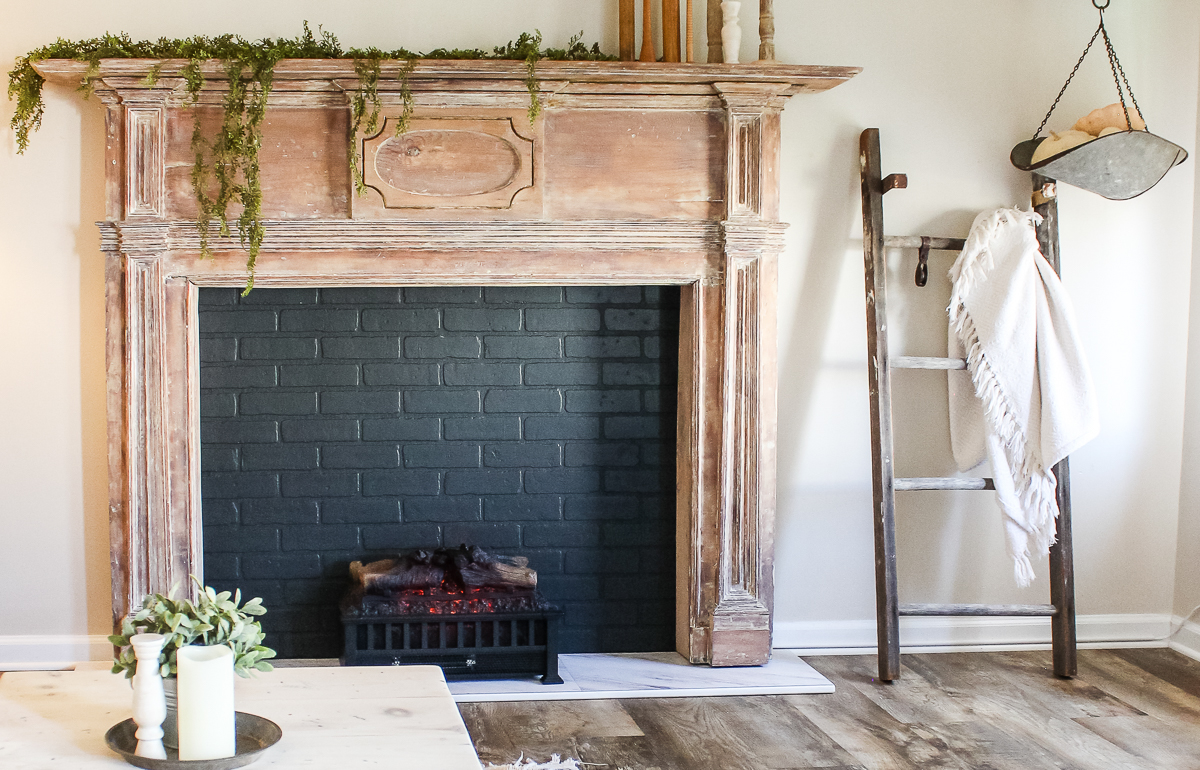
Decorate
We added a white wax to this, as well as a hearth, matte black brick backing, and a small electric fireplace!
This sponsored post was created by Farmhouse Made. To learn how we built out the mantle to accommodate the fireplace, and see how the white wax turned out, visit the full post at Farmhouse Made.
Step #7

Download Project Steps & Shopping List
We’ll never share your email with anyone else