Overview
A few years ago, we made over the small area next to our garage for our sweet pup Kevin. We added pet turf and a fence to create an area for him to “do his business”. it was a nice upgrade from the mud and weeds. while I wish I could say that we were 100% awesome at always cleaning up after him, we sadly are not. So, we made the decision to put up a gate. And also, to try to be more consistent with cleaning…
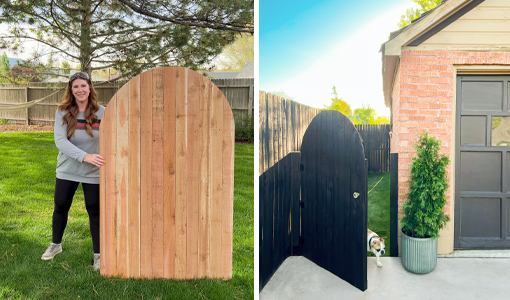
Before
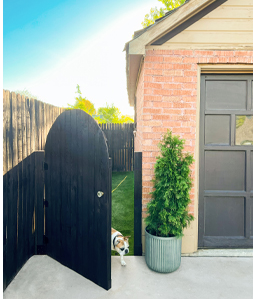
After
Instructions
Building the frame
We have several gates on our property, and they are all stained dark brown with an arched just like our front door. So naturally, that is the design I went with this time as well.
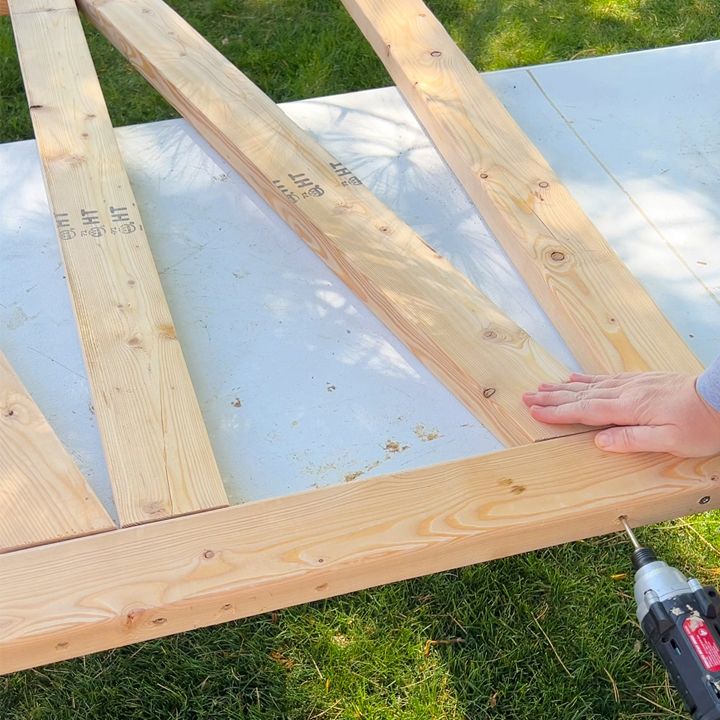
I built the frame for the gate out of 2x4s. I added braces for extra support.
Step #1
Adding the Details
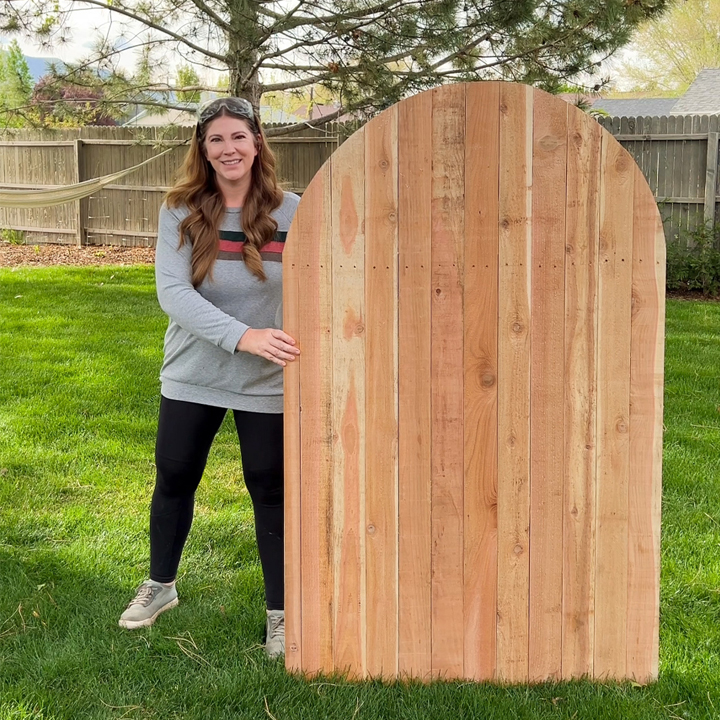
Once the frame was built, I added fence pickets. I placed them as close together as I could. Normally I would add pickets to both sides, but since you can only see the front of this gate (unless it’s open) I decided to only add them to one side. this will make the gate lighter.
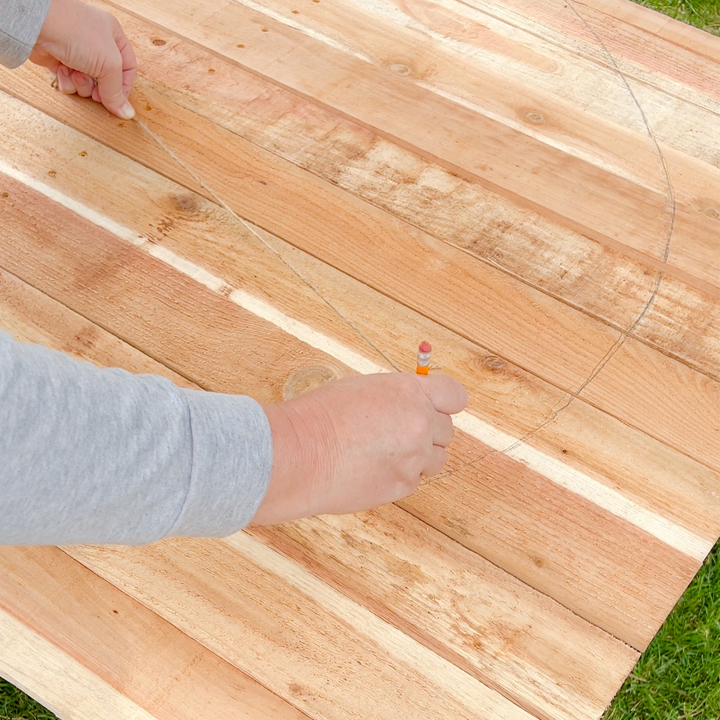
To create the arch, I used the pencil and string trick. In the past I used a tack to hold down the string, but I have done this enough times (and I was feeling lazy) so I just marked the center with pencil and held it down as I drew the arch.
I wanted the gate to be shorter than the fence, but you could easily lengthen the string and make the arch higher.
Step #2

Tips and Tricks
A trick I have learned over the years building arched gates is that it is easier when cutting to have the pickets all attached to a board. that way you don’t have each picket falling as you cut. Plus, it makes it more secure and easier to cut. Almost like it is a solid board. I just used a scrap piece of wood and nailed it on with brad nails.
I used a jigsaw to cut along the line I drew. Go slow and blow away sawdust if it gets in the way of you seeing the line.
Step #3
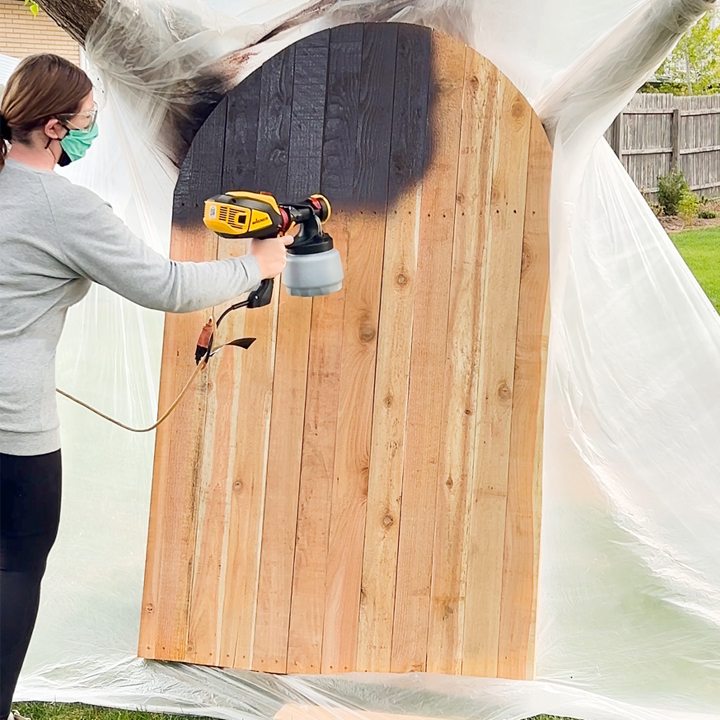
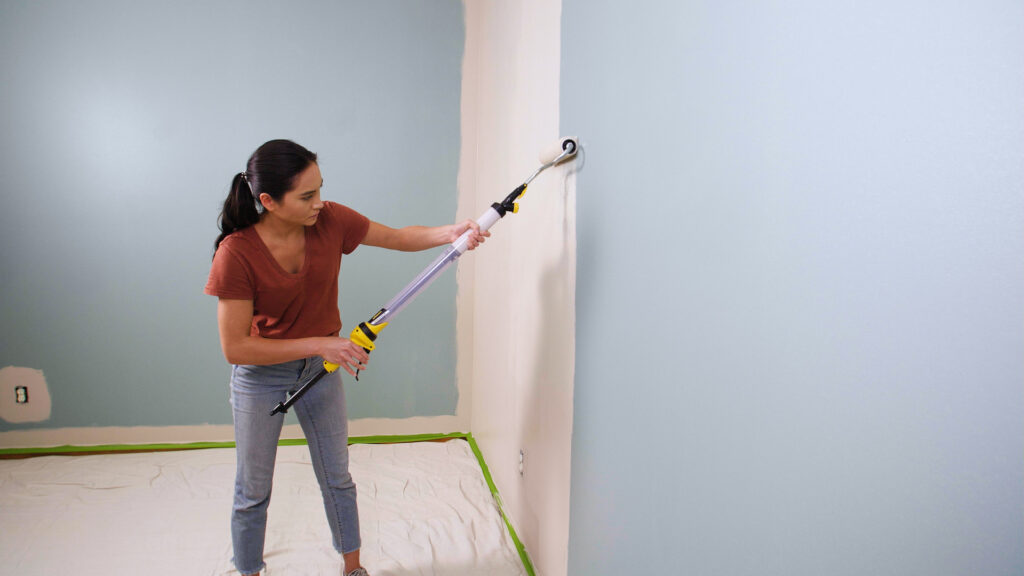
Time to Stain
Now is the fun part! The staining! I used my FLEXiO 3500 sprayer. I t did a beautiful job of creating an even finish and getting it done QUICKLY! Before spraying your actual project, I always suggest that you do a test spray on cardboard or scrap wood.
The awesome thing about this sprayer is that you have SO MUCH control over the spray. You can adjust the amount of product coming out, the spray pattern and direction. This sprayer also comes with a nozzle and canister for fine finish spraying. I used the fine finish nozzle when I painted my kitchen cabinets last fall.
Step #4
Finish and Enjoy!
Once both sides were stained, as well as the posts, I allowed them to fully dry before hanging the gate on the hinges. Since the other gates have glass doorknobs, I figured Kevin deserved a little glam too.
I am so glad the crazy spring weather held out long enough for me to cross this off my list. What fun projects do you have planned for this spring?
Step #5

Download Project Steps & Shopping List
We’ll never share your email with anyone else