Overview
Ever since I painted my mom’s front door, she has wanted me to paint her back door as well. Now that things have cooled off, it is the perfect time to tackle an outdoor project! And of course I couldn’t just paint her door. I needed to give the whole back porch a little makeover.
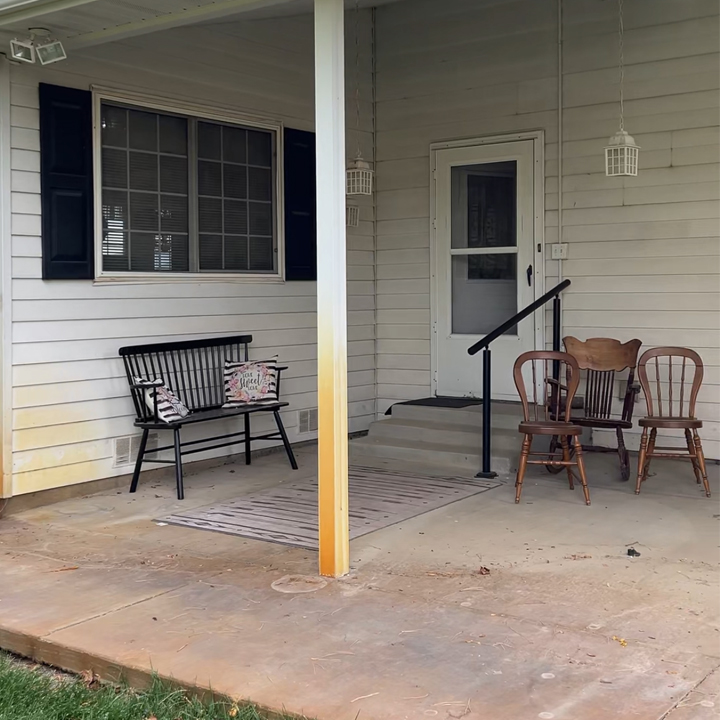
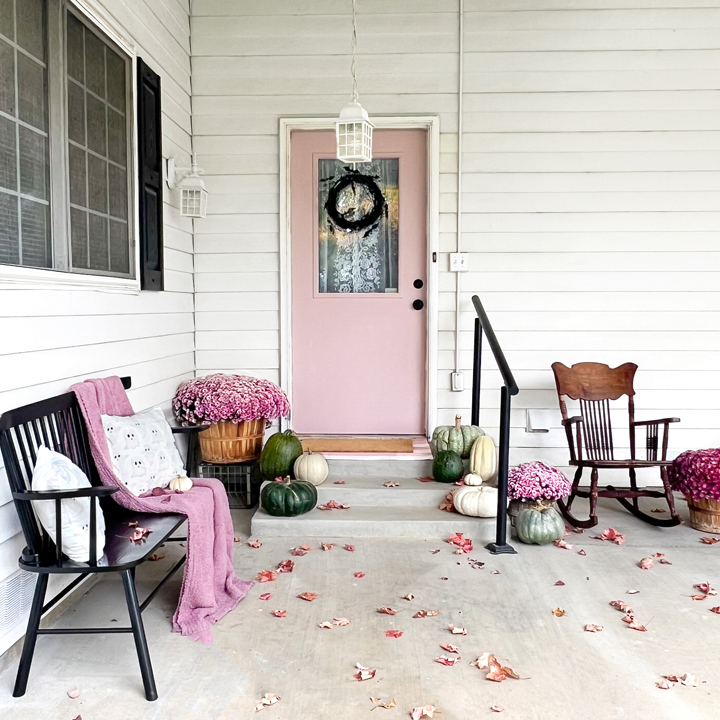
Before
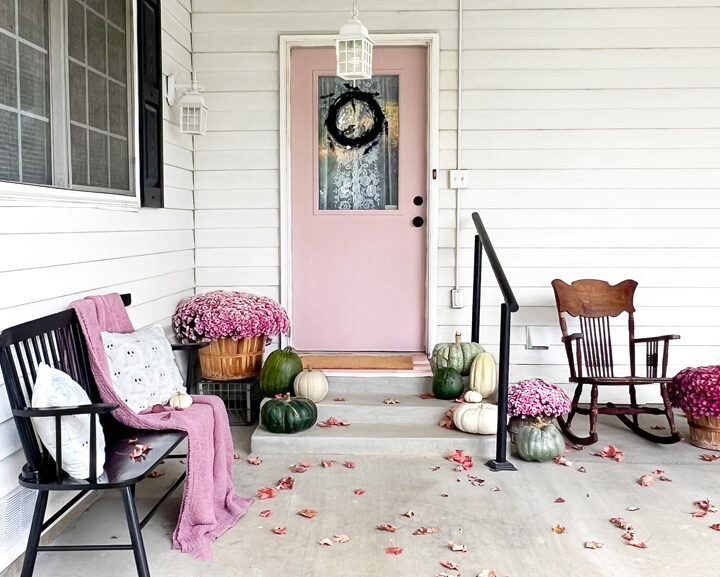
After
Instructions
I started by cleaning the orange stains on her siding and concrete. Her well water is high in iron and the sprinklers leave an orange stain over time. A little iron out cleaner and a lot of elbow grease later, it was much less orange.
Step #1
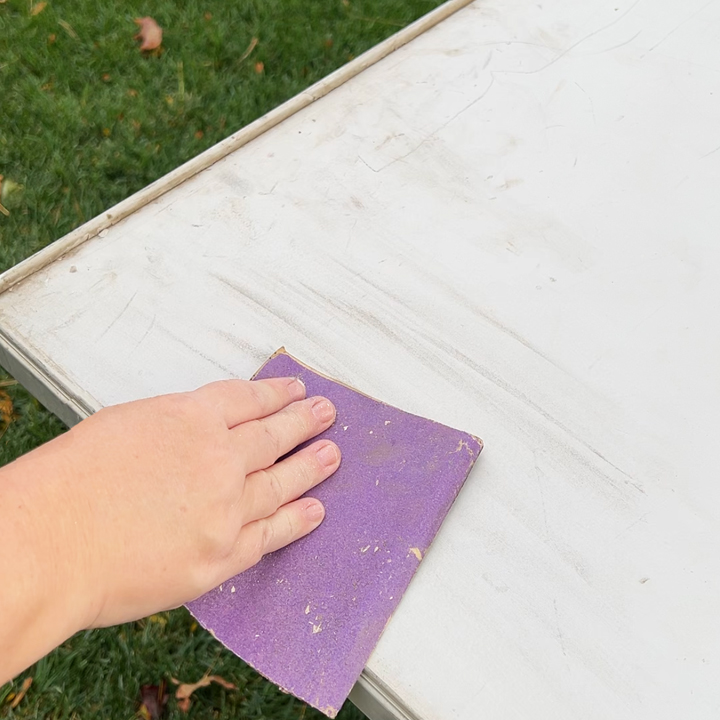
Then I took the door off and removed the knob and lock. I laid the door on some plastic totes so it was at a comfortable level. Sanding is such an important step! I used 220 grit sandpaper all over the door. When it was all sanded, I cleaned it really well with wet, soapy rags. All I had to do was tape off the glass and the prep work was done!
Step #2
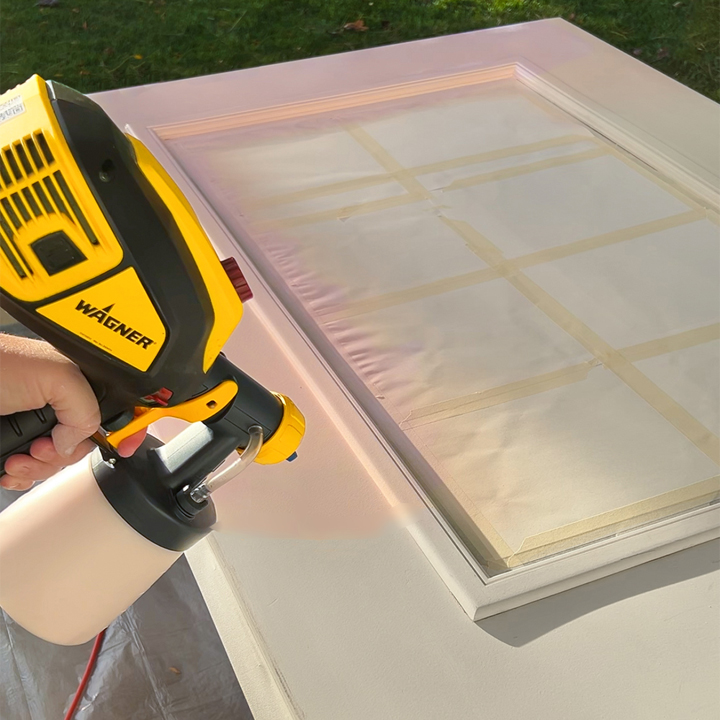
We chose the same color as her front door for the back door. I filled my FLEXiO 3500 sprayer and began to paint! I know it doesn’t look like a super dramatic change, but paint always dries much darker, and the lighting also makes it seem even lighter. But look how smooth it goes on! No brush marks, goopy drips, or texture from a roller. Just a smooth, even finish that looks professionally done.
Step #3
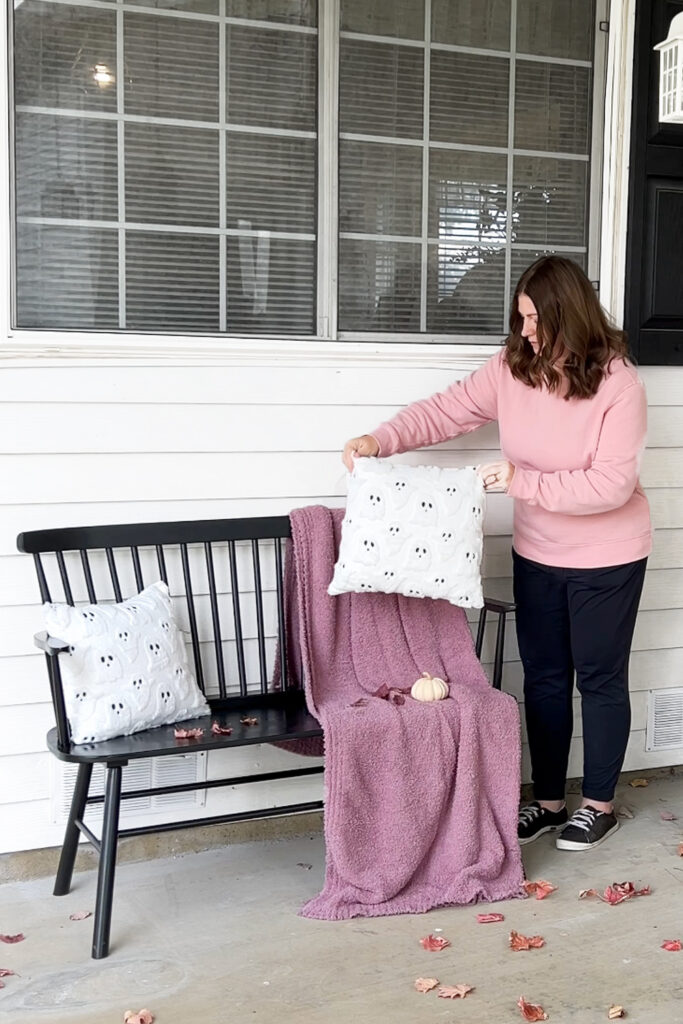
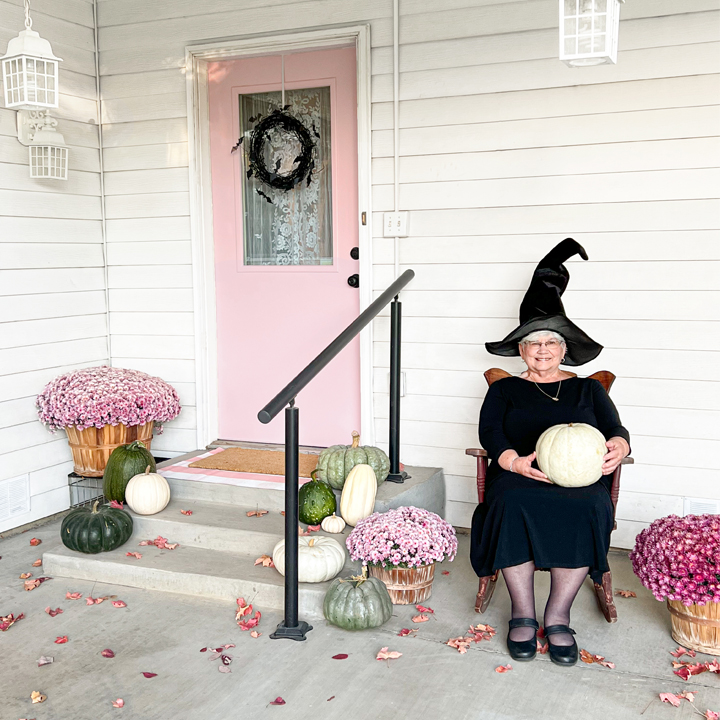
With the door all done and hung back up, it was time to decorate! Now did she ask me to decorate? No. But you can’t have a shiny new porch and not dress it up a bit! I love using nontraditional colors to decorate for holidays so since the door was pink, I ran with it. Give me all the pink!
Step #4
I am so happy with how the porch turned out. Changing your door color can actually make a huge difference! And using the right tools is key.
See the full post by Stacy Risenmay here.
Step #5

Download Project Steps & Shopping List
We’ll never share your email with anyone else