Overview
Need a cute way to display your children’s schoolwork and artwork now that school is back in session? A place that isn’t the refrigerator?
It can be tough to find a good balance of showing off your pride for the hard work your kids put into creating art for you while also keeping your fridge from looking like an overstuffed bulletin board! That’s one of the reason I love having a big, easily-changeable display in my home for family photos, artwork, schoolwork, and more!
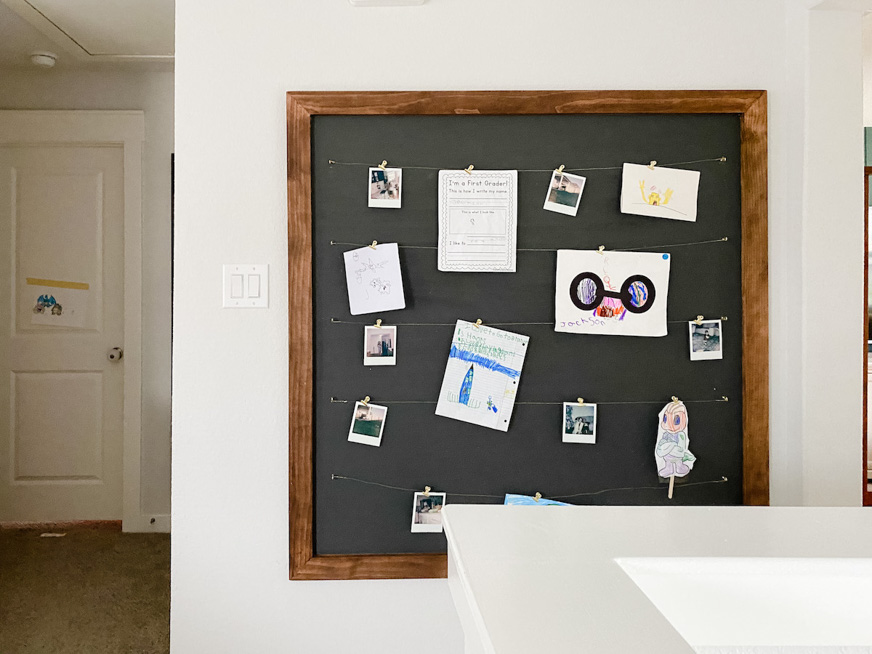
This huge display is a beautiful addition to your home, and it allows you to switch things up as often as you want (which is helpful when your kids bring you 10 new freshly completed pieces of art a day!).
Before
After
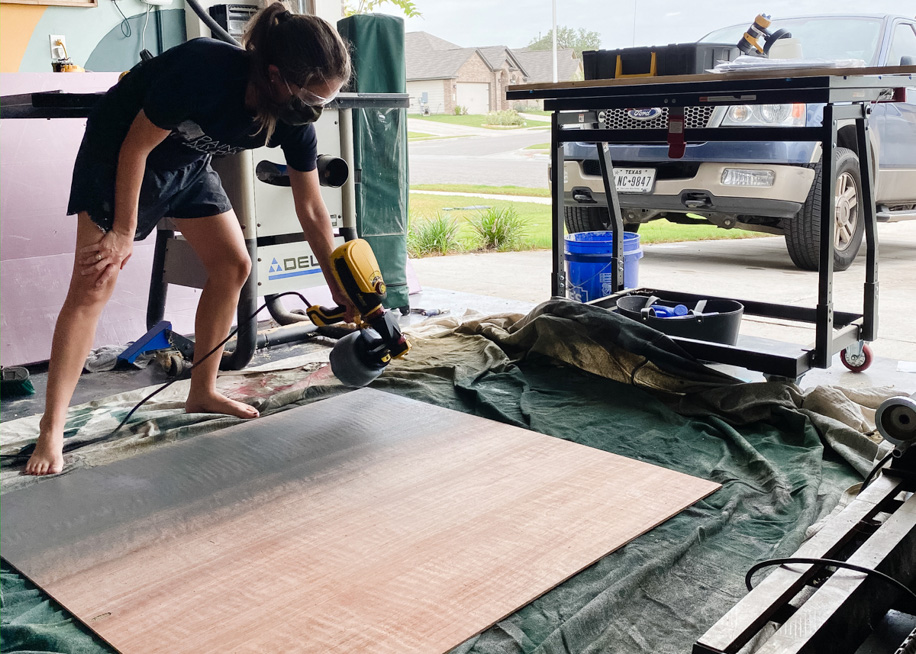
Spray the Board
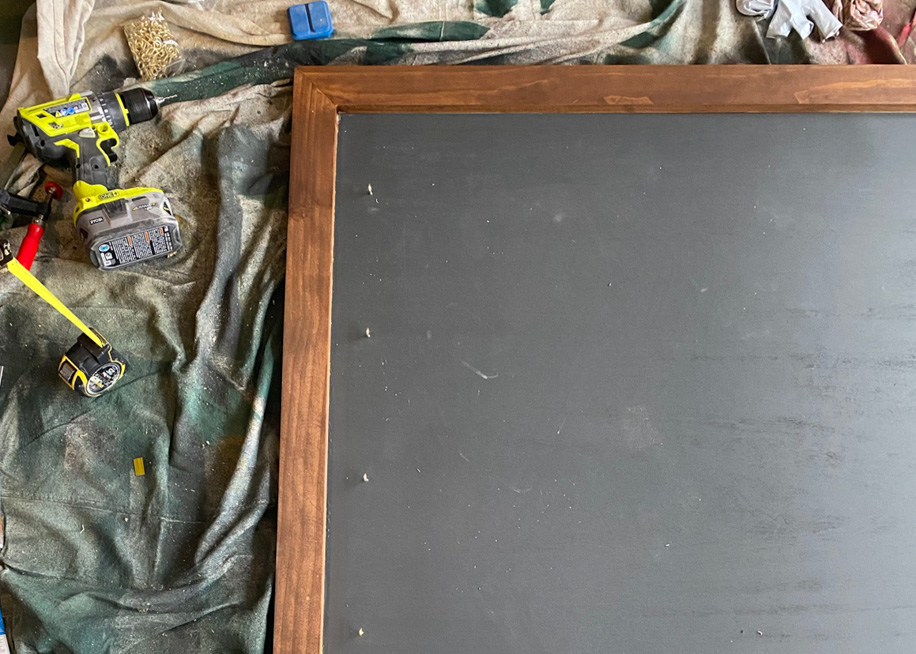
You’ll start by building a simple frame for your display – I used 1×3 wood for mine, and the whole thing is about 4’ square. It’s assembled with wood glue and nails, and you can click here to read my blog post with a full breakdown of the details for the building portion of this project.
Once you’ve got your frame ready to go, it’s time to pick up your favorite Wagner sprayer to ready the backing. For this project, I used my FLEXiO 3000 – it’s always my go-to for projects both big and small, interior and exterior. It’s so versatile, it’s easy to use and clean, and it always leaves a great finish.
I specifically prefer to us a sprayer over a foam roller for something like this because of how much faster it is – a roller would take several coats to get it smooth, it’s kind of back-breaking work to be bending over the plywood to paint it, and it never fails to be a mess. But, with my sprayer, I was able to get the entire thing painted in less than 10 minutes and since the coverage is so much more even than with a roller, one coat was plenty. If you’ve got the space in your workshop or backyard, you could even prop it up on something so you don’t have to bend over!
Step #1
Assemble the Board
Once it’s dry, attach it to the frame by simply laying it on the back of the frame and securing it with wood glue and some nails.
Add a hanging mechanism to the back (I used a french cleat), and then flip it over to add your picture wire.
To create a place to hang your art easily (and switch it out whenever you want), you’ll need some small eye hooks and picture wire. Determine your desired spacing (my rows are about 8.5” apart), and put two rows of eye hooks on either side of the display. Then, wrap your wire around the hooks and string it across to form rows of picture wire, ready to display your photos!
Step #2
Hang Schoolwork, Art or Photos
Now you’re ready to hang it up and fill it up! Use small clips to attach your children’s art, school work, or family photos. You can change it up as often as you want and get creative with it!
This sponsored post was created by Love and Renovations. Head to the blog for the full post and details.
Step #3

Download Project Steps & Shopping List
We’ll never share your email with anyone else