Overview
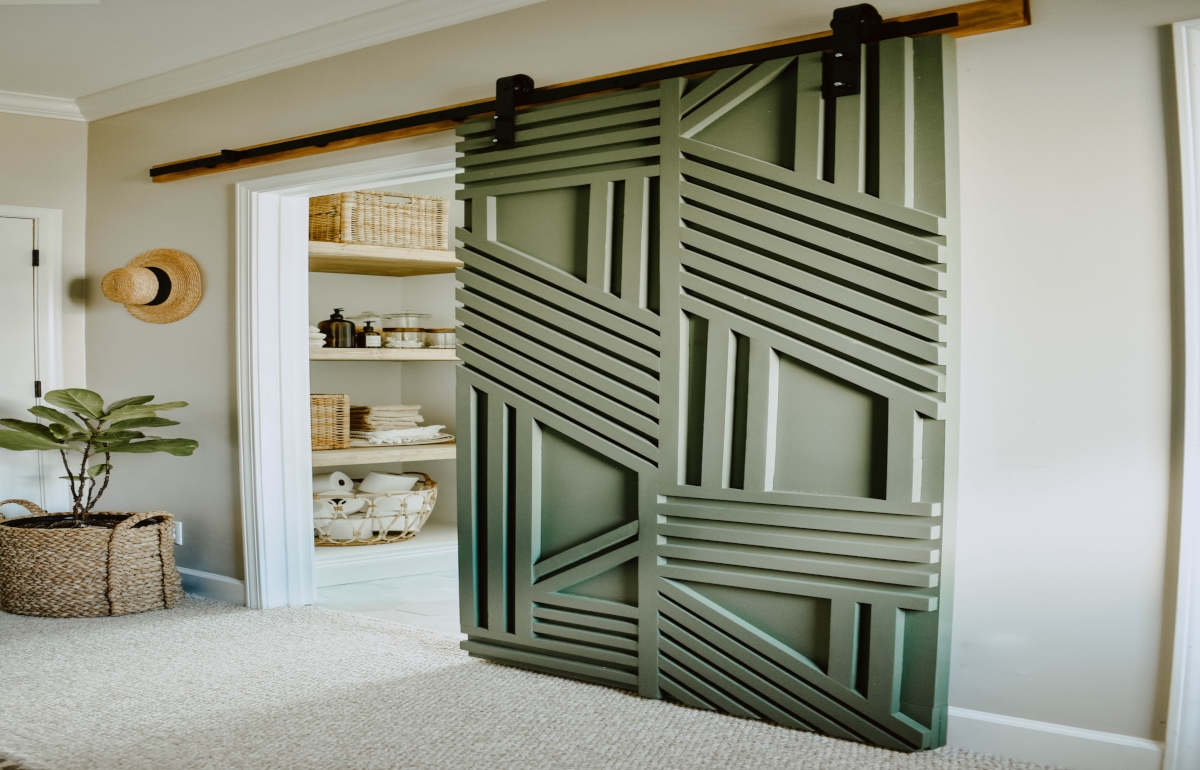
Barn doors don’t always belong in a farmhouse or a barn! Easily make an impact in your home with a new twist on a standard barn door with geometric shapes, a handful of 1×2’s and a Wagner FLEXiO 3000 paint sprayer. For the full details on this post, head to the House on Longwood Lane blog.
DEFINE YOUR DOOR BASE
This project used a primed white smooth flush hardboard door slab as the door base, in simple terms – a plain inexpensive interior door. If you decide to go this route, make sure the door doesn’t have visible wood grain or any pre-drilled door handle holes. You can also use a sheet of plywood or MDF board instead of the door slab.
Step 1
EXTEND DOOR FOR BARN DOOR LENGTH
Standard doors are sized to fit the doorway, so you have to extend a standard door to cover the doorway on all sides.
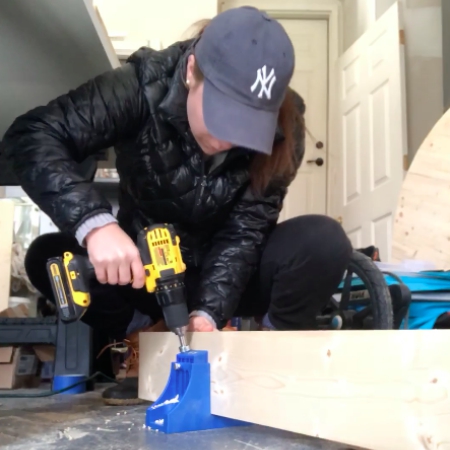
Cut your 1×6 board to door length twice, you will stack the boards on top of each other to get the correct width of the plain door slab. Make 5 pocket holes with a pocket hole maker and clamps to attach the 1×6 board at the bottom of the door. Attach the first board with pocket holes. Stack the second 1×6 under the first 1×6 with wood glue and clamps. Use a brad nailer to secure the two 1×6 together.
Step 2
DRIFT YOUR GEOMETRIC DESIGN
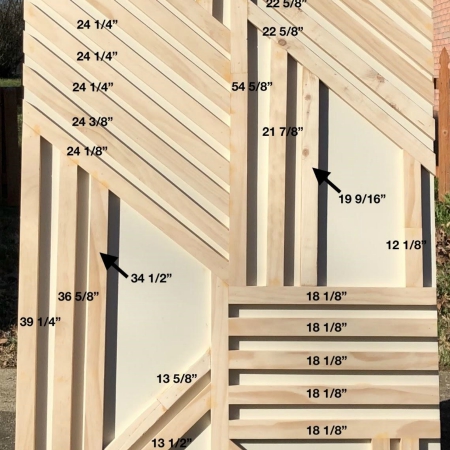
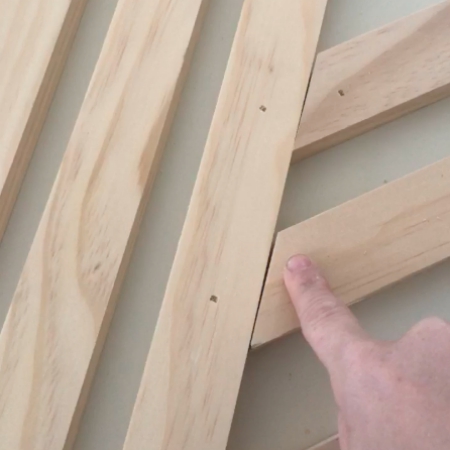
Measure and mark all your boards. The easiest way to double check your mitered cuts is to mark where your 1×2 meets with a pencil after making your first mitered cut.
All the door slats are individually measured and cut between 40-degree to 45-degree angles. It is highly recommended drifting 1×2’s before making miter cuts. Below the measurements are from longest point to longest point. For example, a 6 ¾” piece is measured from the 90-degree edge to the longest point of the 40-degree edge.
Step 3
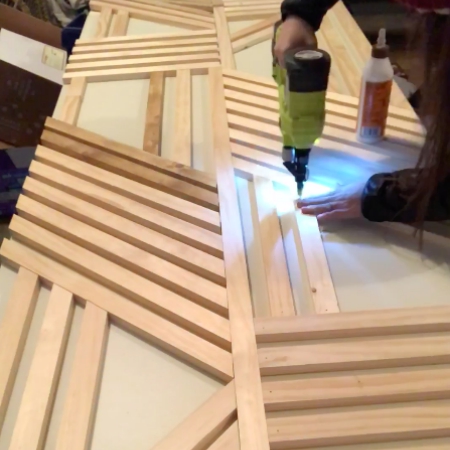
ATTACH DRIFT PIECES
Attach your drift pieces with wood glue and a brad nailer, make sure not to use a ton of wood glue. The more wood glue you use the more the pieces will shift while drying. A thin line or a squiggly line of glue will do!
Step 4
FILL GAPS AND NAIL HOLES
Some of the gaps between geometric pieces may be larger than others so you may need more applications of wood filler. Make sure to fill gaps and cover brad nail holes.
Step 5

PREP FOR PAINT
Wipe down the entire door with a damp cloth to remove any excess dust from sanding. If there is any dust on the door the paint will not adhere properly. Use the Spray Shelter to make sure there won’t be any particles getting stuck in the paint. The spray shelter also helps to prevent overspray on any surrounding objects!
Step 6

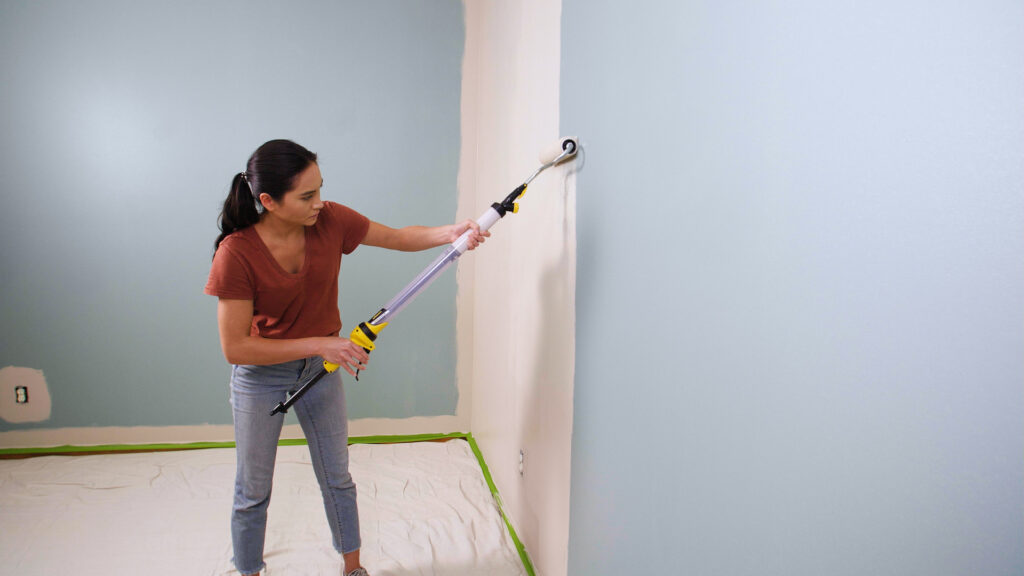
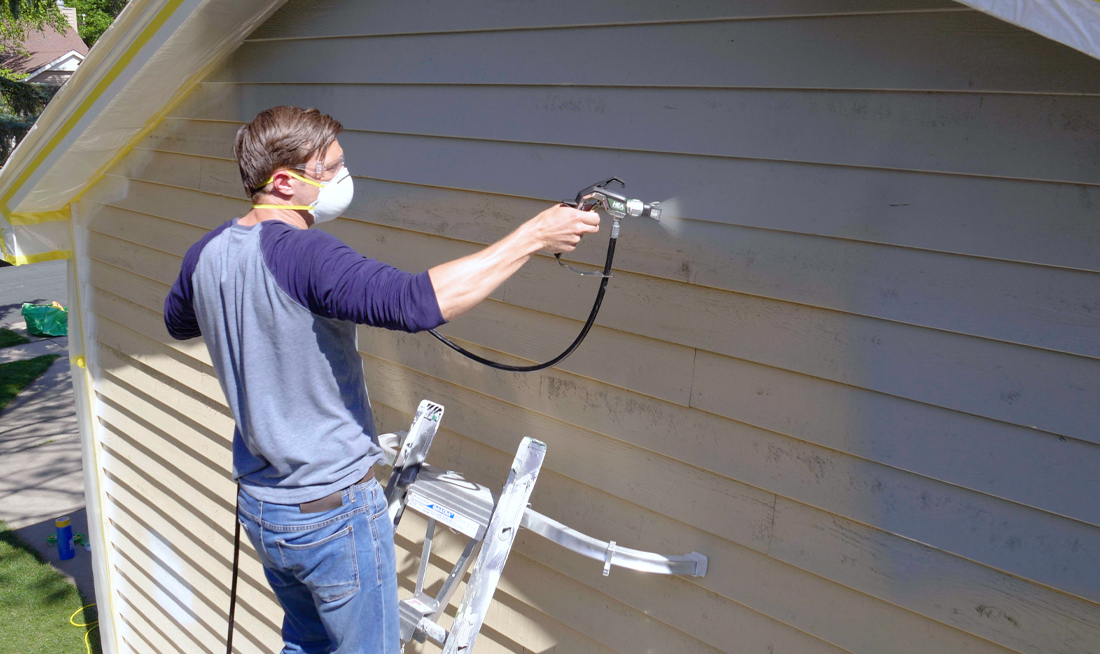
USING YOUR PAINT SPRAYER
To spray the geometric barn door, we used the Wagner Spray Tech FLEXiO 3000 hvlp paint sprayer. We used the larger nozzle called the iSpray nozzle, which is designed to spray un-thinned materials, including latex paint! The whole door was sprayed in 10 minutes with 1 QT of paint. TIP: Pour less than what you think you’ll need into the paint sprayer cup, you’ll waste less paint!
TIP: Be sure to use a damp paper towel to wipe off your nozzle and keep it clean while painting to ensure a professional finish.
This project was created by House on Longwood Lane . Head to her blog for more creative project ideas!
Step 7

Download Project Steps & Shopping List
We’ll never share your email with anyone else