Overview
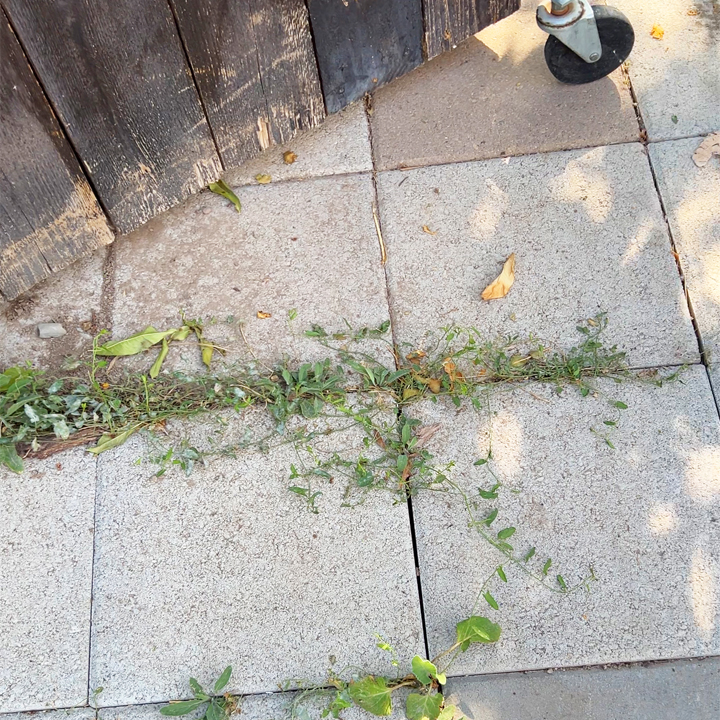
Years ago we added this gate to our backyard. The row of raised beds act as a fence that separates the “pretty” part of our yard from the more practical area. The gate leads to the very back where we store firewood, our trailers, and the compost bins. Because the gates are so wide and heavy, we added wheels to the gates. The wheels need a hard surface to roll on so we added concrete pavers we already had on hand. Initially we were in a hurry to finish the project so we just laid them directly on the dirt. The pavers were not level and were a bit wonky. We always intended to come back and lay them properly but since it was technically functional, it was always a low priority.
Before
After

Instructions
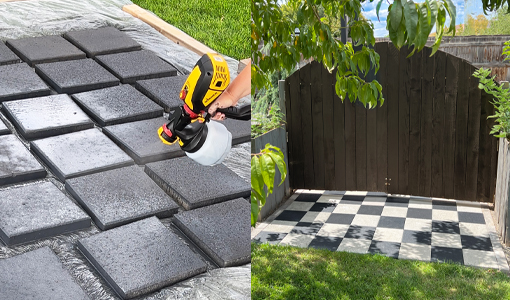
The pavers were all different textures and were varying shades of grays since we had accumulated them over time and from different stores. I am a big believer in using what you’ve got, so I didn’t want to buy all new matching pavers. I needed a way to make them look better so I decided to stain the odd ball ones and create a checkerboard pattern!
Step #1
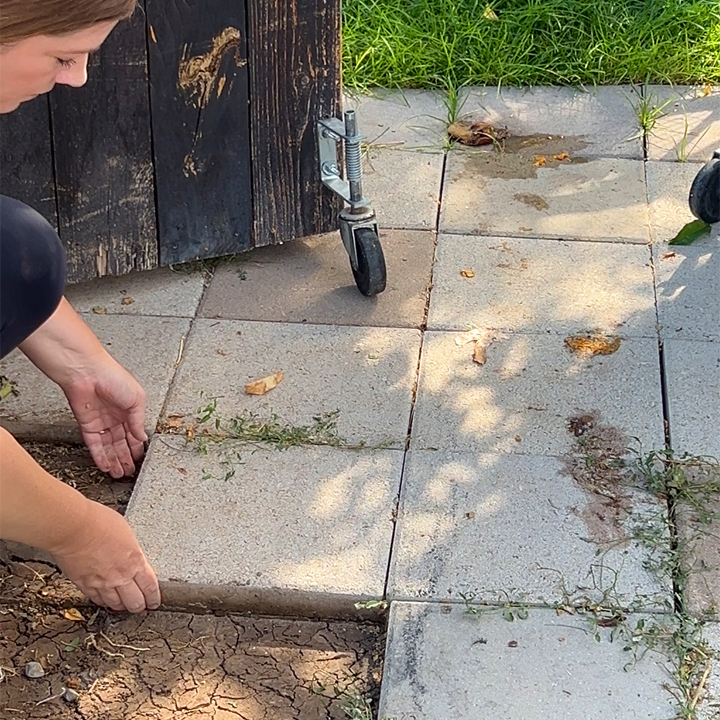
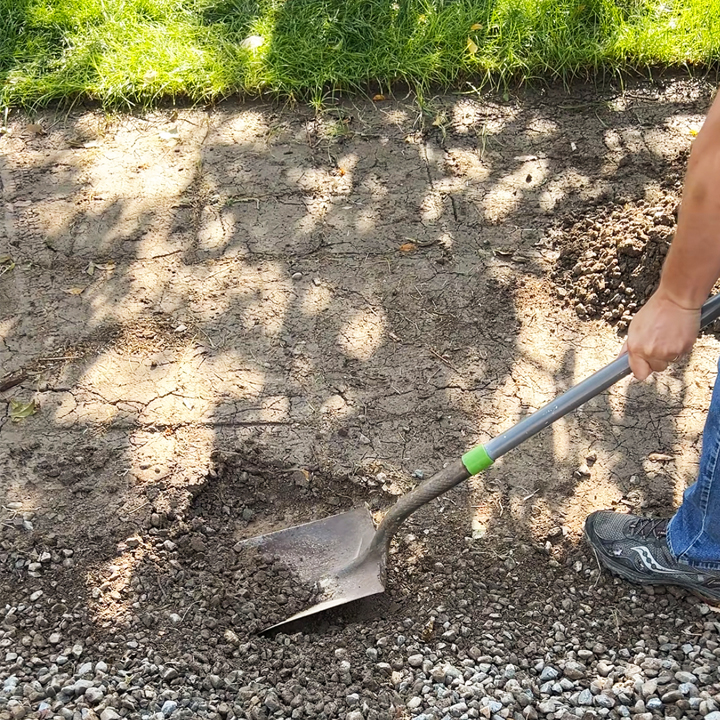
I started by removing the pavers. Once they were all moved out of the way, my husband dug down a few inches and removed the soil. I cleaned each individual tile really well with a scrub brush. I wanted them as clean as possible for the next step.
Step #2
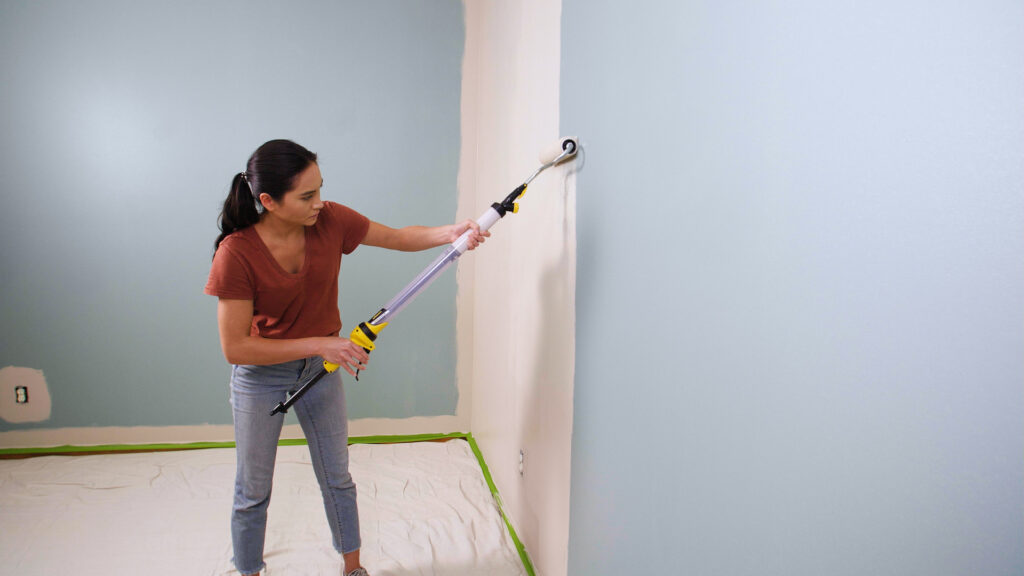
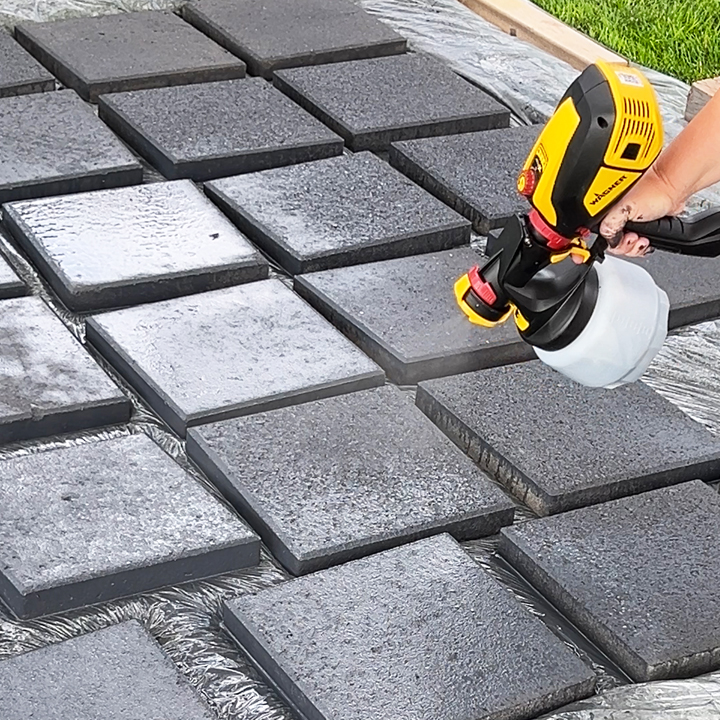
Since it gets walked on and the wheels would be rolling across it, I didn’t want to use paint. I have never used concrete stain before, but decided to give it a try. I applied it using my favorite sprayer, the FLEXiO 3500. It can spray anything from paint to stain to sealers. The concrete stain was thin like water and the concrete absorbed it like a sponge! I’m hoping this helps it retain the color for a long time unlike paint which sits more on the surface.
Step #3
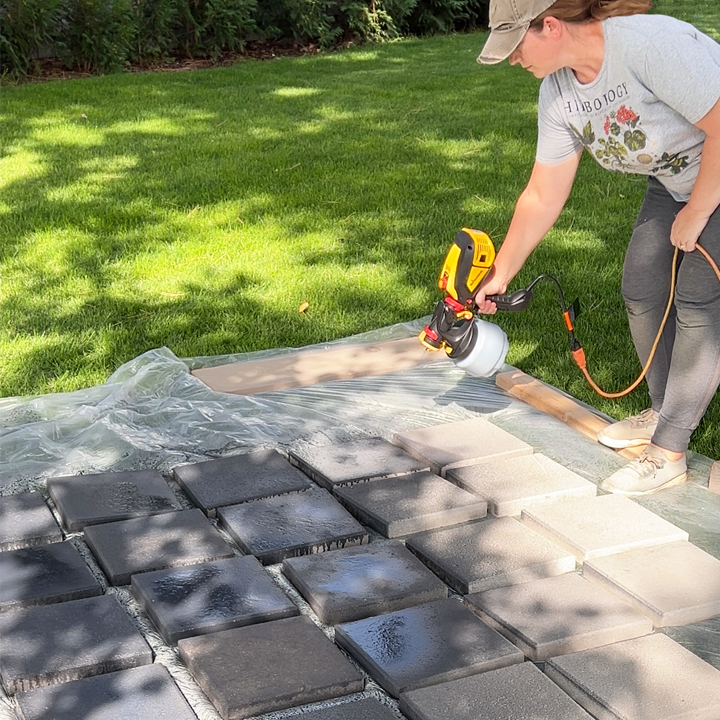
Because it soaked into the concrete, I ended up doing 4 coats of stain to achieve the coverage I wanted. I needed to disguise the fact that they were all different shades of gray.
Step #4
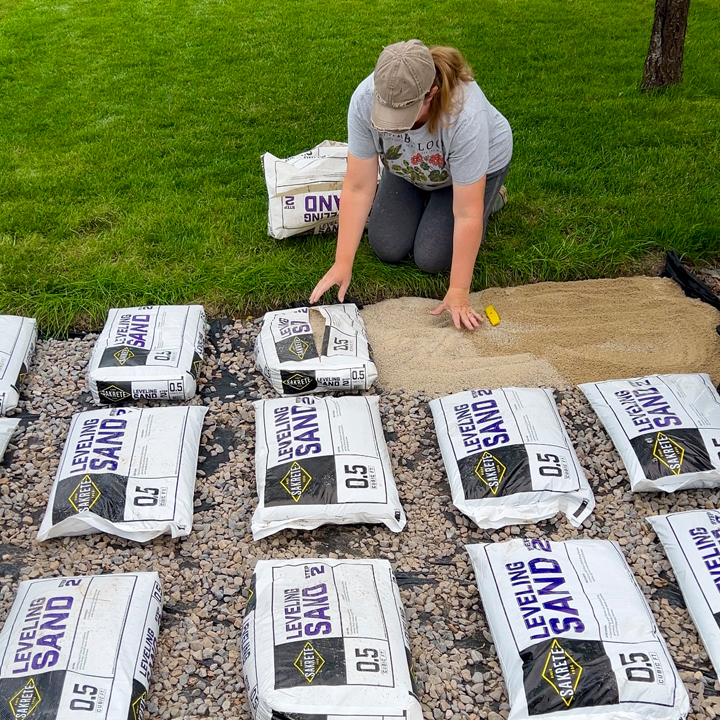
While the stain was drying, I added leveling sand to the area. Since this is not a high-traffic area and since we were trying to stick to a budget, we skipped the paver base material and went straight to the leveling sand. I did add some landscape cloth to help prevent weeds. And we did add some gravel on that but it was just because we had monsoon storms while we were trying to work on this project and the gravel kept the cloth in place.
Step #5
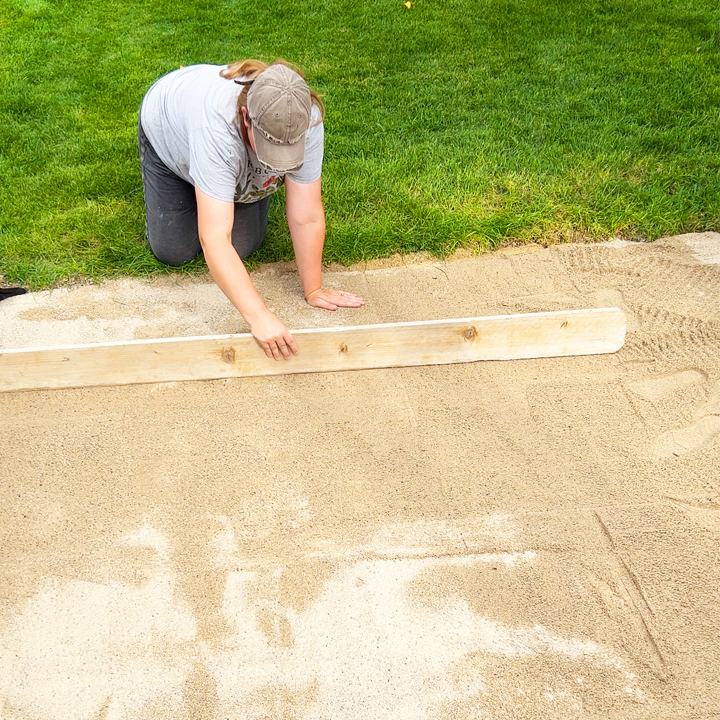
A board is an easy way to get the sand smooth and level. I started out using a fence picket but switched to a 2×4 because it was easier. I kept checking with a level until I got it as flat as I could.
Step #6
Laying the paver was actually quite fun aside from the sore knees. It helped having a partner who could hand me pavers as I went. Not having to get up and down all the time made it go so much faster.
Step #7
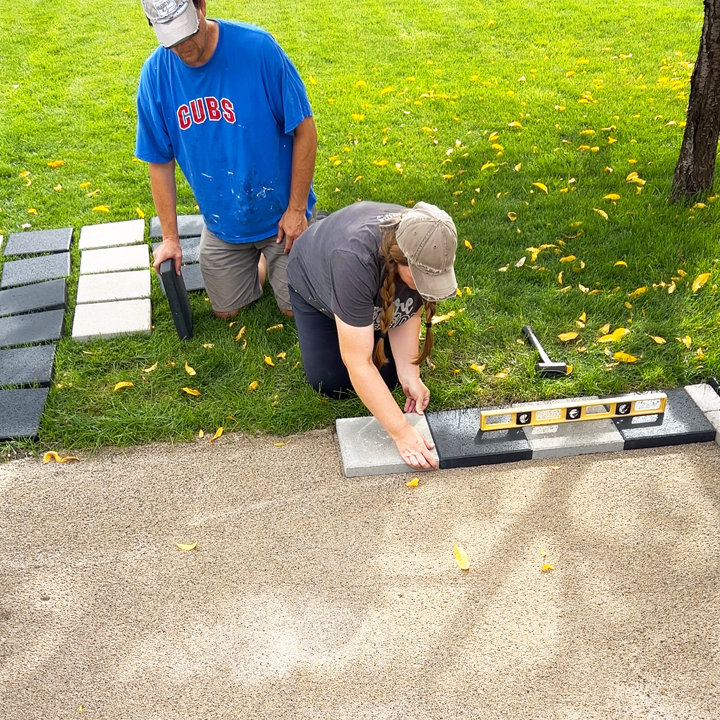
Leveling sand is so awesome because you can hit the pavers with a rubber mallet to adjust the height and remove high spots. I kept the level right by myself and checked often.
Step #8
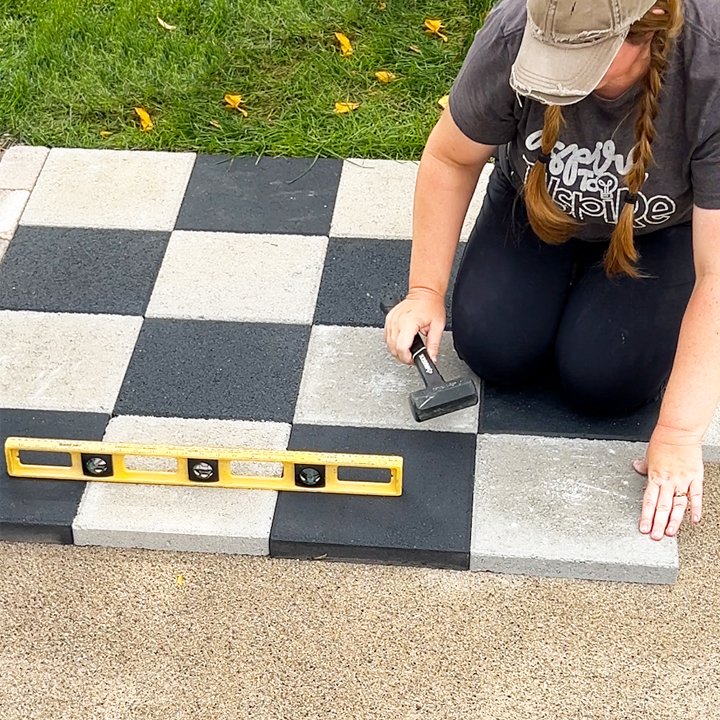
My yard slopes quite a bit so I had to keep that in mind, but I have to say that we got it pretty level all things considered. And let’s be honest, anything is an improvement on what we had before!
Step #9
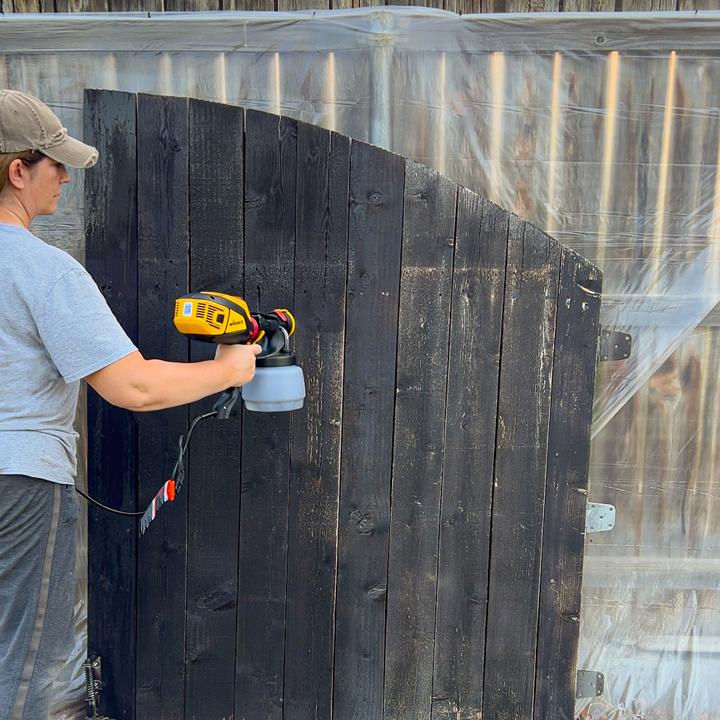
Once the paver pad was done, I realized how shabby one side of our gate was. Since that side faces the harshest sunlight it got more worn down over the years.. You can’t have shiny new pavers and a faded gate! So I pulled out my trusty FLEXiO 3500 again and freshened it up with a thin coat of stain.
Step #10
I am so happy with how it turned out. It might seem like such a minor little thing in my big yard and most people probably won’t even notice it. But I believe the best spaces are made up of lots of small pretty details. Do you have a little project that is low on your to-do list? This is your sign to bump it up to the top!
See the full post by Stacy Risenmay here.
Step #11

Download Project Steps & Shopping List
We’ll never share your email with anyone else