Overview
Refinishing an outdoor wooden swing is super simple with the Wagner FLEXiO 4000. Last month, we shared with our Outdoor Planter Bench project that added not only more seating for our backyard but also a fun pop of color. Today’s project is one that has been on our ‘to-do’ list for quite some time.
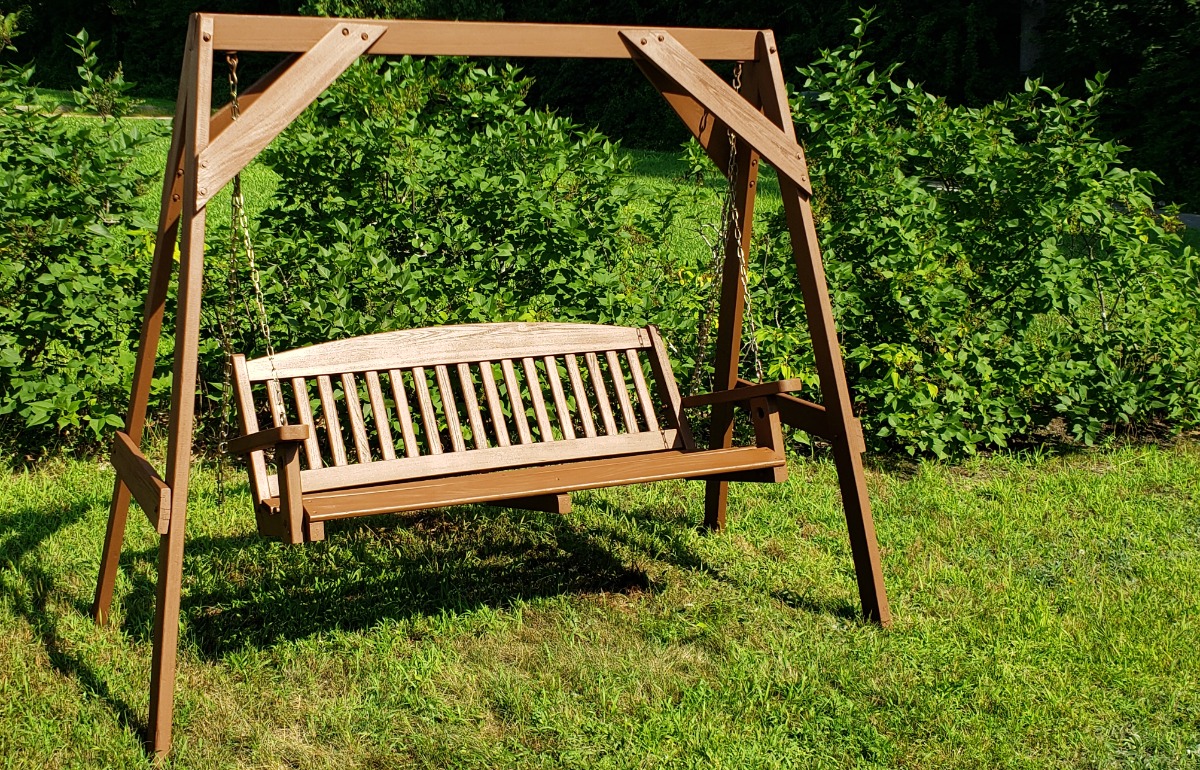
Before

After

Instructions
Prepare
One of our first purchases as new homeowners was this A-frame outdoor wooden swing. That was over a decade ago and it was badly in need of refinishing! I am going to tell you how we gave new life to this swing.
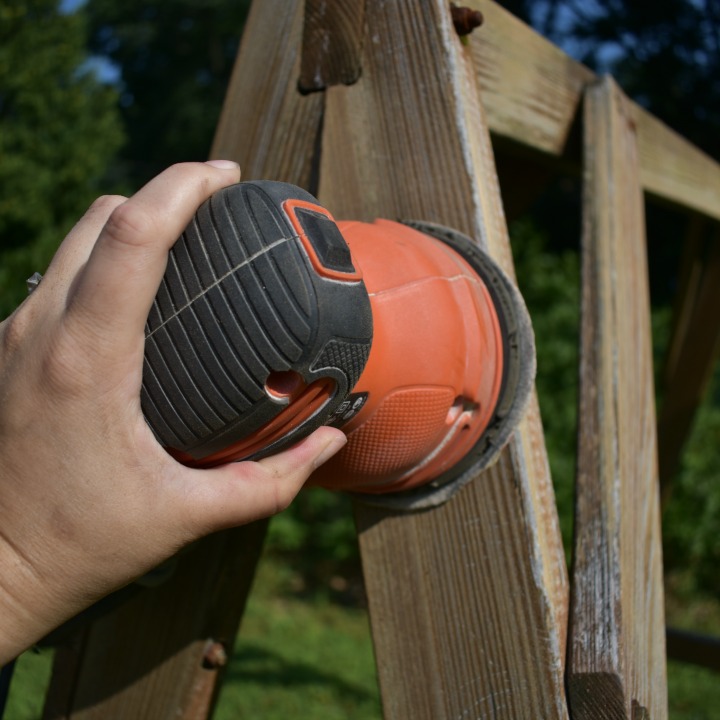
It is super important to prepare the swing before painting, and that includes sanding it. It’s a little time consuming but important so that the paint adheres well.
Step #1

How to Refinish a Wooden Swing
- Tighten/replace any loose/broken screws or bolts
- Use the orbital sander to remove the old stain and create an even surface
- Brush off any dust or debris before you begin to paint
- Set up the Studio Spray Tent
- Stain/paint the swing
Step #2
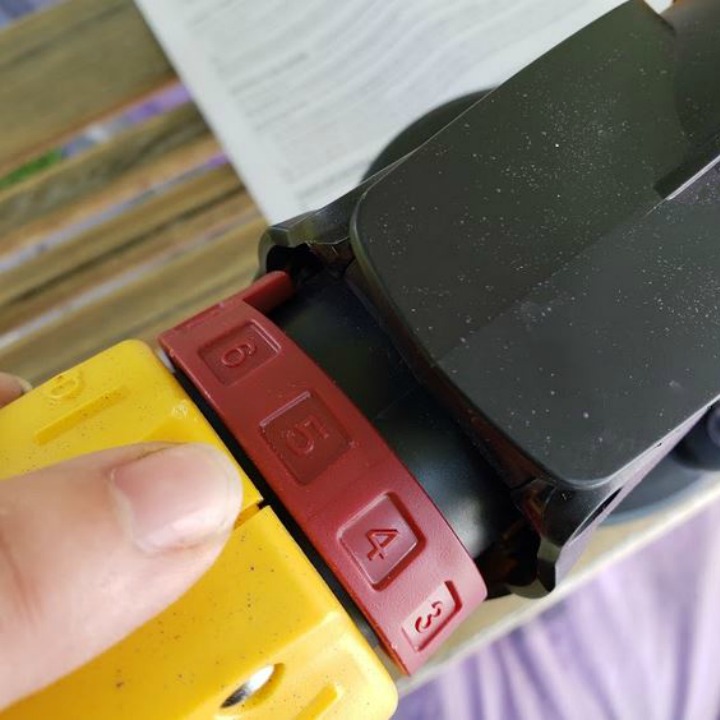
Setting Up the Wagner SprayTech FLEXiO 4000
Take the time to set up the FLEXiO 4000 paint sprayer correctly. For best results, I suggest thoroughly reading through the instructions on how to assemble and use it. Be sure to do a test spray and practice with the included spray poster.
Set the pressure control on the X-Boost power dial to medium-low. This controls how much air power is created by the base.
Set the material flow, which controls the amount that will be sprayed. Because stain is much thinner than latex paint, you want it to be about 4-6.
Step #3
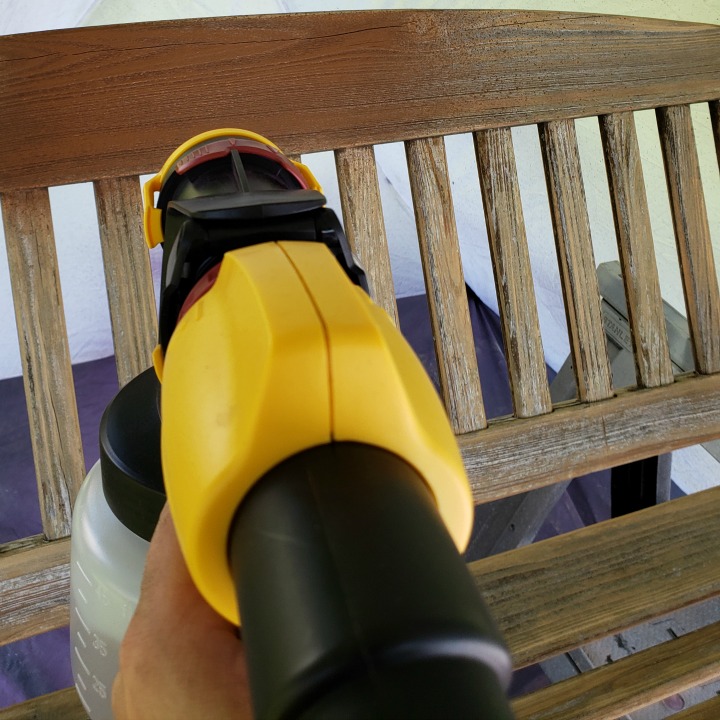
How to Spray
Change the air cap to match the direction you’re going to paint, either horizontal or vertical. I love that you can easily switch back and forth!
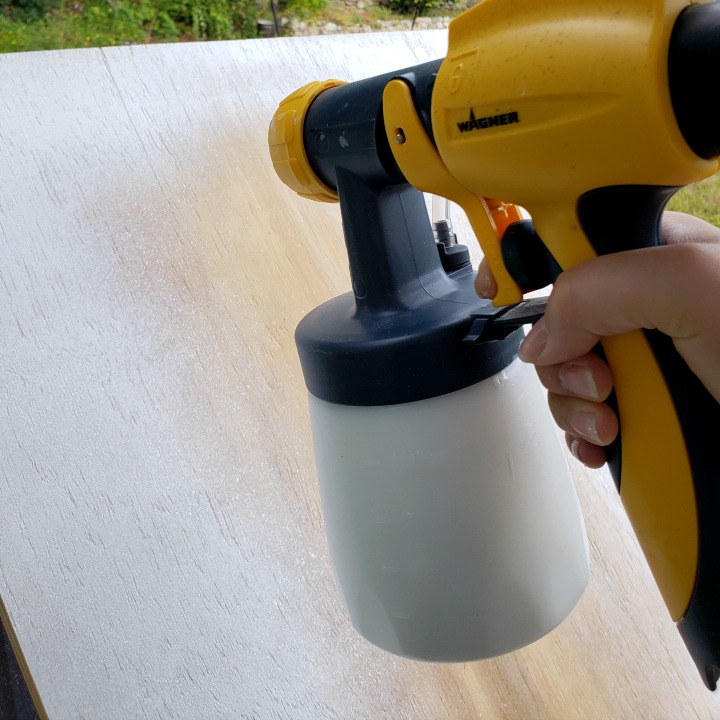
Add paint to the cup and tighten the nozzle assembly.
That’s it! Pretty simple, right?
Tip: Keep paper towels handy to wipe the nozzle of the sprayer, which can clog if you stop frequently for breaks or if the weather if very hot.
Step #4
Painting with Wagner FLEXiO
Hold the sprayer about 6-8 inches from the surface and move the sprayer in smooth even passes across your surface. Allow the paint to dry before adding another coat or touching up any spots.
This guest post was created by the Juggling Act Mama blog. Visit jugglingactmama.com for the full refinishing tutorial!
Step #5

Download Project Steps & Shopping List
We’ll never share your email with anyone else

