Overview
Ready for another fun transformation? We’re back at Mom’s house working on her mini living room makeover and today we’re tackling the fireplace! Her house is actually 100 years old and has beautiful tall ceilings and original molding. We’ve already painted the room using my fun new PaintStick EZ Roller and beefed up the existing crown molding to match the existing baseboards.
Unfortunately the original fireplaces were brick and are no longer in good condition. Some years ago they were all bricked up and drywalled over… so instead of stick with the drywall Mom found an antique fireplace mantle to repurpose. This should add that mantle feeling back to the room even though there isn’t a working fireplace in the space.
Plus the mantle she found is beautiful so I’m pretty excited to show you how it turned out!
Instructions
Step 1: Paint the Fireplace Mantle
The actual mantle has beautiful lines… and I almost didn’t mind the finish. Unfortunately it was originally attached to the wall with large bolts through the front of the fireplace. And while we all love the look of a good patina large holes for bolts is not the look we’re going for.
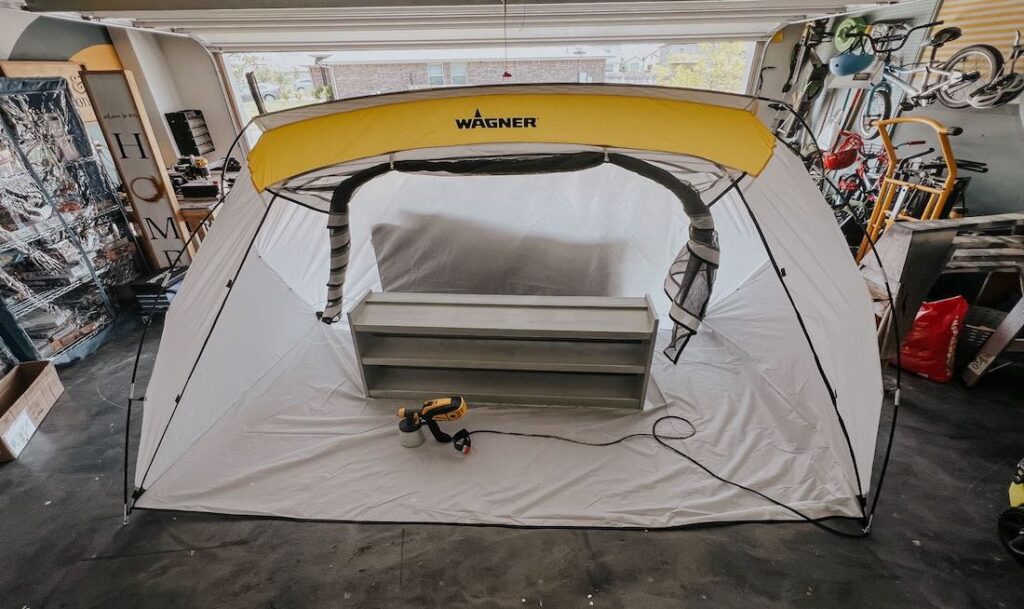
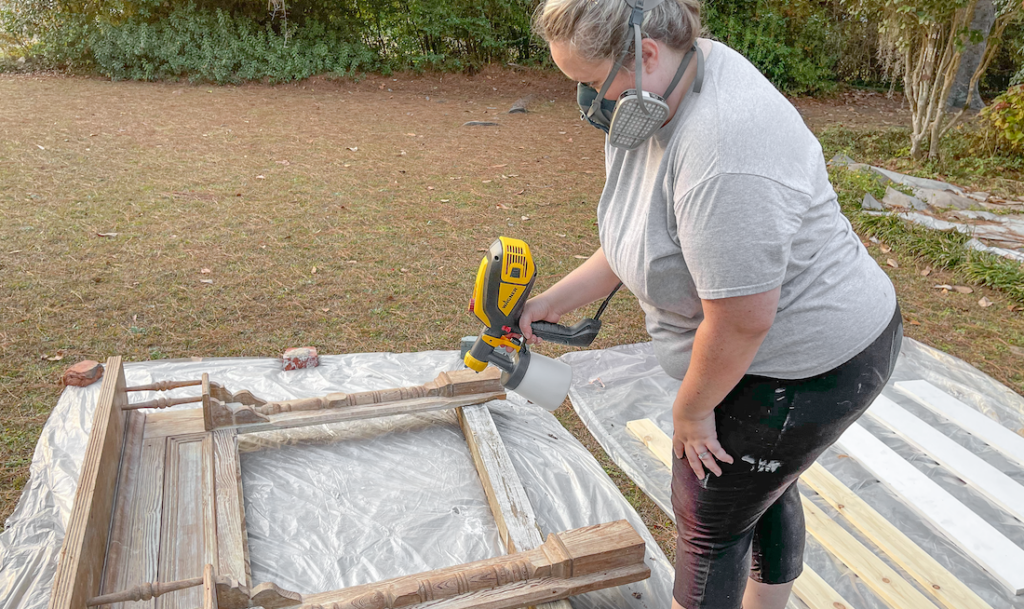
Since this piece is going to be the focal point of the room I wanted a butter soft finish with no brush strokes. So I busted out the fine finish nozzle for my Wagner FLEXiO sprayer and went to town.
A bit of putty in those large bolt holes and 2 coats of paint with my sprayer and this mantle was a new lady. The finish is sooooo smooth and let’s be honest… with an antique piece like this hand painting all those details (have you ever painted spindles with a brush?) is really not fun. My sprayer handles all those curves like a champ and puts an even coat on everything at the same time. An hour outside and I had 2 nice coats of paint on all of the surfaces (3 on the top!).
While I was outside I also put a nice coat of paint on the boards I’ll be using to build the box for my mantle. Might as well spray everything at the same time!
Then I left it to dry overnight before moving on to the next step.
1

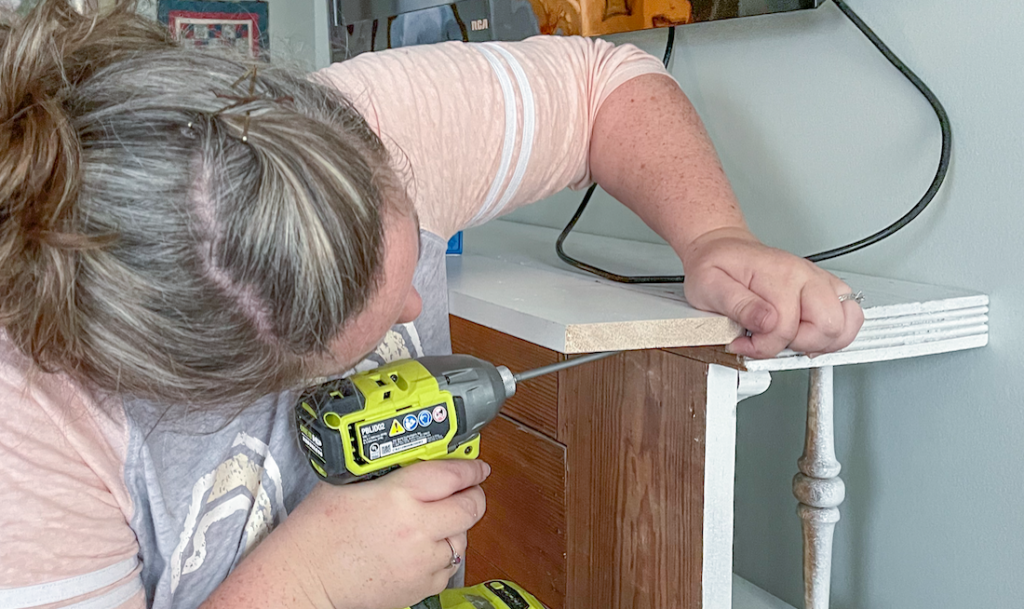
Step 2: Drill Pocket Holes
After everything is dry let’s go ahead and drill a few pocket holes in our 3 boards. These are 3/4 inch thick, 6 inch wide boards that were cut to the same dimensions as our mantle. For the box we’ll need two boards that are the same height as the top of our mantle and one that is the same length as the top of the mantle… we’ll attach these to the back of the mantle to extend it and form the box.
Go ahead and drill pocket holes all the way across the side of all 3 boards… spacing them about a foot apart. Then set one board aside and drill 2 pocket holes on the end of one board… and the opposite end of the other board.
If that sounds confusing just take a look at the photo: you’ll see holes allllll the way down the board and then 2 holes at the top. Drill one just like that and one with the 2 holes on the other end.
Perfect!
Not sure how to drill pocket holes? That’s ok, I’ll walk you step by step through the entire process. Check out my how to drill pocket hole tutorial here.
2
Step 3: Build Box to Extend the Mantle
Now that our pocket holes are ready to roll let’s build this box!
Grab your power drill and the pocket hole bit and let’s put the mantle and the new boards together. I started by holding the top board flush to the top of the mantle and then driving screws through each pocket hole and into the back of the mantle.
Once you have the top board secured go ahead and attach both side boards to the mantle with pocket hole screws and then use those top screw holes to attach the side boards to the top boards. Volia! Instant fireplace mantle box!
3
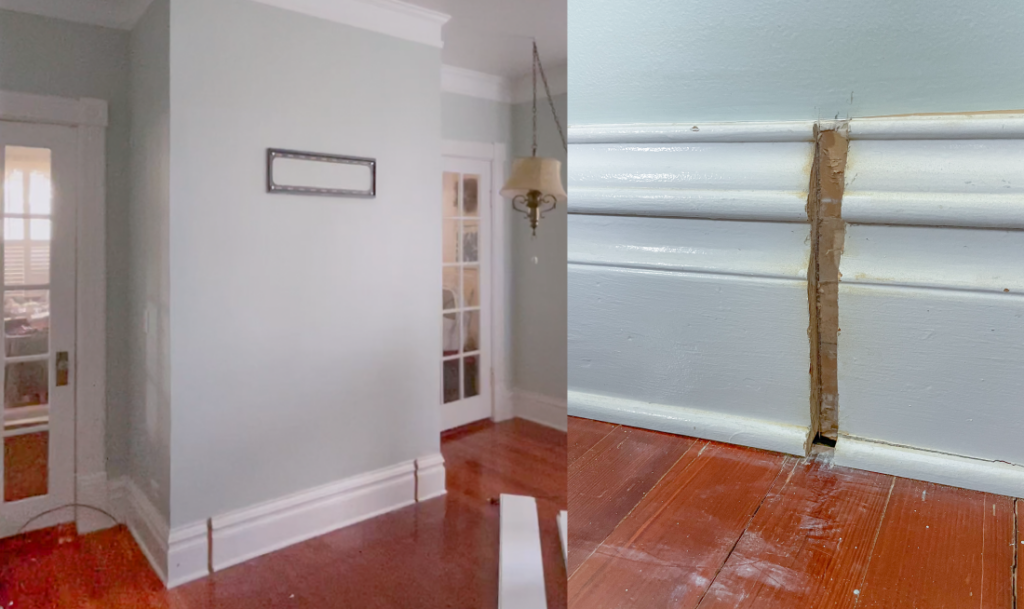
Step 4: Cut Slits Into Baseboards
Ready for the fun part? If you don’t have baseboards you can skip this step and install your fireplace mantle directly to the wall as is. BUT if you have baseboards like Mom you’ll need to cut a section of the molding out for the boards we just attached to the mantle. Once the slits are cut the boards will be able to slide right into the molding and sit flush to the wall.
To start with simply put your mantle in place and make sure it’s centered on the wall. Then use a pen to trace the back of the box on either side. This will give you two lines on your molding that you can cut with your multi-tool. Just go slow and stead and soon you’ll have a section of molding that you can remove to make space for your new fireplace mantle.
4
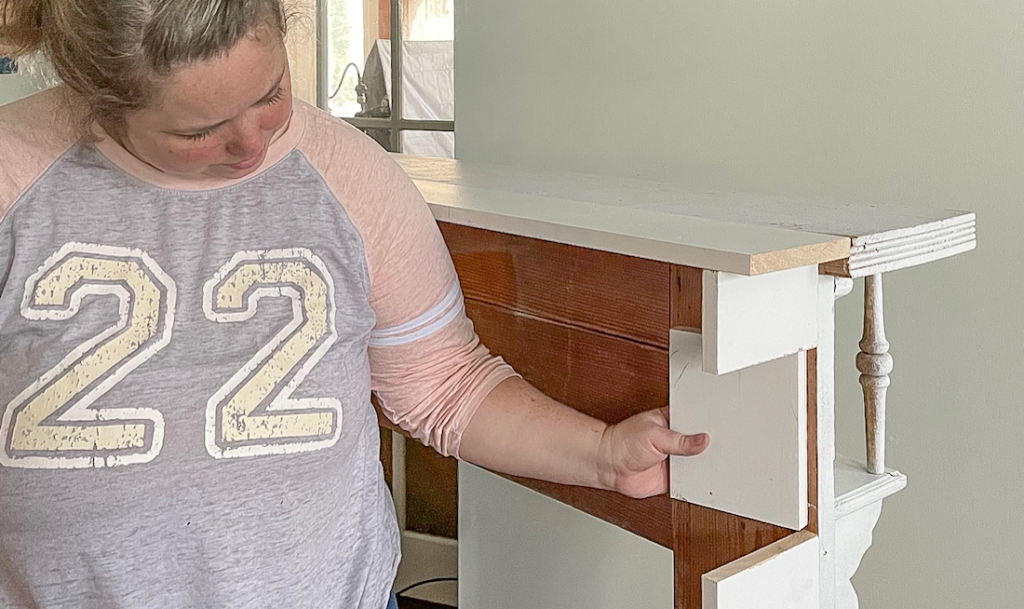
Step 5: Add Hinge Door to Side of Mantle
At this point you could be done but here are a few things that take this project to the next level.
To start with we removed one of the side panels and used our miter saw to make two cuts in the side. We measured these to be between the pocket hole screws so that the other pieces of the side panel could be easily re-attached to the mantle. The size of this little door isn’t too important you just want it to be large enough for your hand to dart in and adjust plugs… and small enough to be inconspicuous.
Once we had made those cuts we measured the opening and cut a piece for the door in the proper size from the end of a scrap board. Then we attached a few hinges to the back of the door and screwed it into place.
Now you can mount the power strip underneath (making sure the on/off switch was next to the door and the cord gave the door enough room to open and close) and use a few cup hooks to secure the cord.
5
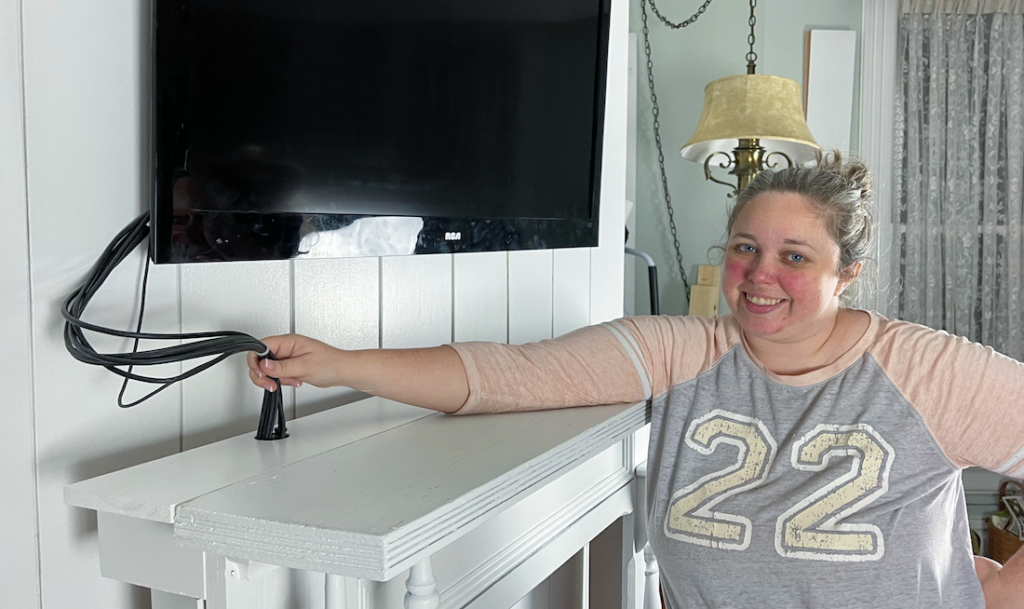
Step 6: Drill Holes in Mantle Box For Cords
We’re almost done. We need to access the powerstrip we just mounted so let’s drill a few holes that we can use to push our cords through the top of the mantle and out the side.
I used a 1.5 inch paddle drill bit for this and made sure to drill both holes in the back portion of our mantle box. I mean… I would much rather have a large hole in the board I just bought then my antique mantle. Plus if it’s in the back it will be much easier to hide! Now you can add a few cord covers (if desired) and you’re good to go!
Just make sure to look at where the powerstrip is mounted inside… I’m not sure what kind of damage a 1.5inch paddle drill bit could do to a powerstrip but I don’t want to find out.
6
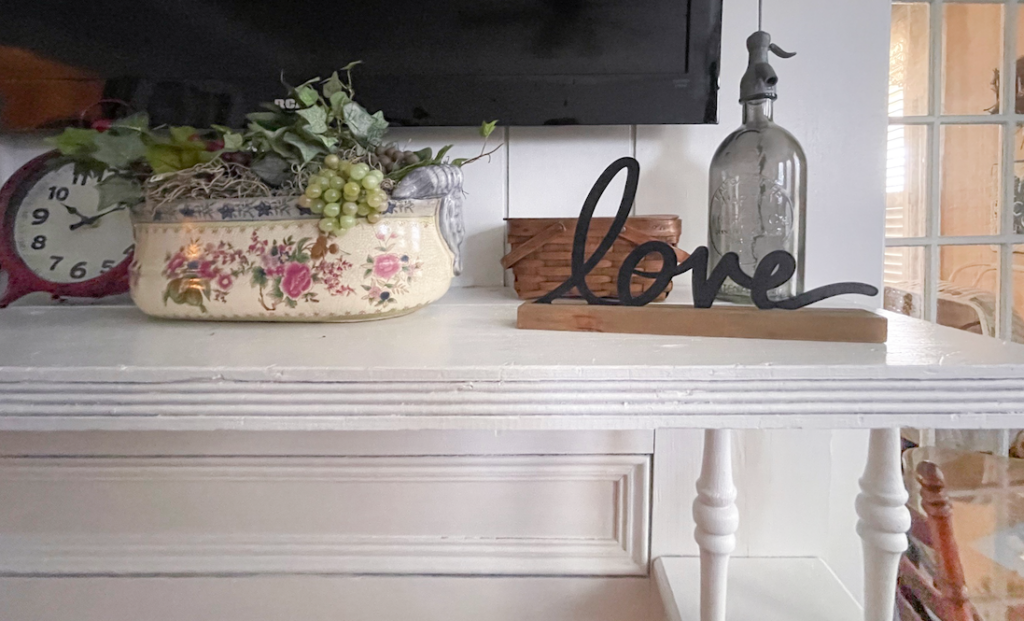
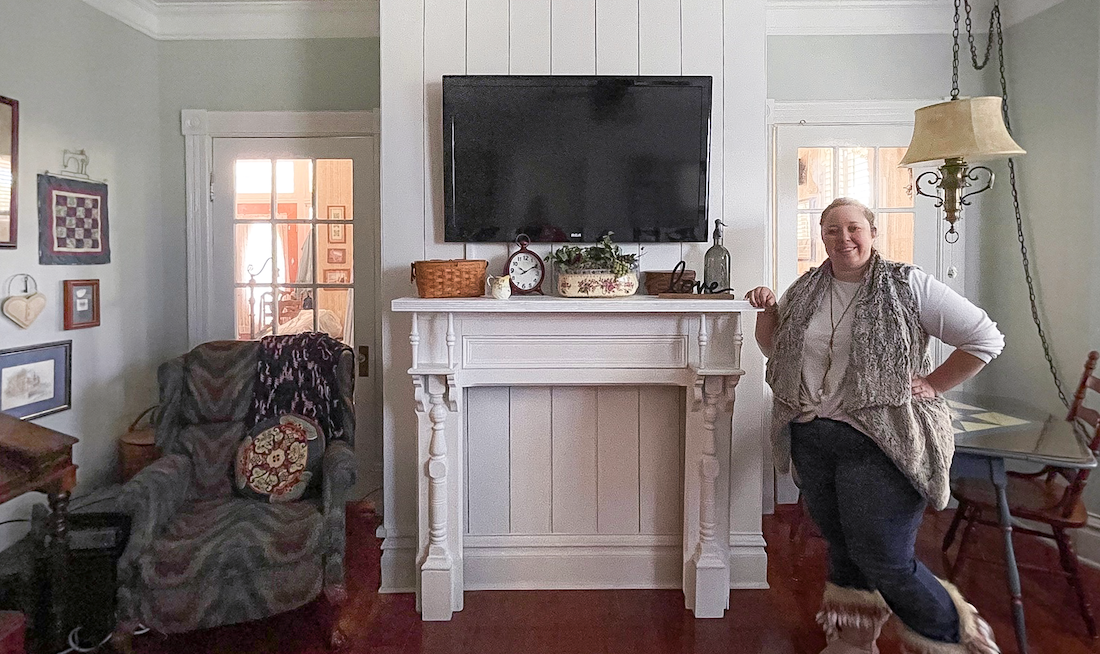
Step 7: Style and Enjoy!
I love how this turned out… it really finishes off living room makeover nicely! Of course, there’s always more projects to do but in the meantime we’ll enjoy our antique mantle masterpiece.
Honestly I can’t believe how much the fireplace mantle has transformed the room… and I love how the shiplap really makes it feel like one grand floor to ceiling fireplace unit.
This sponsored post was created by Happily Ever After Etc. Head to her blog here for the full post and details.
7

Download Project Steps & Shopping List
We’ll never share your email with anyone else