Overview
Looking for a really fun and simple way to update your kitchen on a budget? You can paint your kitchen island for a whole new look! It requires far less work than painting all of your cabinets, and the impact is still huge. Read on to see some details about how I painted our kitchen island in just two days using my Wagner FLEXiO 3500!
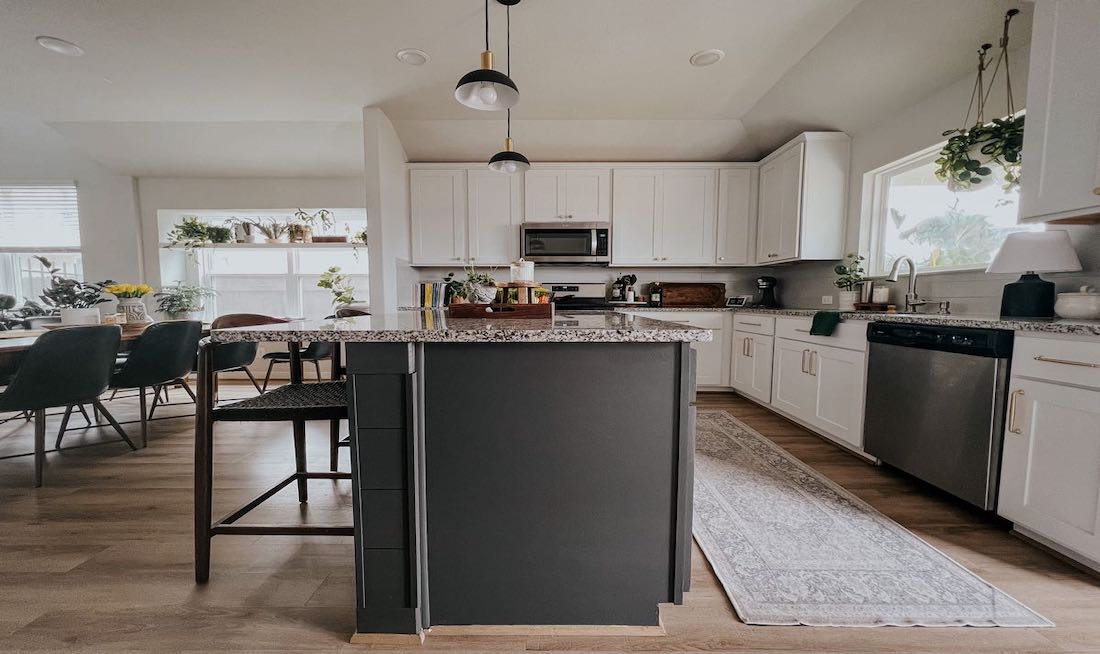
Before
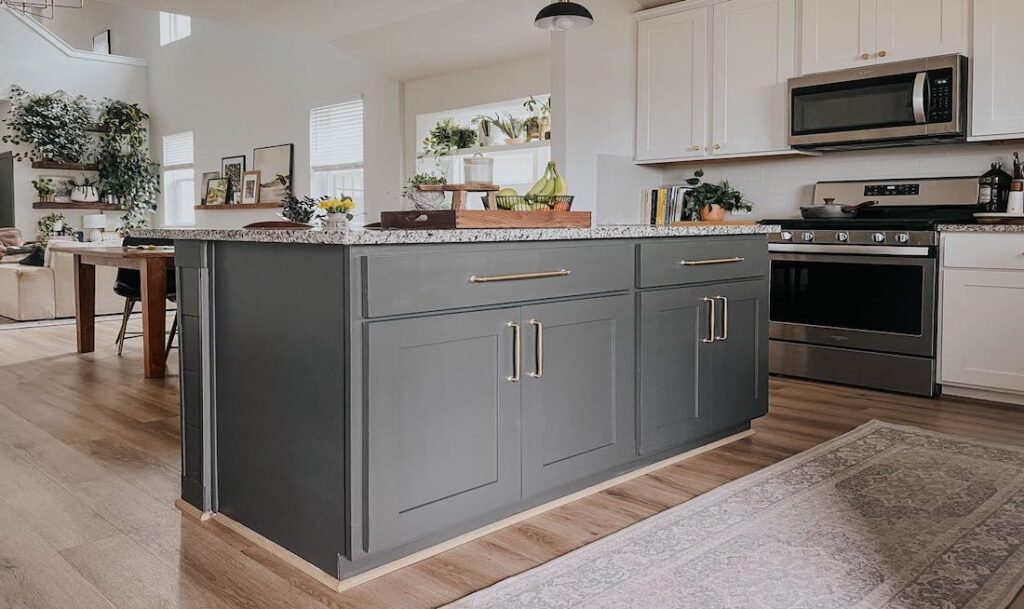
After
Instructions
Prep Work
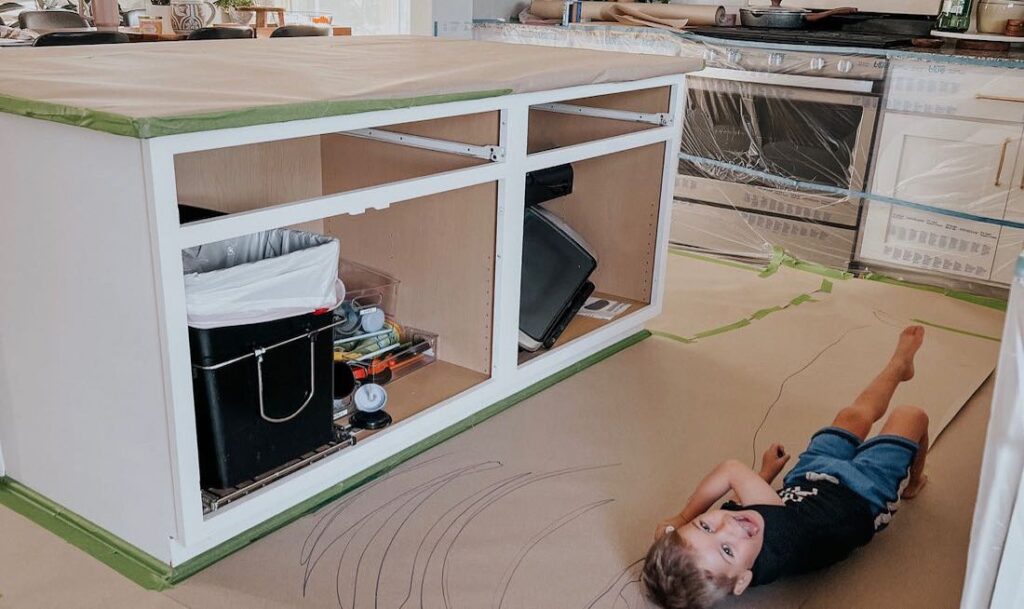
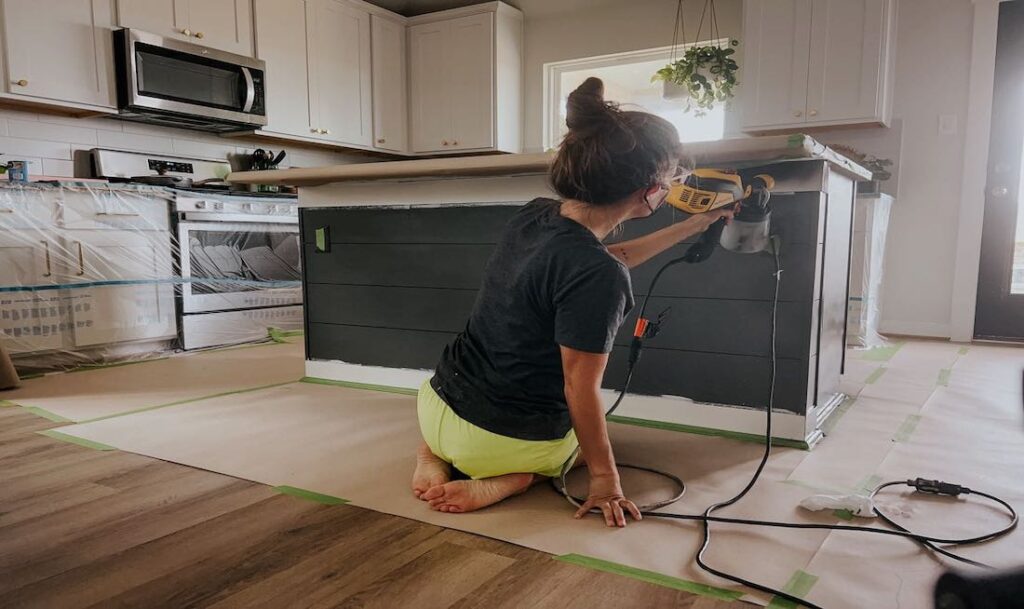
The first step to any painting job is prep work. When you’ll be painting with your sprayer inside, you need to take a little extra care to make sure everything stays protected. I recommend using painter’s tape that comes with a dropcloth attached to cover all of the cabinets in the kitchen. I used kraft paper on the floor, taped down with painter’s tape. I covered the island counter with kraft paper as well. The last step I took was to cover up the interior of the cabinets that I was painting using a plastic drop cloth.
In addition to prepping the kitchen, you’ll also want to thoroughly clean your cabinets, and remove the doors and drawer fronts. It’s much easier to get a great finish if you paint the doors off their hinges. Be sure to set the hinges and cabinet hardware in a place they won’t get lost!
Step 1

Priming
It’s always recommended to prime cabinets prior to painting them. They’ll see daily use, which can mean a lot of wear and tear. A good primer will ensure that you don’t have to do touch-ups constantly, and will keep your cabinets looking great for years to come. An oil or shellac based primer is your best bet for a really durable finish – I recommend two coats, and be sure to follow the directions for dry time before adding a top coat!
Step 2
Painting the Doors
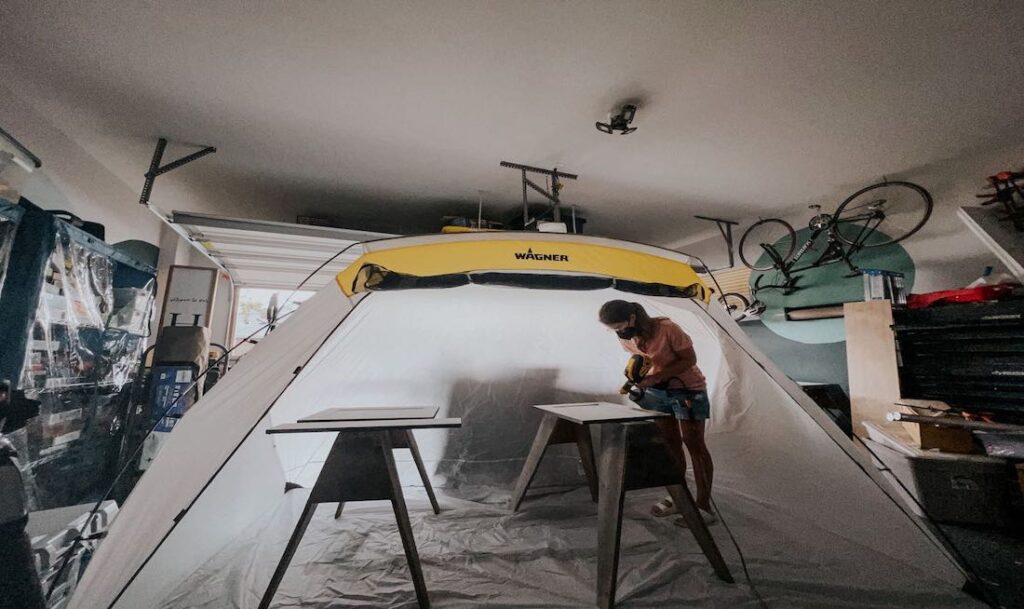
I like to set up outside or in my garage to paint my doors and drawer fronts. I use sawhorses, and paint one side at a time. Generally, I let each side dry for a full 24 hours before flipping them over. The last thing you want is to chip the finish on your freshly painted cabinet doors before you even install them!
I highly recommend using a Wagner Spray Shelter to paint your cabinet doors. I’m using the large one here. Why use a spray shelter? Because they’ll protect your cabinets from any leaves, bugs, or anything other debris that could get blown into them while they’re drying. If it’s important to you to have a really smooth and polished finish on your cabinets, it’s worth it to take the time to protect them while they’re drying!
I spray my cabinet bases and doors using a Wagner FLEXiO 3500 with the detail finish nozzle. It gives a really beautiful, professional-grade finish and cuts my painting time in half. I paint two coats on each side of the doors, allowing a full 24 hours between sides.
Step 3
Painting the Cabinet Bases
Painting the cabinet bases with a paint sprayer can be intimidating, but if you’ve taken the time to prep with the steps listed above, there’s nothing to worry about! Painting the cabinet bases with a paint sprayer ensures you won’t have any brush strokes or paint drips, and gives a finish that will look like it’s always been there. In addition to that, it takes far less time than painting by hand!
Step 4
The Finished Product
After painting two coats of paint on everything and allowing it to dry for 24 hours, it’s time to put it all back together! I recommend continuing to baby your freshly painted cabinets for a little bit before resuming normal use. Paint takes about 7-10 days to fully cure, even if it feels dry to the touch. So, you want to be sure to give it plenty of time to cure and be as durable as possible!
This sponsored post was created by Love and Renovation. Head to the blog for the full post and details.
Step 5

Download Project Steps & Shopping List
We’ll never share your email with anyone else