Overview
Adding a large storage cabinet to your laundry room, mudroom, or any space in your home that needs a little extra storage is a great strategy. They can bring so much function to a space, and there are so many options out there. But, generally speaking, they don’t come in the most exciting colors. You can find black, white, and sometimes a wood tone. What if you want something a little more fun?! That’s how I was feeling when I purchased a new large storage cabinet for my laundry room, so I turned to my trusty Wagner FLEXiO 3500 to help me give it a fresh look. It fits in my house so much better now, and makes me smile every day!
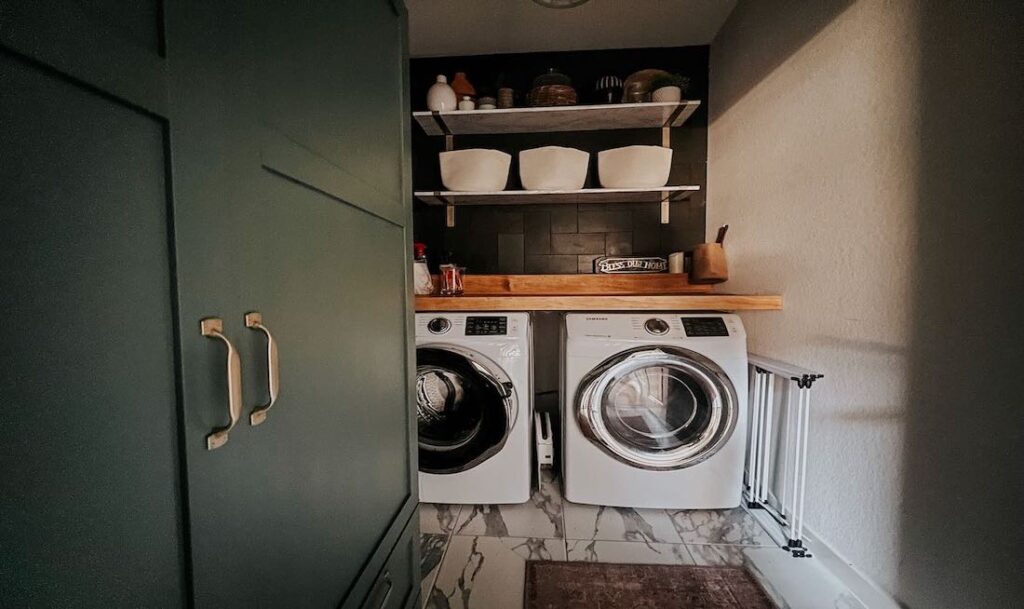
Before

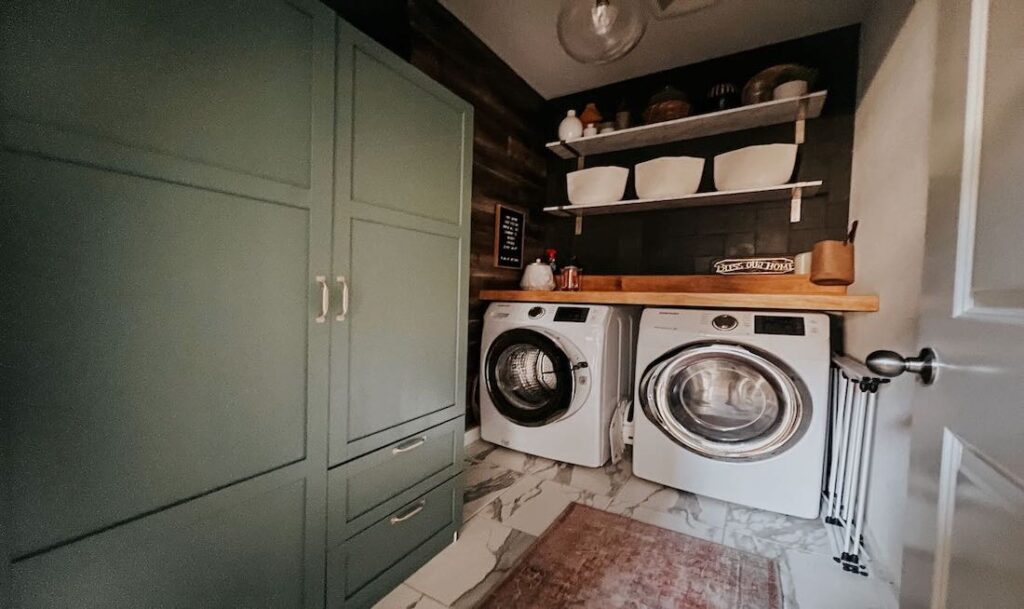
After
Instructions
Step 1
When you are painting a pre-finished piece of furniture, the first and most important step is always primer! I highly recommend using a shellac-based primer on your furniture. I’ve painted a lot of pre-finished furniture in my day and this is the most consistent and reliable option!
One to two coats of shellac-based primer will be enough to give your furniture piece some grip and allow the paint to stick to it!
I was only painting the outside of my storage cabinet, so I didn’t paint every piece. I took the time to pull out the instruction manual and figure out which pieces would go on the outside. Then I only painted the exterior sides of those pieces. So, when you open the cabinet it’s unpainted. I specifically did this because the inside of the cabinet will see a lot of wear and tear from us pulling things out, so it’s easier to just leave it alone!
Step 1

Step 2
Once your primer has fully dried, you should lightly sand it with 220+ grit sandpaper. The goal is just to remove any high spots and smooth out the primer. Work very lightly!
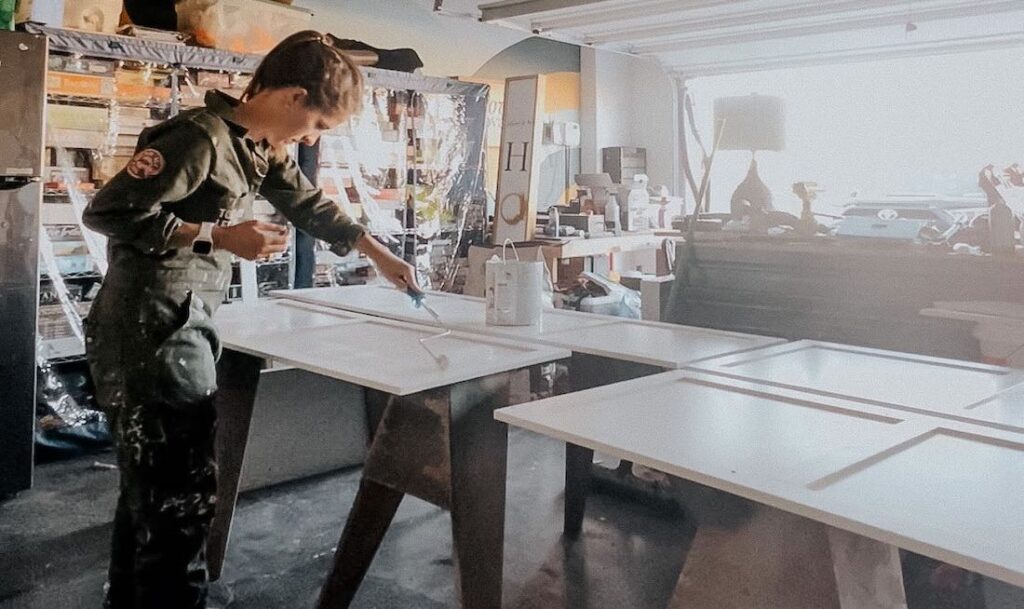
Once it’s sanded, it’s time to paint! I used Current Mood by Clare to paint my piece, and I used my Wagner FLEXiO 3500 with the detail finish nozzle. It’s always my go-to sprayer – it’s so flexible, and works great on just about any project, big or small!
Step 2
Step 3
Allow your paint to dry for at least 24 hours before assembling your furniture. The longer you can wait, the better! Paint takes up to a week to fully cure, so you may end up with chips or scratches if you aren’t cautious.
Once you’ve given it plenty of time to dry, you can carefully assemble your furniture piece and you’re ready to enjoy it!
This project was so fun and satisfying, and I love the finished result! You can use this same basic method on any piece of pre-finished furniture and it should hold up great for you over time.
This sponsored post was created by Love and Renovation. Head to the blog for the full post and details.
Step 3

Download Project Steps & Shopping List
We’ll never share your email with anyone else