Overview
Whether the reason is for a holiday, a family gathering, or just for fun, the reason is food (aka. nom-nom). Who doesn’t love to be greeted by a smorgasbord of yummy? I’m eager to show you how to make a DIY charcuterie board using reclaimed wood, and a delightful paint pour technique. Let’s get started, shall we?
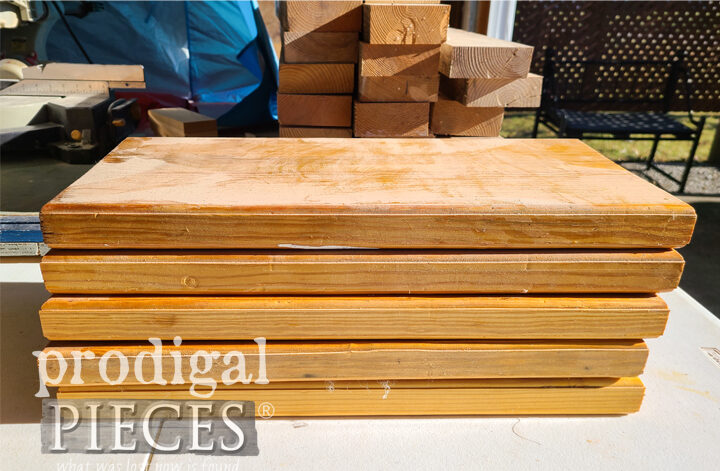
Before
After

Instructions
Step 1
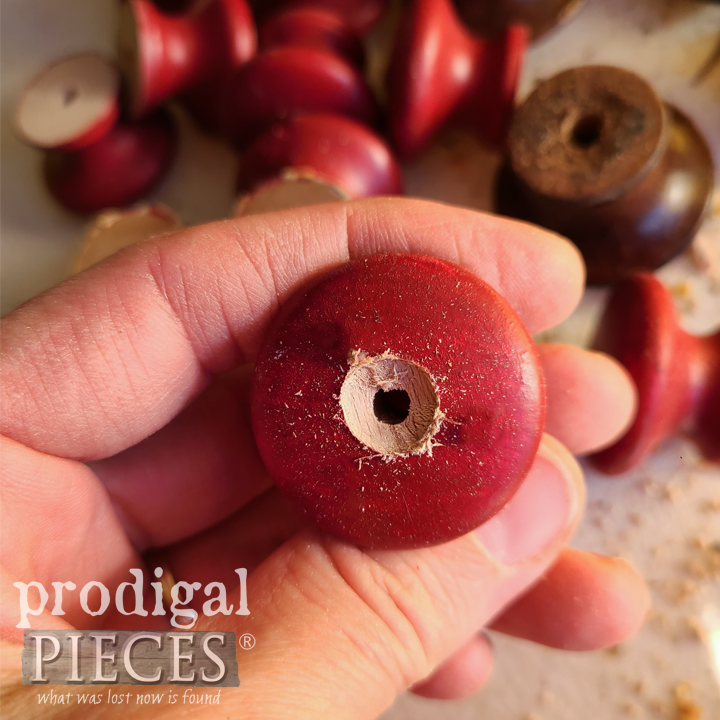
First, take a look at my loot. I call it that because my husband brought these home from work because they were being thrown away. {{gasp}} So, I feel like I stole them. However, I’ve had them in my stash for far too long and today’s the day.
1
Step 2
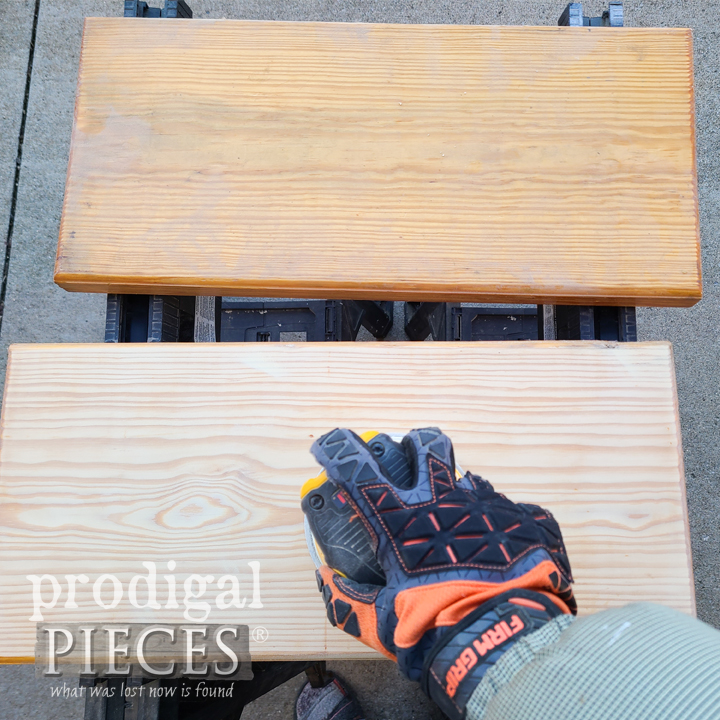
Next, I need to remove that finish down to raw wood. In order to do that, I use my orbital sander. These are basic pine, so you can use any solid wood – just stay away from manufactured or fabricated wood. I use a 150 grit paper to get a fine finish.
2
Step 3
Then, now that I sanded down the boards, it’s time for paint pouring fun. If you’ve never tried this before (like me…ahem), you’re in for a real treat. Paint pouring is a way to let your creative juices flow and have some fun. Plus, it’s messy – not too messy, mind you, but it’s sorta relaxing to let go.
3
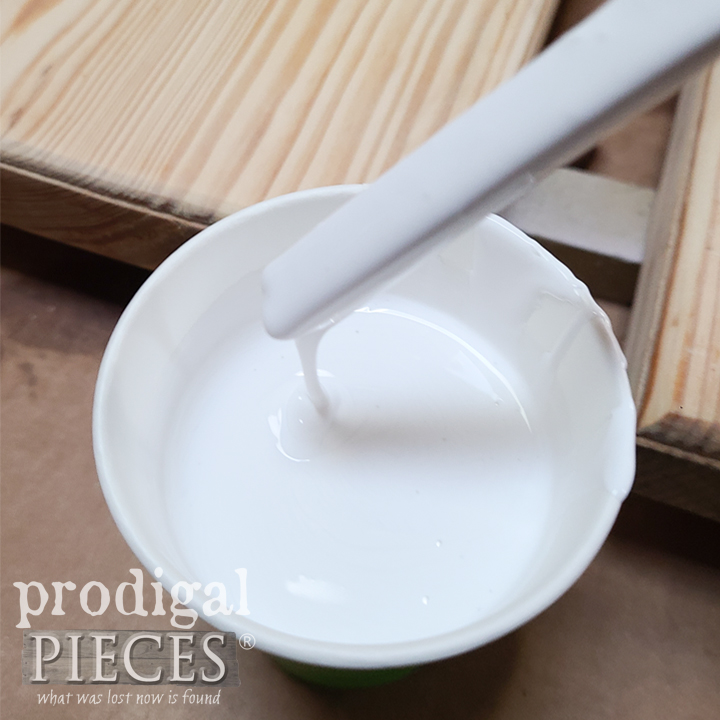
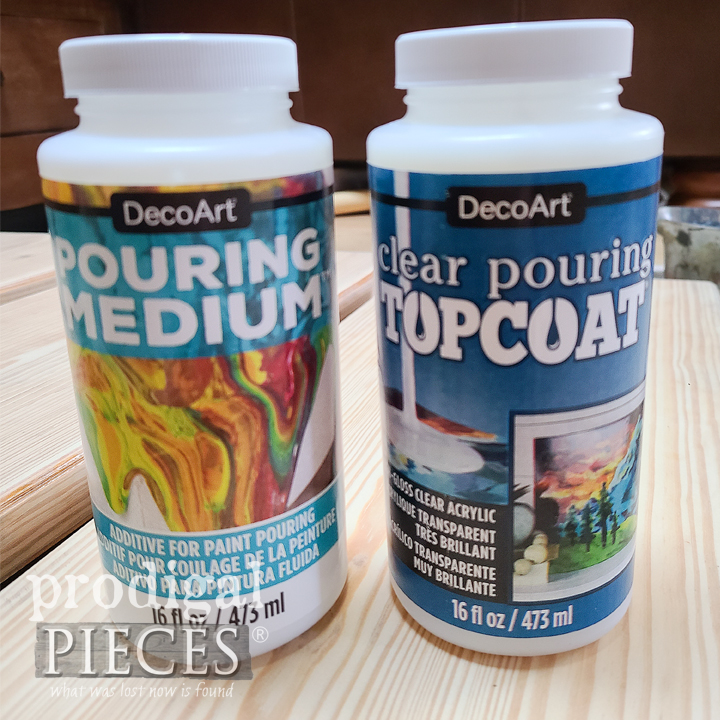
Step 4
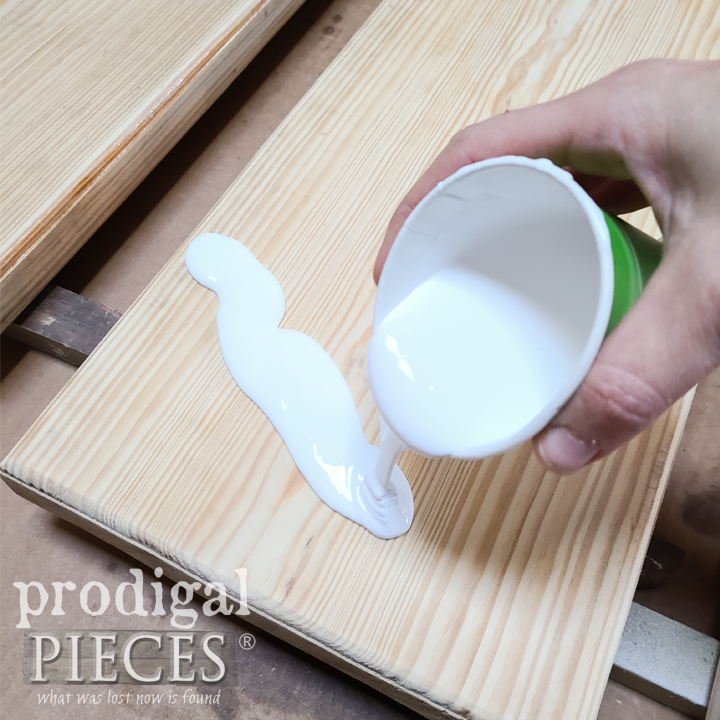
Ready to get started? First, follow the directions on the paint pour medium to get your first (the base color) ready. You’ll want your paint mix to flow like milk. Add more medium if still too thick, and add more paint if too runny.
4
Step 5
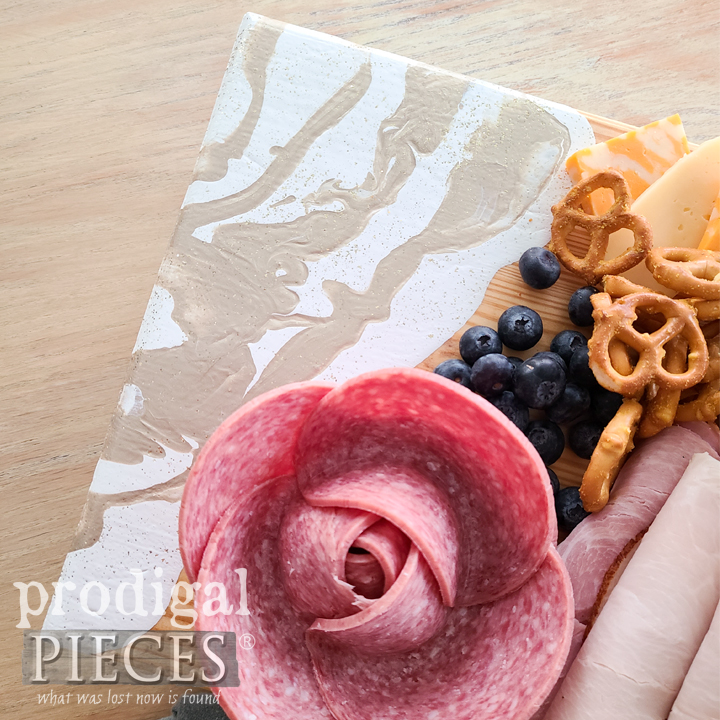
Now, set up your board on scrap wood over a pan or cardboard so it can catch the excess. Then, grab your mixed paint, and begin pouring. You want to use a liberal amount, but not too much. It’s nice to have a natural line, so leave the paint in a freeform motion. I only went over the corner of my charcuterie board because I won’t be placing food on the painted part. We are going for a sweet accent to dress up our board. After you pour, tip the board in to make the excess flow over the edge.
5
Step 6
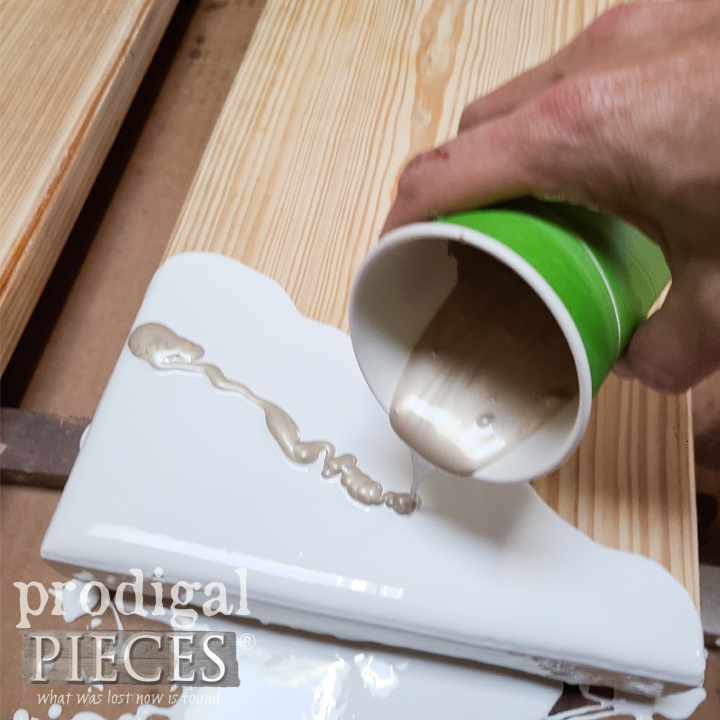
Before we call it quits, we want to grab our other paints we’ve mixed as complimentary colors. Pour in any design you like. I wanted a marbling effect so I went with simple ripples. My accent color is gold, but I’ll add a fun touch in a minute.
6
Step 7
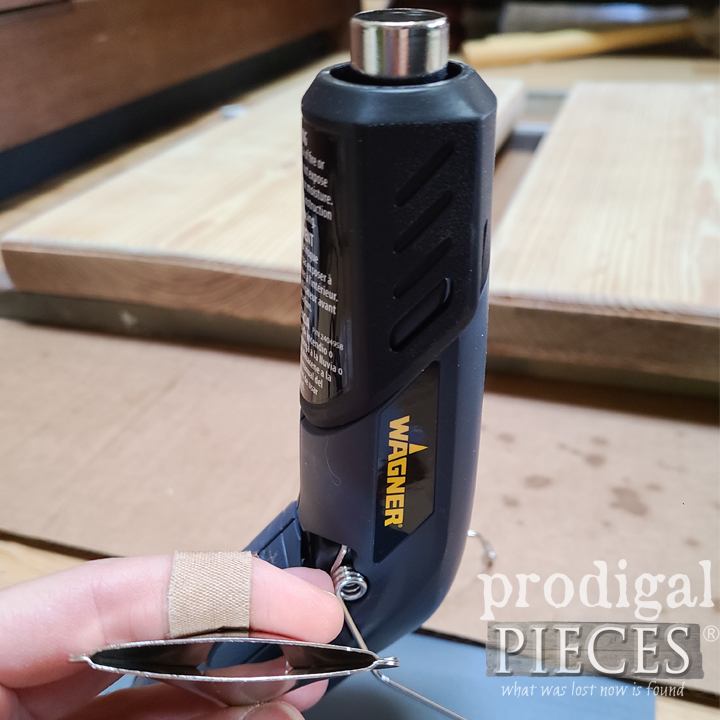
Last, when you feel like your colors are as you want, grab the Wagner HT400 Heat Gun and the flare nozzle included in your craft kit.
7
Step 8
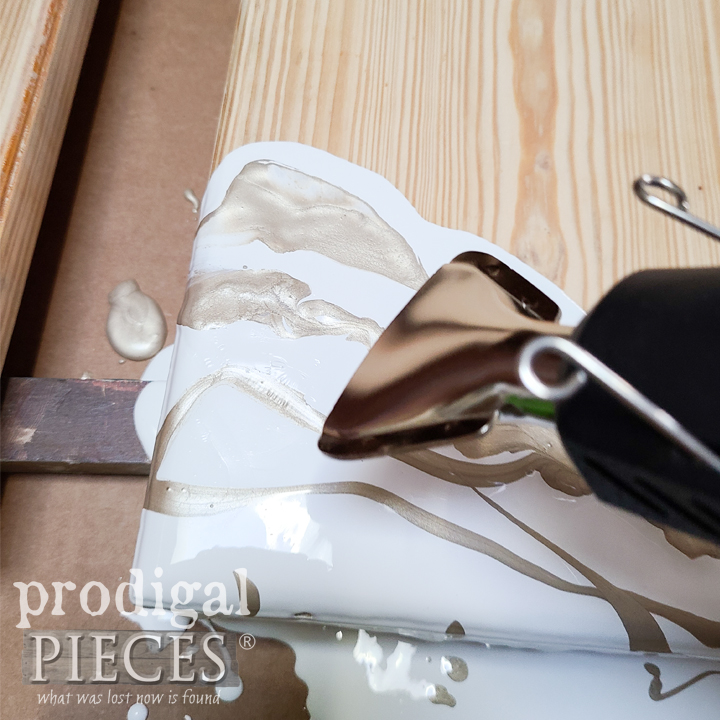
Then, pass over the paint to create a design while at the same time it will be bringing bubbles out to give a sweet finished effect. Win-win! Also, totally optional, but also very fun, I use a bit of gold glitter to sprinkle over my design. Who doesn’t love a little blingy goodness, eh? At this point, we want to let our wood and paint pour cure. It can take up to 24 hours to set and up to 72 hours to fully cure, so keep that in mind.
8
Step 9
Meanwhile, we want to tackle a bit more DIY steps. While your charcuterie board looks awesome, it also needs to function awesome too. Adding a bit of height makes it easier to clean and also adds dimension. Feel free to add pulls/handles as well. For the feet, you can use scrap wood or even knobs. I’m using up my stash for mine. In order to do that I need to pre-drill with a spot for counter-sinking a screw head.
9
Step 10
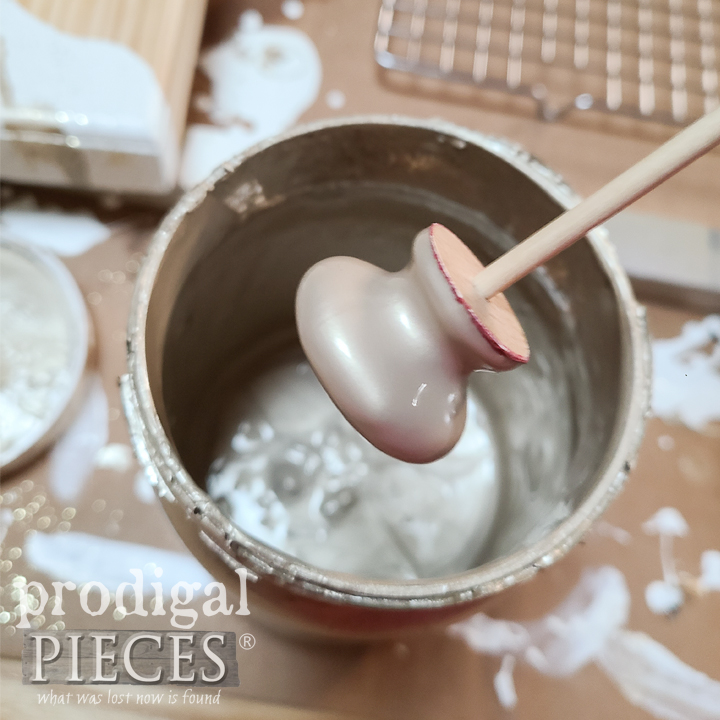
As you can see, my knob stash is already painted a red from a furniture makeover I did for my boys’ bedroom. However, I want to match the blingy goodness of the gold paint, so I use a dowel inserted into the knob and dip them in, followed by curing on my wire rack. This can be tedious (but better than brushing), so feel free to spray paint as well. Finally, we’ve added our feet, now we add a natural oil, like hemp or grapeseed oil or 100% beeswax to finish the natural part of our board. The wood will need oiled on occasion to keep it supple. Wipe clean with a damp cloth.
10
Step 11
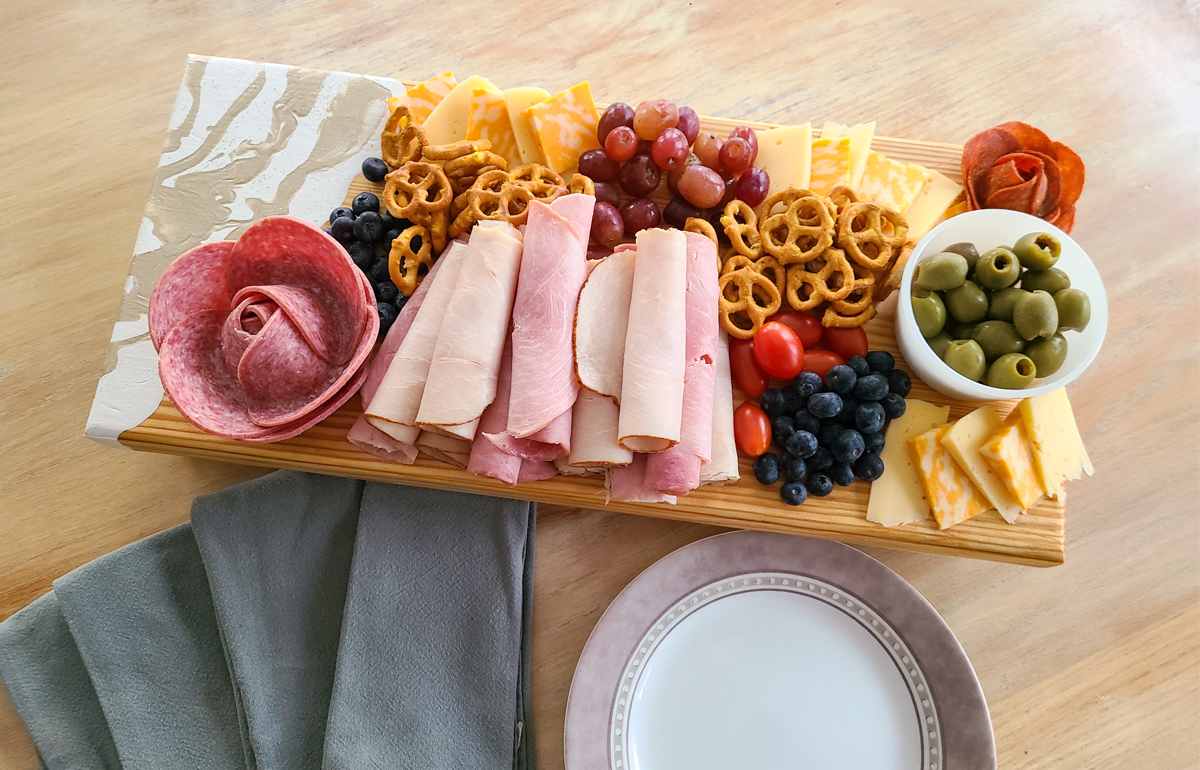
After our crafting stent is done, it’s finally time to eat! {{fist pump!!}} By the way, you can pronounce charcuterie like shar-koo-ter-y, just so ya know. While the original translation in French means “pork butcher shop”, as the original board was filled with curated meat and cheeses, now they are filled with nuts, fruits, breads, olives and so much more. I’m a kinda gal that says go with what you love! Here’s my spread for healthy yummiliciousness…won’t you join me?
11
Step 12
This sponsored post was created by Prodigal Pieces. No matter the season or occasion, these DIY charcuterie boards can be personalized as a gift with wood-burning in addition to the paint pour. Have fun with it! If you’d like to see how to make the salami or pepperoni rose, just head to my blog HERE As always, my goal is to inspire you to journey on a creative adventure of your own. In addition, I’d love for you to come visit me on my blog, Prodigal Pieces, to see what else I’m up to each week. Until next time!
12

Download Project Steps & Shopping List
We’ll never share your email with anyone else